# Getting Started
A quick summary of our Knowledgebase section.
# Virtual Private Servers
A quick overview on how to manage your Virtual Private Servers.
# What is Virtual Private Server
A quick summary on what is a Virtual Private Servers, how it works and how it interacts with an operating system.
A virtual private server (VPS, also referred to as Virtual Dedicated Server or VDS) is a method of partitioning a physical server computer into multiple servers that each has the appearance and capabilities of running on its own dedicated machine. Each virtual server can run its own full-fledged operating system, and each server can be independently rebooted.
A Virtual Private Server (VPS) is a hosting environment that combines the benefits of both shared hosting and dedicated hosting. It does this by creating a virtual server that runs inside a hardware server via a specially designed partition.
Each Virtual Private Server partition runs its own operating system in a secure and private environment and cannot be accessed or interrupted by its neighbors. This system gives you the same level of root access as a dedicated server whilst sharing the cost of the hardware. With a VPS you are virtually running your own server but at a fraction of the cost.
# Getting Started With Linux
This series will bring you up to speed with essential Linux basics, and provide a solid foundation for working with Linux servers.
# An Introduction to the Linux Terminal
#### Introduction
This tutorial, which is the first in a series that teaches Linux basics to get new users on their feet, covers getting started with the terminal, the Linux command line, and executing commands. If you are new to Linux, you will want to familiarize yourself with the terminal, as it is the standard way to interact with a Linux server. Using the command line may seem like a daunting task but it is actually very easy if you start with the basics, and build your skills from there.
If you would like to get the most out of this tutorial, you will need a Linux server to connect to and use. This tutorial is based on an Ubuntu 14.04 server but the general principles apply to any other distribution of Linux.
Let's get started by going over what a terminal emulator is.
### Terminal Emulator
A terminal emulator is a program that allows the use of the terminal in a graphical environment. As most people use an OS with a graphical user interface (GUI) for their day-to-day computer needs, the use of a terminal emulator is a necessity for most Linux server users.
Here are some free, commonly-used terminal emulators by operating system:
* **Mac OS X**: Terminal (default), iTerm 2
* **Windows**: PuTTY
* **Linux**: Terminal, KDE Konsole, XTerm
Each terminal emulator has its own set of features, but all of the listed ones work great and are easy to use.
### The Shell
In a Linux system, the *shell* is a command-line interface that interprets a user's commands and script files, and tells the server's operating system what to do with them. There are several shells that are widely used, such as *Bourne shell* (`sh`) and *C shell* (`csh`). Each shell has its own feature set and intricacies, regarding how commands are interpreted, but they all feature input and output redirection, variables, and condition-testing, among other things.
This tutorial was written using the *Bourne-Again shell*, usually referred to as `bash`, which is the default shell for most Linux distributions, including Ubuntu, CentOS, and RedHat.
### The Command Prompt
When you first login to a server, you will typically be greeted by the *Message of the Day* (MOTD), which is typically an informational message that includes miscellaneous information such as the version of the Linux distribution that the server is running. After the MOTD, you will be dropped into the command prompt, or shell prompt, which is where you can issue commands to the server.
The information that is presented at the command prompt can be customized by the user, but here is an example of the default Ubuntu 14.04 command prompt:
```
sammy@webapp:~$
```
Here is a breakdown of the composition of the command prompt:
* `sammy`: The *username* of the current user
* `webapp`: The *hostname* of the server
* `~`: The *current directory*. In `bash`, which is the default shell, the `~`, or tilde, is a special character that expands to the path of the current user's *home directory*; in this case, it represents `/home/sammy`
* `$`: The prompt symbol. This denotes the end of the command prompt, after which the user's keyboard input will appear
Here is an example of what the command prompt might look like, if logged in as `root` and in the `/var/log` directory:
```
root@webapp:/var/log#
```
Note that the symbol that ends the command prompt is a `#`, which is the standard prompt symbol for `root`. In Linux, the `root` user is the *superuser* account, which is a special user account that can perform system-wide administrative functions--it is an unrestricted user that has permission to perform any task on a server.
### Executing Commands
Commands can be issued at the command prompt by specifying the name of an executable file, which can be a binary program or a script. There are many standard Linux commands and utilities that are installed with the OS, that allow you navigate the file system, install and software packages, and configure the system and applications.
An instance of a running command is known as a **process**. When a command is executed in the *foreground*, which is the default way that commands are executed, the user must wait for the process to finish before being returned to the command prompt, at which point they can continue issuing more commands.
It is important to note that almost everything in Linux is case-sensitive, including file and directory names, commands, arguments, and options. If something is not working as expected, double-check the spelling and case of your commands!
We will run through a few examples that will cover the basics of executing commands.
**Note:** If you're not already connected to a Linux server, now is a good time to log in. If you have a Linux server but are having trouble connecting, follow this link: [How to Connect to Your VPS with SSH](/virtual-private-servers/connect-with-ssh#how-to-connect-to-your-vps-with-putty-on-windows).
#### Without Arguments or Options
To execute a command without any arguments or options, simply type in the name of the command and hit `RETURN`.
If you run a command like this, it will exhibit its default behavior, which varies from command to command. For example, if you run the `cd` command without any arguments, you will be returned to your current user's home directory. The `ls` command will print a listing of the current directory's files and directories. The `ip` command without any arguments will print a message that shows you how to use the `ip`command.
Try running the `ls` command with no arguments to list the files and directories in your current directory (there may be none):
```
ls
```
#### With Arguments
Many commands accept *arguments*, or *parameters*, which can affect the behavior of a command. For example, the most common way to use the `cd` command is to pass it a single argument that specifies which directory to change to. For example, to change to the `/usr/bin` directory, where many standard commands are installed, you would issue this command:
```
cd /usr/bin
```
The `cd` component is the command, and the first argument `/usr/bin` follows the command. Note how your command prompt's current path has updated.
If you would like, try running the `ls` command to see the files that are in your new current directory.
```
ls
```
#### With Options
Most commands accept *options*, also known as *flags* or *switches*, that modify the behavior of the command. As they are special arguments, options follow a command, and are indicated by a single `-`character followed by one or more *options*, which are represented by individual upper- or lower-case letters. Additionally, some options start with `--`, followed by a single, multi-character (usually a descriptive word) option.
For a basic example of how options work, let's look at the `ls` command. Here are a couple of common options that come in handy when using `ls`:
* `-l`: print a "long listing", which includes extra details such as permissions, ownership, file sizes, and timestamps
* `-a`: list *all* of a directory's files, including hidden ones (that start with `.`)
To use the `-l` flag with `ls`, use this command:
```
ls -l
```
Note that the listing includes the same files as before, but with additional information about each file.
As mentioned earlier, options can often be grouped together. If you want to use the `-l` and `-a` option together, you could run `ls -l -a`, or just combine them like in this command:
```
ls -la
```
Note that the listing includes the hidden `.` and `..` directories in the listing, because of the `-a` option.
#### With Options and Arguments
Options and arguments can almost always be combined, when running commands.
For example, you could check the contents of `/home`, regardless of your current directory, by running this `ls` command:
```
ls -la /home
```
`ls` is the command, `-la` are the options, and `/home` is the argument that indicates which file or directory to list. This should print a detailed listing of the `/home` directory, which should contain the home directories of all of the normal users on the server.
### Environment Variables
Environment variables are named values that are used to change how commands and processes are executed. When you first log in to a server, several environment variables will be set according to a few configuration files by default.
#### View All Environment Variables
To view all of the environment variables that are set for a particular terminal session, run the `env`command:
```
env
```
There will likely be a lot of output, but try and look for `PATH` entry:
```
PATH=/usr/local/sbin:/usr/local/bin:/usr/sbin:/usr/bin:/sbin:/bin:/usr/games:/usr/local/games
```
The `PATH` environment variable is a colon-delimited list of directories where the shell will look for executable programs or scripts when a command is issued. For example, the `env` command is located in `/usr/bin`, and we are able to execute it without specifying its fully-qualified location because its path is in the `PATH` environment variable.
#### View the Value of a Variable
The value of an environment variable can be retrieved by prefixing the variable name with a `$`. Doing so will expand the referenced variable to its value.
For example, to print out the value of the `PATH` variable, you may use the `echo` command:
```
echo $PATH
```
Or you could use the `HOME` variable, which is set to your user's home directory by default, to change to your home directory like this:
```
cd $HOME
```
If you try to access an environment variable that hasn't been set, it will be expanded to nothing; an empty string.
#### Setting Environment Variables
Now that you know how to view your environment variables, you should learn how to set them.
To set an environment variable, all you need to do is start with a variable name, followed immediately by an `=` sign, followed immediately by its desired value:
```
VAR=value
```
Note that if you set an existing variable, the original value will be overwritten. If the variable did not exist in the first place, it will be created.
Bash includes a command called `export` which exports a variable so it will be inherited by child processes. In simple terms, this allows you to use scripts that reference an exported environment variable from your current session. If you're still unclear on what this means, don't worry about it for now.
You can also reference existing variables when setting a variable. For example, if you installed an application to `/opt/app/bin`, you could add that directory to the end of your `PATH` environment variable with this command:
```
export PATH=$PATH:/opt/app/bin
```
Now verify that `/opt/app/bin` has been added to the end of your `PATH` variable with `echo`:
```
echo $PATH
```
Keep in mind that setting environment variables in this way only sets them for your current session. This means if you log out or otherwise change to another session, the changes you made to the environment will not be preserved. There is a way to permanently change environment variables, but this will be covered in a later tutorial.
### Conclusion
Now that you have learned about the basics of the Linux terminal (and a few commands), you should have a good foundation for expanding your knowledge of Linux commands. Read the next tutorial in this series to learn how to navigate, view, and edit files and their permissions
# Basic Linux Navigation and File Management
#### Introduction
If you do not have much experience working with Linux systems, you may be overwhelmed by the prospect of controlling an operating system from the command line. In this guide, we will attempt to get you up to speed with the basics.
This guide will not cover everything you need to know to effectively use a Linux system. However, it should give you a good jumping-off point for future exploration. This guide will give you the bare minimum you need to know before moving on to other guides.
### Prerequisites and Goals
In order to follow along with this guide, you will need to have access to a Linux server. If you need information about connecting to your server for the first time, you can follow [our guide on connecting to a Linux server using SSH](/virtual-private-servers/connect-with-ssh).
You will also want to have a basic understanding of how the terminal works and what Linux commands look like. [This guide covers terminal basics](/virtual-private-servers/getting-started-with-linux/an-introduction-to-the-linux-terminal), so you should check it out if you are new to using terminals.
All of the material in this guide can be accomplished with a regular, non-root (non-administrative) user account. You can learn how to configure this type of user account by following your distribution's initial server setup guide ([Ubuntu](/virtual-private-servers/introduction-to-nginx-and-lemp-on-ubuntu/initial-server-setup-with-ubuntu), [CentOS 7](https://www.digitalocean.com/community/tutorials/initial-server-setup-with-centos-7)).
When you are ready to begin, connect to your Linux server using SSH and continue below.
### Navigation and Exploration
The most fundamental skills you need to master are moving around the filesystem and getting an idea of what is around you. We will discuss the tools that allow you to do this in this section.
#### Finding Where You Are with the "pwd" Command
When you log into your server, you are typically dropped into your user account's **home directory**. A home directory is a directory set aside for your user to store files and create directories. It is the location in the filesystem where you have full dominion.
To find out where your home directory is in relationship to the rest of the filesystem, you can use the `pwd`command. This command displays the directory that we are currently in:
```
pwd
```
You should get back some information that looks like this:
```
/home/demo
```
The home directory is named after the user account, so the above example is what the value would be if you were logged into the server with an account called `demo`. This directory is within a directory called `/home`, which is itself within the top-level directory, which is called "root" but represented by a single slash "/".
#### Looking at the Contents of Directories with "ls"
Now that you know how to display the directory that you are in, we can show you how to look at the contents of a directory.
Currently, your home directory that we saw above does not have much to see, so we will go to another, more populated directory to explore. Type the following in your terminal to move to this directory (we will explain the details of moving directories in the next section). Afterward, we'll use `pwd` to confirm that we successfully moved:
```
cd /usr/share
pwd
```
```
/usr/share
```
Now that we are in a new directory, let's look at what's inside. To do this, we can use the `ls` command:
```
ls
```
```
adduser groff pam-configs
applications grub perl
apport grub-gfxpayload-lists perl5
apps hal pixmaps
apt i18n pkgconfig
aptitude icons polkit-1
apt-xapian-index info popularity-contest
. . .
```
As you can see, there are *many* items in this directory. We can add some optional flags to the command to modify the default behavior. For instance, to list all of the contents in an extended form, we can use the `-l`flag (for "long" output):
```
ls -l
```
```
total 440
drwxr-xr-x 2 root root 4096 Apr 17 2014 adduser
drwxr-xr-x 2 root root 4096 Sep 24 19:11 applications
drwxr-xr-x 6 root root 4096 Oct 9 18:16 apport
drwxr-xr-x 3 root root 4096 Apr 17 2014 apps
drwxr-xr-x 2 root root 4096 Oct 9 18:15 apt
drwxr-xr-x 2 root root 4096 Apr 17 2014 aptitude
drwxr-xr-x 4 root root 4096 Apr 17 2014 apt-xapian-index
drwxr-xr-x 2 root root 4096 Apr 17 2014 awk
. . .
```
This view gives us plenty of information, most of which looks rather unusual. The first block describes the file type (if the first column is a "d" the item is a directory, if it is a "-", it is a normal file) and permissions. Each subsequent column, separated by white space, describes the number of hard links, the owner, group owner, item size, last modification time, and the name of the item. We will describe some of these at another time, but for now, just know that you can view this information with the `-l` flag of `ls`.
To get a listing of all files, including *hidden* files and directories, you can add the `-a` flag. Since there are no real hidden files in the `/usr/share` directory, let's go back to our home directory and try that command. You can get back to the home directory by typing `cd` with no arguments:
```
cd
ls -a
```
```
. .. .bash_logout .bashrc .profile
```
As you can see, there are three hidden files in this demonstration, along with `.` and `..`, which are special indicators. You will find that often, configuration files are stored as hidden files, as is the case here.
For the dot and double dot entries, these aren't exactly directories as much as built-in methods of referring to related directories. The single dot indicates the current directory, and the double dot indicates this directory's parent directory. This will come in handy in the next section.
#### Moving Around the Filesystem with "cd"
We have already made two directory moves in order to demonstrate some properties of `ls` in the last section. Let's take a better look at the command here.
Begin by going back to the `/usr/share` directory by typing this:
```
cd /usr/share
```
This is an example of changing a directory by giving an **absolute path**. In Linux, every file and directory is under the top-most directory, which is called the "root" directory, but referred to by a single leading slash "/". An absolute path indicates the location of a directory in relation to this top-level directory. This lets us refer to directories in an unambiguous way from any place in the filesystem. Every absolute path **must**begin with a slash.
The alternative is to use **relative paths**. Relative paths refer to directories in relation to the *current*directory. For directories close to the current directory in the hierarchy, this is usually easier and shorter. Any directory within the current directory can be referenced by name without a leading slash. We can change to the `locale` directory within `/usr/share` from our current location by typing:
```
cd locale
```
We can likewise move multiple directory levels with relative paths by providing the portion of the path that comes after the current directory's path. From here, we can get to the `LC_MESSAGES` directory within the `en` directory by typing:
```
cd en/LC_MESSAGES
```
To go back up, travelling to the parent of the current directory, we use the special double dot indicator we talked about earlier. For instance, we are now in the `/usr/share/locale/en/LC_MESSAGES` directory. To move up one level, we can type:
```
cd ..
```
This takes us to the `/usr/share/locale/en` directory.
A shortcut that you saw earlier that will always take you back to your home directory is to use `cd` without providing a directory:
```
cd
pwd
```
```
/home/demo
```
To learn more about how to use these three commands, you can check out [our guide on exploring the Linux filesystem](https://www.digitalocean.com/community/tutorials/how-to-use-cd-pwd-and-ls-to-explore-the-file-system-on-a-linux-server).
### Viewing Files
In the last section, we learned a bit about how to navigate the filesystem. You probably saw some files when using the `ls` command in various directories. In this section, we'll discuss different ways that you can use to view files. In contrast to some operating systems, Linux and other Unix-like operating systems rely on plain text files for vast portions of the system.
The main way that we will view files is with the `less` command. This is what we call a "pager", because it allows us to scroll through pages of a file. While the previous commands immediately executed and returned you to the command line, `less` is an application that will continue to run and occupy the screen until you exit.
We will open the `/etc/services` file, which is a configuration file that contains service information that the system knows about:
```
less /etc/services
```
The file will be opened in `less`, allowing you to see the portion of the document that fits in the area of the terminal window:
```
# Network services, Internet style
#
# Note that it is presently the policy of IANA to assign a single well-known
# port number for both TCP and UDP; hence, officially ports have two entries
# even if the protocol doesn't support UDP operations.
#
# Updated from http://www.iana.org/assignments/port-numbers and other
# sources like http://www.freebsd.org/cgi/cvsweb.cgi/src/etc/services .
# New ports will be added on request if they have been officially assigned
# by IANA and used in the real-world or are needed by a debian package.
# If you need a huge list of used numbers please install the nmap package.
tcpmux 1/tcp # TCP port service multiplexer
echo 7/tcp
. . .
```
To scroll, you can use the up and down arrow keys on your keyboard. To page down one whole screens-worth of information, you can use either the space bar, the "Page Down" button on your keyboard, or the `CTRL-f` shortcut.
To scroll back up, you can use either the "Page Up" button, or the `CTRL-b` keyboard shortcut.
To search for some text in the document, you can type a forward slash "/" followed by the search term. For instance, to search for "mail", we would type:
```
/mail
```
This will search forward through the document and stop at the first result. To get to another result, you can type the lower-case `n` key:
```
n
```
To move backwards to the previous result, use a capital `N` instead:
```
N
```
When you wish to exit the `less` program, you can type `q` to quit:
```
q
```
While we focused on the `less` tool in this section, there are many other ways of viewing a file that come in handy in certain circumstances. The `cat` command displays a file's contents and returns you to the prompt immediately. The `head` command, by default, shows the first 10 lines of a file. Likewise, the `tail`command shows the last 10 lines by default. These commands display file contents in a way that is useful for "piping" to other programs. We will discuss this concept in a future guide.
Feel free to see how these commands display the `/etc/services` file differently.
### File and Directory Manipulation
We learned in the last section how to view a file. In this section, we'll demonstrate how to create and manipulate files and directories.
#### Create a File with "touch"
Many commands and programs can create files. The most basic method of creating a file is with the `touch`command. This will create an empty file using the name and location specified.
First, we should make sure we are in our home directory, since this is a location where we have permission to save files. Then, we can create a file called `file1` by typing:
```
cd
touch file1
```
Now, if we view the files in our directory, we can see our newly created file:
```
ls
```
```
file1
```
If we use this command on an existing file, the command simply updates the data our filesystem stores on the time when the file was last accessed and modified. This won't have much use for us at the moment.
We can also create multiple files at the same time. We can use absolute paths as well. For instance, if our user account is called `demo`, we could type:
```
touch /home/demo/file2 /home/demo/file3
ls
```
```
file1 file2 file3
```
#### Create a Directory with "mkdir"
Similar to the `touch` command, the `mkdir` command allows us to create empty directories.
For instance, to create a directory within our home directory called `test`, we could type:
```
cd
mkdir test
```
We can make a directory *within* the `test` directory called `example` by typing:
```
mkdir test/example
```
For the above command to work, the `test` directory must already exist. To tell `mkdir` that it should create any directories necessary to construct a given directory path, you can use the `-p` option. This allows you to create nested directories in one step. We can create a directory structure that looks like `some/other/directories` by typing:
```
mkdir -p some/other/directories
```
The command will make the `some` directory first, then it will create the `other` directory inside of that. Finally it will create the `directories` directory within those two directories.
#### Moving and Renaming Files and Directories with "mv"
We can move a file to a new location using the `mv` command. For instance, we can move `file1` into the `test` directory by typing:
```
mv file1 test
```
For this command, we give all of the items that we wish to move, with the location to move them at the end. We can move that file *back* to our home directory by using the special dot reference to refer to our current directory. We should make sure we're in our home directory, and then execute the command:
```
cd
mv test/file1 .
```
This may seem unintuitive at first, but the `mv` command is also used to *rename* files and directories. In essence, moving and renaming are both just adjusting the location and name for an existing item.
So to rename the `test` directory to `testing`, we could type:
```
mv test testing
```
**Note**: It is important to realize that your Linux system will not prevent you from certain destructive actions. If you are renaming a file and choose a name that *already* exists, the previous file will be **overwritten** by the file you are moving. There is no way to recover the previous file if you accidentally overwrite it.
#### Copying Files and Directories with "cp"
With the `mv` command, we could move or rename a file or directory, but we could not duplicate it. The `cp`command can make a new copy of an existing item.
For instance, we can copy `file3` to a new file called `file4`:
```
cp file3 file4
```
Unlike a `mv` operation, after which `file3` would no longer exist, we now have both `file3` and `file4`.
**Note**: As with the `mv` command, it is possible to **overwrite** a file if you are not careful about the filename you are using as the target of the operation. For instance, if `file4` already existed in the above example, its content would be completely replaced by the content of `file3`.
In order to copy directories, you must include the `-r` option to the command. This stands for "recursive", as it copies the directory, plus all of the directory's contents. This option is necessary with directories, regardless of whether the directory is empty.
For instance, to copy the `some` directory structure to a new structure called `again`, we could type:
```
cp -r some again
```
Unlike with files, with which an existing destination would lead to an overwrite, if the target is an *existing directory*, the file or directory is copied *into* the target:
```
cp file1 again
```
This will create a new copy of `file1` and place it inside of the `again` directory.
#### Removing Files and Directories with "rm" and "rmdir"
To delete a file, you can use the `rm` command.
**Note**: Be extremely careful when using any destructive command like `rm`. There is no "undo" command for these actions so it is possible to accidentally destroy important files permanently.
To remove a regular file, just pass it to the `rm` command:
```
cd
rm file4
```
Likewise, to remove *empty* directories, we can use the `rmdir` command. This will only succeed if there is nothing in the directory in question. For instance, to remove the `example` directory within the `testing`directory, we can type:
```
rmdir testing/example
```
If you wish to remove a *non-empty* directory, you will have to use the `rm` command again. This time, you will have to pass the `-r` option, which removes all of the directory's contents recursively, plus the directory itself.
For instance, to remove the `again` directory and everything within it, we can type:
```
rm -r again
```
Once again, it is worth reiterating that these are permanent actions. Be entirely sure that the command you typed is the one that you wish to execute.
### Editing Files
Currently, we know how to manipulate files as objects, but we have not learned how to actually edit them and add content to them.
The `nano` command is one of the simplest command-line Linux text editors, and is a great starting point for beginners. It operates somewhat similarly to the `less` program discussed above, in that it occupies the entire terminal for the duration of its use.
The `nano` editor can open existing files, or create a file. If you decide to create a new file, you can give it a name when you call the `nano` editor, or later on, when you wish to save your content.
We can open the `file1` file for editing by typing:
```
cd
nano file1
```
The `nano` application will open the file (which is currently blank). The interface looks something like this:
```
GNU nano 2.2.6 File: file1
[ Read 0 lines ]
^G Get Help ^O WriteOut ^R Read File ^Y Prev Page ^K Cut Text ^C Cur Pos
^X Exit ^J Justify ^W Where Is ^V Next Page ^U UnCut Text ^T To Spell
```
Along the top, we have the name of the application and the name of the file we are editing. In the middle, the content of the file, currently blank, is displayed. Along the bottom, we have a number of key combinations that indicate some basic controls for the editor. For each of these, the `^` character means the `CTRL` key.
To get help from within the editor, type:
```
CTRL-G
```
When you are finished browsing the help, type `CTRL-X` to get back to your document.
Type in or modify any text you would like. For this example, we'll just type these two sentences:
```
Hello there.
Here is some text.
```
To save our work, we can type:
```
CTRL-O
```
This is the letter "o", not a zero. It will ask you to confirm the name of the file you wish to save to:
```
File Name to Write: file1
^G Get Help M-D DOS Format M-A Append M-B Backup File
^C Cancel M-M Mac Format M-P Prepend
```
As you can see, the options at the bottom have also changed. These are contextual, meaning they will change depending on what you are trying to do. If `file1` is still the file you wish to write to, hit "ENTER".
If we make some additional changes and wish to save the file and exit the program, we will see a similar prompt. Add a new line, and then try to exit the program by typing:
```
CTRL-X
```
If you have not saved after making your modification, you will be asked whether you wish to save the modifications you made:
```
Save modified buffer (ANSWERING "No" WILL DESTROY CHANGES) ?
Y Yes
N No ^C Cancel
```
You can type "Y" to save your changes, "N" to discard your changes and exit, or "CTRL-C" to cancel the exit operation. If you choose to save, you will be given the same file prompt that you received before, confirming that you want to save the changes to the same file. Press ENTER to save the file and exit the editor.
You can see the contents of the file you created using either the `cat` program to display the contents, or the `less` program to open the file for viewing. After viewing with `less`, remember that you should hit `q`to get back to the terminal.
```
less file1
```
```
Hello there.
Here is some text.
Another line.
```
Another editor that you may see referenced in certain guides is `vim` or `vi`. This is a more advanced editor that is very powerful, but comes with a very steep learning curve. If you are ever told to use `vim` or `vi`, feel free to use `nano` instead. If you wish to learn how to use `vim`, read our [guide to getting started with vim](https://www.digitalocean.com/community/tutorials/installing-and-using-the-vim-text-editor-on-a-cloud-server).
### Conclusion
By now, you should have a basic understanding of how to get around your Linux server and how to see the files and directories available. You should also know some basic file manipulation commands that will allow you to view, copy, move, or delete files. Finally, you should be comfortable with some basic editing using the `nano` text editor.
With these few skills, you should be able to continue on with other guides and learn how to get the most out of your server. In our next guide, we will discuss [how to view and understand Linux permissions](/virtual-private-servers/getting-started-with-linux/linux-permissions-basics-and-how-to-use-umask-on-a-vps).
* [
](https://www.digitalocean.com/community/users/jellingwood)
# An Introduction to Linux Permissions
#### Introduction
Linux is a multi-user OS that is based on the Unix concepts of *file ownership* and *permissions* to provide security at the file system level. If you are planning to improve your Linux skills, it is essential that you have a decent understanding of how ownership and permissions work. There are many intricacies when dealing with file ownership and permissions, but we will try our best to distill the concepts down to the details that are necessary for a foundational understanding of how they work.
In this tutorial, we will cover how to view and understand Linux ownership and permissions. If you are looking for a tutorial on how to modify permissions, check out this guide: [Linux Permissions Basics and How to Use Umask on a VPS](https://www.digitalocean.com/community/tutorials/linux-permissions-basics-and-how-to-use-umask-on-a-vps#types-of-permissions)
### Prerequisites
Make sure you understand the concepts covered in the prior tutorials in this series:
* [An Introduction to the Linux Terminal](https://www.digitalocean.com/community/tutorials/an-introduction-to-the-linux-terminal)
* [Basic Linux Navigation and File Management](https://www.digitalocean.com/community/tutorials/basic-linux-navigation-and-file-management)
Access to a Linux server is not strictly necessary to follow this tutorial, but having one to use will let you get some first-hand experience. If you want to set one up, [check out this link](https://www.digitalocean.com/community/tutorials/how-to-create-your-first-digitalocean-droplet-virtual-server) for help.
### About Users
As mentioned in the introduction, Linux is a multi-user system. We must understand the basics of Linux *users* and *groups* before we can talk about ownership and permissions, because they are the entities that the ownership and permissions apply to. Let's get started with the basics of what users are.
In Linux, there are two types of users: *system users* and *regular users*. Traditionally, system users are used to run non-interactive or background processes on a system, while regular users used for logging in and running processes interactively. When you first log in to a Linux system, you may notice that it starts out with many system users that run the services that the OS depends on--this is completely normal.
An easy way to view all of the users on a system is to look at the contents of the `/etc/passwd` file. Each line in this file contains information about a single user, starting with its *user name* (the name before the first `:`). Print the `passwd` file with this command:
```
cat /etc/passwd
```
#### Superuser
In addition to the two user types, there is the *superuser*, or *root* user, that has the ability to override any file ownership and permission restrictions. In practice, this means that the superuser has the rights to access anything on its own server. This user is used to make system-wide changes, and must be kept secure.
It is also possible to configure other user accounts with the ability to assume "superuser rights". In fact, creating a normal user that has `sudo` privileges for system administration tasks is considered to be best practice.
### About Groups
Groups are collections of zero or more users. A user belongs to a default group, and can also be a member of any of the other groups on a server.
An easy way to view all the groups and their members is to look in the `/etc/group` file on a server. We won't cover group management in this article, but you can run this command if you are curious about your groups:
```
cat /etc/group
```
Now that you know what users and groups are, let's talk about file ownership and permissions!
### Viewing Ownership and Permissions
In Linux, each and every file is owned by a single user and a single group, and has its own access permissions. Let's look at how to view the ownership and permissions of a file.
The most common way to view the permissions of a file is to use `ls` with the long listing option, e.g. `ls -l myfile`. If you want to view the permissions of all of the files in your current directory, run the command without an argument, like this:
```
ls -l
```
**Hint:** If you are in an empty home directory, and you haven't created any files to view yet, you can follow along by listing the contents of the `/etc` directory by running this command: `ls -l /etc`
Here is an example screenshot of what the output might look like, with labels of each column of output:
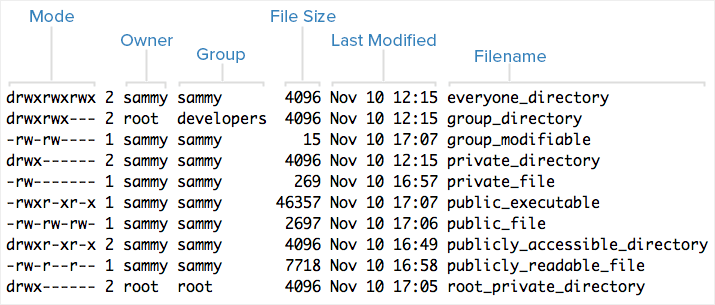
Note that each file's mode (which contains permissions), owner, group, and name are listed. Aside from the *Mode* column, this listing is fairly easy to understand. To help explain what all of those letters and hyphens mean, let's break down the *Mode* column into its components.
### Understanding Mode
To help explain what all the groupings and letters mean, take a look at this closeup of the *mode* of the first file in the example above:
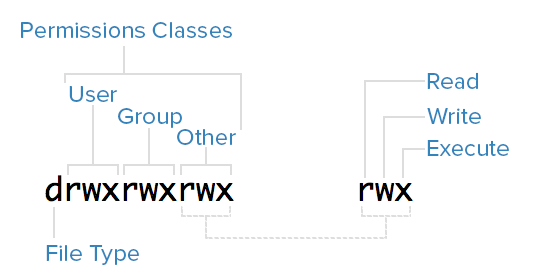
#### File Type
In Linux, there are two basic types of files: *normal* and *special*. The file type is indicated by the first character of the *mode* of a file--in this guide, we refer to this as the *file type field*.
Normal files can be identified by files with a hyphen (`-`) in their file type fields. Normal files are just plain files that can contain data. They are called normal, or regular, files to distinguish them from special files.
Special files can be identified by files that have a non-hyphen character, such as a letter, in their file type fields, and are handled by the OS differently than normal files. The character that appears in the file type field indicates the kind of special file a particular file is. For example, a directory, which is the most common kind of special file, is identified by the `d` character that appears in its file type field (like in the previous screenshot). There are several other kinds of special files but they are not essential what we are learning here.
#### Permissions Classes
From the diagram, we know that *Mode* column indicates the file type, followed by three triads, or classes, of permissions: user (owner), group, and other. The order of the classes is consistent across all Linux distributions.
Let's look at which users belong to each permissions class:
* **User**: The *owner* of a file belongs to this class
* **Group**: The members of the file's group belong to this class
* **Other**: Any users that are not part of the *user* or *group* classes belong to this class.
#### Reading Symbolic Permissions
The next thing to pay attention to are the sets of three characters, or triads, as they denote the permissions, in symbolic form, that each class has for a given file.
In each triad, read, write, and execute permissions are represented in the following way:
* **Read**: Indicated by an `r` in the first position
* **Write**: Indicated by a `w` in the second position
* **Execute**: Indicated by an `x` in the third position. In some special cases, there may be a different character here
A hyphen (`-`) in the place of one of these characters indicates that the respective permission is not available for the respective class. For example, if the *group* triad for a file is `r--`, the file is "read-only" to the group that is associated with the file.
### Understanding Read, Write, Execute
Now that you know how to read which permissions of a file, you probably want to know what each of the permissions actually allow users to do. We will explain each permission individually, but keep in mind that they are often used in combination with each other to allow for meaningful access to files and directories.
Here is a quick breakdown of the access that the three basic permission types grant a user.
#### Read
For a normal file, read permission allows a user to view the contents of the file.
For a directory, read permission allows a user to view the names of the file in the directory.
#### Write
For a normal file, write permission allows a user to modify and delete the file.
For a directory, write permission allows a user to delete the directory, modify its contents (create, delete, and rename files in it), and modify the contents of files that the user can read.
#### Execute
For a normal file, execute permission allows a user to execute a file (the user must also have read permission). As such, execute permissions must be set for executable programs and shell scripts before a user can run them.
For a directory, execute permission allows a user to access, or traverse, into (i.e. `cd`) and access metadata about files in the directory (the information that is listed in an `ls -l`).
### Examples of Modes (and Permissions)
Now that know how to read the mode of a file, and understand the meaning of each permission, we will present a few examples of common modes, with brief explanations, to bring the concepts together.
* `-rw-------`: A file that is only accessible by its owner
* `-rwxr-xr-x`: A file that is executable by every user on the system. A "world-executable" file
* `-rw-rw-rw-`: A file that is open to modification by every user on the system. A "world-writable" file
* `drwxr-xr-x`: A directory that every user on the system can read and access
* `drwxrwx---`: A directory that is modifiable (including its contents) by its owner and group
* `drwxr-x---`: A directory that is accessible by its group
As you may have noticed, the owner of a file usually enjoys the most permissions, when compared to the other two classes. Typically, you will see that the *group* and *other* classes only have a subset of the owner's permissions (equivalent or less). This makes sense because files should only be accessible to users who need access to them for a particular reason.
Another thing to note is that even though many permissions combinations are possible, only certain ones make sense in most situations. For example, *write* or *execute* access is almost always accompanied by *read* access, since it's hard to modify, and impossible to execute, something you can't read.
### Modifying Ownership and Permissions
To keep this tutorial simple, we will not cover how to modify file ownership and permissions here. To learn how to use `chown`, `chgrp`, and `chmod` to accomplish these tasks, refer to this guide: [Linux Permissions Basics and How to Use Umask on a VPS](https://www.digitalocean.com/community/tutorials/linux-permissions-basics-and-how-to-use-umask-on-a-vps#types-of-permissions).
### Conclusion
You should now have a good understanding of how ownership and permissions work in Linux. If you would like to learn more about Linux basics, it is highly recommended that you read the next tutorial in this series:
* [An Introduction to Linux I/O Redirection](https://www.digitalocean.com/community/tutorials/an-introduction-to-linux-i-o-redirection)
# An Introduction to Linux I/O Redirection
#### Introduction
The redirection capabilities built into Linux provide you with a robust set of tools used to make all sorts of tasks easier to accomplish. Whether you're writing complex software or performing file management through the command line, knowing how to manipulate the different I/O streams in your environment will greatly increase your productivity.
### Streams
Input and output in the Linux environment is distributed across three streams. These streams are:
* **standard input** (**stdin**)
* **standard output** (**stdout**)
* **standard error** (**stderr**)
The streams are also numbered:
* **stdin** (**0**)
* **stdout** (**1**)
* **stderr** (**2**)
During standard interactions between the user and the terminal, standard input is transmitted through the user's keyboard. Standard output and standard error are displayed on the user's terminal as text. Collectively, the three streams are referred to as the *standard streams*.
### Standard Input
The standard input stream typically carries data from a user to a program. Programs that expect standard input usually receive input from a device, such as a keyboard. Standard input is terminated by reaching EOF (end-of-file). As described by its name, EOF indicates that there is no more data to be read.
To see standard input in action, run the *cat* program. Cat stands for concatenate, which means to link or combine something. It is commonly used to combine the contents of two files. When run on its own, cat opens a looping prompt.
```
cat
```
After opening cat, type a series of numbers as it is running.
```
1
2
3
ctrl-d
```
When you type a number and press enter, you are sending standard input to the running cat program, which is expecting said input. In turn, the cat program is sending your input back to the terminal display as standard output.
EOF can be input by the user by pressing ctrl-d. After the cat program receives EOF, it stops.
### Standard Output
Standard output writes the data that is generated by a program. When the standard output stream is not redirected, it will output text to the terminal. Try the following example:
```
echo Sent to the terminal through standard output
```
When used without any additional options, the **echo** command displays any argument that is passed to it on the command line. An argument is something that is received by a program.
Run echo without any arguments:
```
echo
```
It will return an empty line, since there are no arguments.
### Standard Error
Standard error writes the errors generated by a program that has failed at some point in its execution. Like standard output, the default destination for this stream is the terminal display.
When a program's standard error stream is piped to a second program, the piped data (consisting of program errors) is simultaneously sent to the terminal as well.
Let's see a basic example of standard error using the ls command. *ls* lists a directory's contents.
When run without an argument, ls lists the contents within the current directory. If ls is run with a directory as an argument, it will list the contents of the provided directory.
```
ls %
```
Since % is not an existing directory, this will send the following text to standard error:
```
ls: cannot access %: No such file or directory
```
### Stream Redirection
Linux includes redirection commands for each stream. These commands write standard output to a file. If a non-existent file is targetted (either by a single-bracket or double-bracket command), a new file with that name will be created prior to writing.
Commands with a single bracket *overwrite* the destination's existing contents.
**Overwrite**
* **>** - standard output
* **<** - standard input
* **2>** - standard error
Commands with a double bracket *do not* overwrite the destination's existing contents.
**Append**
* **>>** - standard output
* **<<** - standard input
* **2>>** - standard error
Let's see an example:
```
cat > write_to_me.txt
a
b
c
ctrl-d
```
Here, cat is being used to write to a file, which is created as a result of the loop.
View the contents of write*to*me.txt using cat:
```
cat write_to_me.txt
```
It should have the following contents:
```
a
b
c
```
Redirect cat to write*to*me.txt again, and enter three numbers.
```
cat > write_to_me.txt
1
2
3
ctrl-d
```
When you use cat to view write*to*me.txt, you will see the following:
```
1
2
3
```
The prior contents are no longer there, as the file was overwritten by the single-bracket command.
Do one more cat redirection, this time using double brackets:
```
cat >> write_to_me.txt
a
b
c
ctrl-d
```
Open write*to*me.txt again, and you will see this:
```
1
2
3
a
b
c
```
The file now contains text from both uses of cat, as the second one did not override the first one.
### Pipes
Pipes are used to redirect a stream from one program to another. When a program's standard output is sent to another through a pipe, the first program's data, which is received by the second program, will not be displayed on the terminal. Only the filtered data returned by the second program will be displayed.
The Linux *pipe* is represented by a vertical bar.
```
*|*
```
An example of a command using a pipe:
```
ls | less
```
This takes the output of ls, which displays the contents of your current directory, and *pipes* it to the *less*program. less displays the data sent to it one line at a time.
ls normally displays directory contents across multiple rows. When you run it through less, each entry is placed on a new line.
Though the functionality of the pipe may appear to be similar to that of **>** and **>>** (standard output redirect), the distinction is that pipes redirect data from one command to another, while **>** and **>>** are used to redirect exclusively to files.
### Filters
*Filters* are commands that alter piped redirection and output. Note that filter commands are also standard Linux commands that can be used without pipes.
* **find** - Find returns files with filenames that match the argument passed to find.
* **grep** - Grep returns text that matches the string pattern passed to grep.
* **tee** - Tee redirects standard input to both standard output and one or more files.
* **tr** - tr finds-and-replaces one string with another.
* **wc** - wc counts characters, lines, and words.
#### Examples
Now that you have been introduced to redirection, piping, and basic filters, let's look at some basic redirection patterns and examples.
**command > file**
This pattern redirects the standard output of a command to a file.
```
ls ~ > root_dir_contents.txt
```
The command above passes the contents of your system's root directory as standard output, and writes the output to a file named root*dir*contents.txt. It will delete any prior contents in the file, as it is a single-bracket command.
**command > /dev/null**
/dev/null is a special file that is used to trash any data that is redirected to it. It is used to discard standard output that is not needed, and that might otherwise interfere with the functionality of a command or a script. Any output that is sent to /dev/null is discarded.\
In the future, you may find the practice of redirecting standard output and standard error to /dev/null when writing shell scripts.
```
ls > /dev/null
```
This command discards the standard output stream returned from the command *ls* by passing it to /dev/null.
**command 2> file**
This pattern redirects the standard error stream of a command to a file, overwriting existing contents.
```
mkdir '' 2> mkdir_log.txt
```
This redirects the error raised by the invalid directory name *''*, and writes it to log.txt. Note that the error is still sent to the terminal and displayed as text.
**command >> file**
This pattern redirects the standard output of a command to a file *without* overwriting the file's existing contents.
```
echo Written to a new file > data.txt
echo Appended to an existing file's contents >> data.txt
```
This pair of commands first redirects the text inputted by the user through echo to a new file. It then appends the text received by the second echo command to the existing file, without overwriting its contents.
**command 2>> file**
The pattern above redirects the standard error stream of a command to a file *without* overwriting the file's existing contents. This pattern is useful for creating error logs for a program or service, as the log file will not have its previous content wiped each time the file is written to.
```
find '' 2> stderr_log.txt
wc '' 2>> stderr_log.txt
```
The above command redirects the error message caused by an invalid find argument to a file named stderr\_log.txt. It then appends the error message caused by an invalid wc argument to the same file.
**command | command**
Redirects the standard output from the first command to the standard input of the second command.
```
find /var lib | grep deb
```
This command searches through /var and its subfolders for filenames and extensions that match the string *deb*, and returns the file paths for the files, with the matching portion in each path highlighted in red.
**command | tee file**
This pattern (which includes the *tee* command) redirects the standard output of the command to a file and overwrites its contents. Then, it displays the redirected output in the terminal. It creates a new file if the file does not already exist.
In the context of this pattern, tee is typically used to view a program's output while simultaneously saving it to a file.
```
wc /etc/magic | tee magic_count.txt
```
This pipes the counts for characters, lines, and words in the magic file (used by the Linux shell to determine file types) to the tee command, which then splits wc's output in two directions, and sends it to the terminal display and the magic\_count.txt file. For the tee command, imagine the letter T. The bottom part of the letter is the initial data, and the top part is the data being split in two different directions (standard output and the terminal).
Multiple pipes can be used to redirect output across multiple commands and/or filters.
**command | command | command >> file**
This pattern predirects the standard output of the first command and filters it through the next two commands. It then appends the final result to a file.
```
ls ~ | grep *tar | tr e E >> ls_log.txt
```
This begins by running ls in your root directory (\~) and piping the result to the grep command. In this case, grep returns a list of files containing *tar* in their filename or extension.
The results from grep are then piped to tr, which replaces occurrences of the letter *e* with *E*, since e is being passed as the first argument (the string to search for), and E is passed as the second argument (the string that replaces any matches for the first argument). This final result is then appended to the file ls\_log.txt, which is created if it does not already exist).
#### Conclusion
Learning how to use the redirection capabilities built into the Linux command line can be a bit daunting, but you are well on your way to mastering this skillset after completing this tutorial. Now that you have seen the basics of how redirections and pipes work, you'll be able to begin your foray into the world of shell scripting, which makes frequent use of the programs and patterns highlighted in this guide.
If you would like to dig deeper into the commands that were introduced in this tutorial, you can do so with *man command | less*. For example:
```
man tee | less
```
This will show you the full list of commands available for the tee program. You can use this pattern to display information and usage options for any Linux command or program.
Googling for specific commands, or for something that you would like to do in the command line (e.g. "delete all files in a directory that begin with an uppercase letter") can also prove helpful when you need to accomplish a specific task using the command line.
# Linux Permissions Basics and How to Use Umask on a VPS
#### Introduction
Linux permissions allow a file or directory owner to restrict access based on the accessor's relationship to each file. This allows for control schemes that provide varying levels of access to different people.
The *umask* command is used to determine the default permissions assigned to files created by each user. It can be modified to provide strict security restrictions or relaxed permissions for file sharing scenarios, depending on the needs of the system and user.
This guide will explain the basics of Linux permissions, and will demonstrate the usefulness of configuring umask correctly. It will also briefly cover the *chmod* command as an associated permissions tool.
### Permission Categories
Linux permissions can seem obscure and difficult to understand to new users. However, once you are familiar with the way that permissions are represented, it is trivial to read and change the permissions of a file or directory with ease.
#### Owner Permissions
The first concept necessary to understand permissions is that Linux is fundamentally a multi-user operating system.
Each file is owned by exactly one user. Even if you are the only person using your VPS, there are still a number of different "users" created to run specific programs. You can see the different users on your system by typing:
```
cat /etc/passwd
```
```
root:x:0:0:root:/root:/bin/bash
daemon:x:1:1:daemon:/usr/sbin:/bin/sh
bin:x:2:2:bin:/bin:/bin/sh
sys:x:3:3:sys:/dev:/bin/sh
sync:x:4:65534:sync:/bin:/bin/sync
games:x:5:60:games:/usr/games:/bin/sh
man:x:6:12:man:/var/cache/man:/bin/sh
lp:x:7:7:lp:/var/spool/lpd:/bin/sh
mail:x:8:8:mail:/var/mail:/bin/sh
news:x:9:9:news:/var/spool/news:/bin/sh
uucp:x:10:10:uucp:/var/spool/uucp:/bin/sh
. . .
```
The */etc/passwd* file contains a line for every user that has been created on your operating system. The first field on each line is the name of a unique user. As you can see, many of these users are associated with services and applications.
Configuring services to operate as a distinct user allows us to control the service's access by taking advantage of the user permissions assignment. Many programs are configured to create a username and perform all operations using that user.
#### Group Permissions
The second category that we can assign permissions to is the "group owner" of the file.
As with the owner category, a file can be owned by exactly one group. Each user can be a member of multiple groups and each group can contain multiple users.
To see the groups that your user currently belongs to, type:
```
groups
```
This will show you all of the groups that your user is currently a member of. By default, you might only be a member of one or two groups, one of which might be the same as your username.
To show all of the groups currently available on your system, type:
```
cat /etc/group
```
```
root:x:0:
daemon:x:1:
bin:x:2:
sys:x:3:
adm:x:4:
tty:x:5:
disk:x:6:
lp:x:7:
. . .
```
The first field of each line is the name of a group.
Linux allows you to assign permissions based on the group owner of a file. This allows you to provide custom permissions to a group of people since only one user can own a file.
#### Other Permissions
The last category that you can assign permissions for is the "other" category. In this context, other is defined as any user that is not the file owner and is not a member of the group that owns the file.
This category allows you to set a base permissions level that will apply to anyone outside of the other two control groups.
### Types of Permissions
Each permissions category (owner, group owner, and other) can be assigned permissions that allow or restrict their ability to read, write, or execute a file.
For a regular file, read permissions are required to read the contents of a file, write permissions are necessary to modify it, and execute permissions are needed to run the file as a script or an application.
For directories, read permissions are necessary to *ls* (list) the contents of a directory, write permissions are required to modify the contents of a directory, and execute permissions allow a user to *cd* (change directories) into the directory.
Linux represents these types of permissions using two separate symbolic notations: alphabetic and octal.
#### Alphabetic Notation
Alphabetic notation is easy to understand and is used by a few common programs to represent permissions.
Each permission is represented by a single letter:
* r = read permissions
* w = write permissions
* x = execute permissions
It is important to remember that alphabetic permissions are always specified in this order. If a certain privilege is granted, it is represented by the appropriate letter. If access is restricted, it is represented by a dash (-).
Permissions are given for a file's owner first, followed by the group owner, and finally for other users. This gives us three groups of three values.
The *ls* command uses alphabetic notation when called with its long-format option:
```
cd /etc
ls -l
```
```
drwxr-xr-x 3 root root 4096 Apr 26 2012 acpi
-rw-r--r-- 1 root root 2981 Apr 26 2012 adduser.conf
drwxr-xr-x 2 root root 4096 Jul 5 20:53 alternatives
-rw-r--r-- 1 root root 395 Jun 20 2010 anacrontab
drwxr-xr-x 3 root root 4096 Apr 26 2012 apm
drwxr-xr-x 3 root root 4096 Apr 26 2012 apparmor
drwxr-xr-x 5 root root 4096 Jul 5 20:52 apparmor.d
drwxr-xr-x 6 root root 4096 Apr 26 2012 apt
…
```
The first field in the output of this command represents the permissions of the file.
Ten characters represent this data. The first character is not actually a permissions value and instead signifies the file type (- for a regular file, d for a directory, etc).
The next nine characters represent the permissions that we discussed above. Three groups representing owner, group owner, and other permissions, each with values indicating read, write, and execute permissions.
In the example above, the owner of the "acpi" directory has read, write, and execute permissions. The group owner and other users have read and execute permissions.
The "anacrontab" file allows the file owner to read and modify, but group members and other users only have permission to read.
#### Octal Notation
The more concise, but slightly less intuitive way of representing permissions is with octal notation.
Using this method, each permissions category (owner, group owner, and other) is represented by a number between 0 and 7.
We arrive at the appropriate number by assigning each type of permission a numerical value:
* 4 = read permissions
* 2 = write permissions
* 1 = execute permission
We add up the numbers associated with the type of permissions we would like to grant for each category. This will be a number between 0 and 7 (0 representing no permissions and 7 representing full read, write, and execute permissions) for each category.
For example, if the file owner has read and write permissions, this would be represented as a 6 in the file owner's column. If the group owner requires only read permissions, then a 4 can be used to represent their permissions.
Similar to alphabetic notation, octal notation can include an optional leading character specifying the file type. This is followed by owner permissions, group owner permissions, and other permissions respectively.
An essential program that benefits from using octal notation is the *chmod* command.
### Using the Chmod Command
The most popular way of changing a file's permissions is by using octal notation with the *chmod* command. We will practice by creating an empty file in our home directory:
```
cd
touch testfile
```
First, lets view the permissions that were given to this file upon creation:
```
ls -l testfile
```
```
-rw-rw-r-- 1 demouser demouser 0 Jul 10 17:23 testfile
```
If we interpret the permissions, we can see that the file owner and file group owner both have read and write privileges, and other users have read capabilities.
If we convert that into octal notation, the owner and group owner would have a permission value of 6 (4 for read, plus 2 for write) and the other category would have 4 (for read). The full permissions would be represented by the triplet 664.
We will pretend that this file contains a bash script that we would like to execute, as the owner. We don't want anyone else to modify the file, including group owners, and we don't want anyone not in the group to be able to read the file at all.
We can represent our desired permissions setting alphabetically like this: -rwxr-----. We will convert that into octal notation and change the permissions with *chmod*:
```
chmod 740 testfile
ls -l testfile
```
```
-rwxr----- 1 demouser demouser 0 Jul 10 17:23 testfile
```
As you can see, the permissions were assigned correctly.
If we want to change the permissions back, we can easily do that by giving chmod the following command:
```
chmod 664 testfile
ls -l testfile
```
```
-rw-rw-r-- 1 demouser demouser 0 Jul 10 17:23 testfile
```
### Setting Default Permissions with Umask
The *umask* command defines the default permissions for newly created files based on the "base" permissions set defined for files and directories.
Files have a base permissions set of 666, or full read and write access for all users. Execute permissions are not assigned by default because most files are not made to be executed (assigning executable permissions also opens up some security concerns).
Directories have a base permissions set of 777, or read, write, and execute permissions for all users.
Umask operates by applying a subtractive "mask" to the base permissions shown above. We will use an example to demonstrate how this works.
If we want the owner and members of the owner group to be able to write to newly created directories, but not other users, we would want to assign the permissions to 775.
We need the three digit number that would express the difference between the base permissions and the desired permissions. That number is 002.
```
777
- 775
------
002
```
This resulting number is the umask value that we would like to apply. Coincidently, this is the default umask value for many systems, as we saw when we created a file with the *touch* command earlier. Let's try again:
```
touch test2
ls -l test2
```
```
-rw-rw-r-- 1 demouser demouser 0 Jul 10 18:30 test2
```
We can define a different umask using the *umask* command.
If we want to secure our system more, we can say that by default, we want users who are not the file owner to have no permissions at all. This can be accomplished with the 077 umask:
```
umask 077
touch restricted
ls -l restricted
```
```
-rw------- 1 demouser demouser 0 Jul 10 18:33 restricted
```
If we have a process that creates shared content, we may want give full permissions to every file and directory that it creates:
```
umask 000
touch openfile
ls -l openfile
```
```
-rw-rw-rw- 1 demouser demouser 0 Jul 10 18:36 openfile
```
By default, the settings you assign to *umask* will only apply to the current shell session. When you log in next time, any new files and directories will be give the original settings chosen by your distribution.
If you would like to make your umask settings persist across sessions, you can define the umask settings in your .bashrc file:
```
cd
nano .bashrc
```
Search to see if there is already a umask value set. Modify the existing value if there is one. Otherwise, add a line at the bottom of the file with your desired umask settings:
```
umask 022
```
Here, we have chosen to give the owner full permissions, and take away write permissions for both the group owner and other categories. Adjust this setting to your liking to make your preferences available next time you log in.
### A Word of Caution
An important point to remember when changing permissions is that certain areas of the filesystem and certain processes require specific permissions to run correctly. Inadequate permissions can lead to errors and non-functioning applications.
On the other hand, settings that are *too* permissive can be a security risk.
For these reasons, it is recommended that you do not adjust permissions outside of your own home directory unless you are aware of the repercussions that can arise due to improperly configured settings.
Another good rule to abide by, especially when configuring software manually, is to always assign the most restrictive permissions policy possible without affecting functionality.
This means that if only one user (such as a service) needs to access a group of files, then there is no need to allow the rest of the world to have write or even read access to the contents. This is especially true in contexts where passwords are stored in plain-text.
You can fine-tune permissions more fully by correctly utilizing group owner permissions and adding necessary users to the appropriate group. If all of the users who need access to a file are members of the group owner, then the other permission category can be locked down for more security.
# Connect with SSH
To connect, you’ll need to open an SSH terminal. How you do this varies between operating systems and window managers, but you can do by following this guide.
Virtual Private Servers are managed using a terminal and SSH. You’ll need to have an SSH client and, optionally, an SSH key pair. Clients generally authenticate either using passwords (which are less secure and not recommended) or SSH keys (which are very secure and strongly recommended).
To log in to your VPS with SSH, you need three pieces of information:
* The VPS IP address
* The default username on the server
* The default password for that username, if you aren’t using SSH keys
To get your VPS's IP address, visit the [VPS Control Panel](https://vps.vimzaa.com). The IP address will be displayed in the **IP Address** column under your VPS Hostname. You can mouse over it to copy it into your clipboard.
The default username is `root` on most operating systems, like Ubuntu and CentOS. Exceptions to this include CoreOS, where you’ll log in as `core`, Rancher, where you’ll log in as `rancher`, and FreeBSD, where you’ll log in as `freebsd`.
By default, the password for that user is randomly generated and emailed to you at your account’s email address.
Once you have your VPS IP address, username, and password (if necessary), follow the instructions for your SSH client. OpenSSH is included on Linux and macOS. Windows users with Bash also have access to OpenSSH. Windows users without Bash can use PuTTY.
## How to Connect to your VPS with OpenSSH on Linux or macOS
To connect, you’ll need to open an SSH terminal. How you do this varies between operating systems and window managers, but generally you can:
* **Linux**: Search Terminal or press `CTRL+ALT+T`.
* **macOS**: Search Terminal.
* **Bash on Windows**: Search Bash.
Once the terminal is open, enter the following SSH command. Make sure to substitute in your VPS’s IP address after the `@`. If you’re using CoreOS, Rancher, or FreeBSD, the username will be `core`, `rancher`, or `freebsd` instead of `root`, respectively.
```
ssh username@203.0.113.0
```
If you have multiple SSH keys, you may need to specify the path of your private key using the `-i` flag. Make sure to substitute in the pato your private key.
```
ssh -i /path/to/private/key username@203.0.113.0
```
The very first time you log in, the server isn’t identified on your local machine, so you’ll be asked if you’re sure you want to continue connecting. You can type `yes` and then press `ENTER`.
```
The authenticity of host '203.0.113.0 (203.0.113.0)' can't be established.
ECDSA key fingerprint is SHA256:IcLk6dLi+0yTOB6d7x1GMgExamplewZ2BuMn5/I5Jvo.
Are you sure you want to continue connecting (yes/no)? yes
```
Next, a host key fingerprint will be saved to your local machine and you’ll receive this confirmation:
```
Warning: Permanently added '203.0.113.0' (ECDSA) to the list of known hosts.
```
You may receive an intimidating-looking remote host identification warning:
```
@@@@@@@@@@@@@@@@@@@@@@@@@@@@@@@@@@@@@@@@@@@@@@@@@@@@@@@@@@@
@ WARNING: REMOTE HOST IDENTIFICATION HAS CHANGED! @
@@@@@@@@@@@@@@@@@@@@@@@@@@@@@@@@@@@@@@@@@@@@@@@@@@@@@@@@@@@
IT IS POSSIBLE THAT SOMEONE IS DOING SOMETHING NASTY!
Someone could be eavesdropping on you right now (man-in-the-middle attack)!
It is also possible that a host key has just been changed.
```
This happens most often when you’ve destroyed a VPS immediately before creating and trying to connect to a new one. If the new VPS gets assigned the same IP address as the VPS that was destroyed, the host key of the old server is stored and conflicts with the new host key.
If this happens, you can delete the old VPS’s host key from your local system with the command `ssh-keygen -R 203.0.113.0` and then reconnect.
The next part of the connection process is authentication. If you’ve added SSH keys, you’ll connect to the VPS immediately (or after entering the passphrase for your key pair).
If you haven’t added SSH keys, you’ll be prompted for your password:
```
root@203.0.113.0's password:
```
When you enter your password, nothing is displayed in the terminal, so it can be easier to paste in the initial password. Pasting into text-based terminals is different than other desktop applications and is also different from one window manager to another:
* For Linux Gnome Terminal, use `CTRL+SHIFT+V`.
* For macOS, use `SHIFT-CMD-V` or the middle mouse button.
* For Bash on Windows, right-click on the window bar, choose **Edit**, then **Paste**. You can also right-click to paste if you enable QuickEdit mode.
Once you’ve entered the password, press `ENTER`.
E-mailed passwords aren’t secure, so the first time you log in with the default password, you will immediately be prompted to change it.
```
. . .
Changing password for root.
```
To do that, first re-enter the current password, then press `ENTER`. Nothing will display on the screen when you type.
```
(current) UNIX password:
```
After that, enter your new password and press `ENTER`. Again, nothing will display on the screen as you type. You’ll be asked to supply the new password a second time to confirm that you’ve typed it accurately.
```
Enter new UNIX password:
Retype new UNIX password:
```
When you’ve successfully logged in, you’ll receive an operating system-specific welcome screen. Your command prompt will change to display the username you’ve logged in as, separated by the `@` symbol from the hostname of the VPS, like `root@ubuntu-512mb-sfo2-01:~#`.
## How to Connect to your VPS with PuTTY on Windows
[PuTTY](http://www.putty.org/) is an open-source SSH and Telnet client for Windows. It allows you to securely connect to remote servers from a local Windows computer.
If you don’t have PuTTY installed, visit the [Download PuTTY site](http://www.chiark.greenend.org.uk/~sgtatham/putty/download.html) and choose the Windows installer from the **Package files** list. Once PuTTY is installed, start the program.
### Configuring PuTTY
On the **PuTTY Configuration** screen that opens, fill in the field labeled **Host Name (or IP Address)** with your VPS’s IP address, which you can find on [your dashboard](https://vps.vimzaa.com). Confirm that the **Port** is set to `22` and that the **Connection type** `SSH` is selected.

Next, click on **SSH** in the left sidebar (under **Connection**). Make sure “2 only” is selected for **Preferred SSH protocol version**.
If you want to created an SSH key pair, you can add them in the **Auth** subcategory. In the **Private key file for authentication**section, click the **Browse** button.

Search for the private key file that you saved. This is the key that ends in `.ppk`. Find it and select “Open” in the file window.
Next, in the **Connection** subheading in the **Data** configuration section, enter your server’s username in the **Auto-login username** field. For the initial setup, this should be the `root` user, which is the administrative user of your server. If you’re using CoreOS, Rancher, or FreeBSD, the username will be `core`, `rancher`, or `freebsd` instead of `root`, respectively.
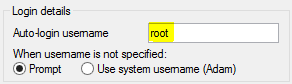
Finally, you can save these preferences to avoid typing them manually in the future. Click on **Session** in the left sidebar, then add a name in the text box under **Saved Sessions** and click **Save** on the right.
You now have saved all of the configuration data needed to connect to your new server.
### Connecting with PuTTY
Once you have a session saved, you can recall these values at any time by returning to the **Session** screen, selecting the session you would like to use in the **Saved Sessions** section, and clicking **Load** to recall the settings. This will auto-fill all of the fields with the values you initially selected.
Before you connect to a server for the first time, PuTTY will ask you to confirm that you trust the server. Choose **Yes** to save the server identity in PuTTY’s cache or **No** to connect without saving the identity.

After PuTTY starts, type in the root password that was emailed to you. If you uploaded SSH keys, you will either be connected directly or prompted for the password you set on your key.
When you have successfully authenticated, you will be connected to your new VPS.
# How to Add SSH Keys to VPS
While it is possible to manage your servers using password-based logins, it is often a better idea to set up and use SSH key pairs. SSH keys are more secure than passwords, and can help you log in without having to remember long passwords.
To use SSH keys with your virtual private servers, you need to create an SSH key using an SSH client installed on your local computer. [OpenSSH](https://www.digitalocean.com/docs/droplets/how-to/add-ssh-keys/create-with-openssh/) is included on Linux, macOS, and Windows Subsystem for Linux. Windows users without Bash can [PuTTY](https://www.digitalocean.com/docs/droplets/how-to/add-ssh-keys/create-with-putty/).
## How to Create SSH Keys with OpenSSH on Linux or macOS
The standard OpenSSH suite of tools contains the `ssh-keygen` utility, which is used to generate key pairs. Run it on your local computer to generate a 2048-bit RSA key pair, which is fine for most uses.
```
ssh-keygen
```
The utility will prompt you to select a location for the keys. By default, the keys are stored in the `~/.ssh` directory with the filenames `id_rsa` for the private key and `id_rsa.pub` for the public key. Using the default locations will allow your SSH client to automatically find your SSH keys when authenticating, so we recommend accepting them by pressing `ENTER`.
```
Generating public/private rsa key pair.
Enter file in which to save the key (/home/username/.ssh/id_rsa):
```
If you have previously generated a key pair, you may see a prompt that looks like this:
```
/home/username/.ssh/id_rsa already exists.
Overwrite (y/n)?
```
If you choose to overwrite the key on disk, you will **not** be able to authenticate using the previous key anymore. Selecting yes is an irreversible destructive process.
Once you select a location for the key, you’ll be prompted to enter an optional passphrase which encrypts the private key file on disk.
If you enter one, you will have to provide it every time you use this key (unless you are running SSH agent software that stores the decrypted key). We recommend using a passphrase, but you can press `ENTER` to bypass this prompt.
```
Created directory '/home/username/.ssh'.
Enter passphrase (empty for no passphrase):
Enter same passphrase again:
```
This is the last step in the creation process. You now have a public and private key that you can use to authenticate.
```
Your identification has been saved in /home/username/.ssh/id_rsa.
Your public key has been saved in /home/username/.ssh/id_rsa.pub.
The key fingerprint is:
a9:49:EX:AM:PL:E3:3e:a9:de:4e:77:11:58:b6:90:26 username@203.0.113.0
The key's randomart image is:
+--[ RSA 2048]----+
| ..o |
| E o= . |
| o. o |
| .. |
| ..S |
| o o. |
| =o.+. |
|. =++.. |
|o=++. |
+-----------------+
```
## How to Create SSH Keys with PuTTY on Windows
To create and use SSH keys on Windows, you need to download and install both PuTTY, the utility used to connect to remote servers through SSH, and PuTTYgen, a utility used to create SSH keys.
On [the PuTTY website](http://www.chiark.greenend.org.uk/~sgtatham/putty/download.html), download the `.msi` file in the **Package files** section at the top of the page, under **MSI (‘Windows Installer’)**. Next, install it on your local computer by double clicking it and using the installation wizard.
After the programs are installed, start the PuTTYgen program through your Start Menu or by tapping the Windows key and typing `puttygen`. The key generation program looks similar to this:

You can customize the **Parameters** at the bottom if you like, but the default values are appropriate in most situations. When you’re ready, click the **Generate** button on the right-hand side.
You might be prompted to “generate some randomness by moving the mouse over the blank area”. This randomness, known as *entropy*, is used to create keys in a secure fashion so that other people can’t reproduce them.

When the key is generated, you’ll see the public key displayed in a text box. Copy this into your clipboard now if you plan to add it to your servers. Be sure to scroll within the text area so you copy the entire key.

Click the **Save private key** button and select a secure location to keep it. You can name your key whatever you’d like, and the extension `.ppk` will be automatically added.
### Working with PuTTY’s Public Key Format
You can click **Save public key** as well, but take note: The format PuTTYGen uses when it saves the public key is incompatible with the OpenSSH `authorized_keys` files used for SSH key authentication on Linux servers.
If you need to see the public key in the right format after the private key has been saved:
1. Click the **Load** button.
2. Navigate to the *private* key and open it.
The public key will be redisplayed again.
Click the **Save private key** button and select a secure location to keep it. You can name your key whatever you’d like, and the extension `.ppk` will be automatically added.
### Working with PuTTY’s Public Key Format
You can click **Save public key** as well, but take note: The format PuTTYGen uses when it saves the public key is incompatible with the OpenSSH `authorized_keys` files used for SSH key authentication on Linux servers.
If you need to see the public key in the right format after the private key has been saved, either:
* Click the **Load** button
* Navigate to the *private* key and open it.
The public key will be redisplayed again.
Now that you have your generated key pair saved on your computer and ready to use.
## How to Add SSH Keys to Your Virtual Private Server
There are several ways to add your public key to a server:
* Using `ssh-copy-id`, which is included in many Linux distributions’ OpenSSH packages. This is a good choice when you have password-based SSH access.
* By copying the contents of the key and piping the contents into the `~/.ssh/authorized_keys` file. This is a good choice when you have password-based SSH access but don’t have `ssh-copy-id`.
* By adding the public key manually, which is necessary if you do not have password-based SSH access.
### With ssh-copy-id and Password-Based Access
You can copy your SSH key using `ssh-copy-id`, substituting in the IP address of your VPS.
```
ssh-copy-id username@203.0.113.0
```
This will prompt you for the user account’s password on the remote system:
```
The authenticity of host '203.0.113.0 (203.0.113.0)' can't be established.
ECDSA key fingerprint is fd:fd:d4:f9:EX:AM:PL:E0:e1:55:00:ad:d6:6d:22:fe.
Are you sure you want to continue connecting (yes/no)? yes
/usr/bin/ssh-copy-id: INFO: attempting to log in with the new key(s), to filter out any that are already installed
/usr/bin/ssh-copy-id: INFO: 1 key(s) remain to be installed -- if you are prompted now it is to install the new keys
username@203.0.113.0's password:
```
After typing in the password, the contents of your `~/.ssh/id_rsa.pub` key will be appended to the end of the user account’s `~/.ssh/authorized_keys` file:
```
Number of key(s) added: 1
Now try logging into the machine, with: "ssh 'username@203.0.113.0'"
and check to make sure that only the key(s) you wanted were added.
```
After entering the password, it will copy your key, and you can log in without a password.
### With ssh and Password-Based Access
If you do not have the `ssh-copy-id` utility available, but still have password-based SSH access to the remote server, you can pipe the contents of the key into the `ssh` command.
On the remote side, make sure the `~/.ssh` directory exists, and then append the piped contents into the `~/.ssh/authorized_keys` file. Substitute the IP address for your VPS.
```
cat ~/.ssh/id_rsa.pub | ssh username@203.0.113.0 "mkdir -p ~/.ssh && cat >> ~/.ssh/authorized_keys"
```
You will be asked to supply the password for the remote account:
```
The authenticity of host '203.0.113.0 (203.0.113.0)' can't be established.
ECDSA key fingerprint is fd:fd:d4:f9:EX:AM:PL:E0:e1:55:00:ad:d6:6d:22:fe.
Are you sure you want to continue connecting (yes/no)? yes
username@203.0.113.0's password:
```
After entering the password, it will copy your key, and you can log in without a password.
### Without Password-Based Access
If you do not have password-based SSH access available, you will have to add your public key to the remote server manually.
On your local machine, output the contents of your public key.
```
cat ~/.ssh/id_rsa.pub
```
Copy the output.
```
ssh-rsa EXAMPLEzaC1yc2EAAAADAQABAAACAQCqql6MzstZYh1TmWWv11q5O3pISj2ZFl9HgH1JLknLLx44+tXfJ7mIrKNxOOwxIxvcBF8PXSYvobFYEZjGIVCEAjrUzLiIxbyCoxVyle7Q+bqgZ8SeeM8wzytsY+dVGcBxF6N4JS+zVk5eMcV385gG3Y6ON3EG112n6d+SMXY0OEBIcO6x+PnUSGHrSgpBgX7Ks1r7xqFa7heJLLt2wWwkARptX7udSq05paBhcpB0pHtA1Rfz3K2B+ZVIpSDfki9UVKzT8JUmwW6NNzSgxUfQHGwnW7kj4jp4AT0VZk3ADw497M2G/12N0PPB5CnhHf7ovgy6nL1ikrygTKRFmNZISvAcywB9GVqNAVE+ZHDSCuURNsAInVzgYo9xgJDW8wUw2o8U77+xiFxgI5QSZX3Iq7YLMgeksaO4rBJEa54k8m5wEiEE1nUhLuJ0X/vh2xPff6SQ1BL/zkOhvJCACK6Vb15mDOeCSq54Cr7kvS46itMosi/uS66+PujOO+xt/2FWYepz6ZlN70bRly57Q06J+ZJoc9FfBCbCyYH7U/ASsmY095ywPsBo1XQ9PqhnN1/YOorJ068foQDNVpm146mUpILVxmq41Cj55YKHEazXGsdBIbXWhcrRf4G2fJLRcGUr9q8/lERo9oxRm5JFX6TCmj6kmiFqv+Ow9gI0x8GvaQ== username@203.0.113.0
```
Log into your VPS and create the `~/.ssh` directory if it does not already exist:
```
mkdir -p ~/.ssh
```
Add the key to the `~/.ssh/authorized_keys`. Make sure to substitute the contents of your public key.
```
echo "ssh-rsa EXAMPLEzaC1yc2E...GvaQ== username@203.0.113.0" >> ~/.ssh/authorized_keys
```
The `~/.ssh` directory and `authorized_keys` file must have specific restricted permissions (`700` for `~/.ssh` and `600` for `authorized_keys`). If they don’t, you won’t be able to log in.
Make sure the permissions and ownership of the files are correct.
```
chmod -R go= ~/.ssh
chown -R $USER:$USER ~/.ssh
```
You can now log in without a password.
# SSH Essentials: Working with SSH Servers, Clients, and Keys
#### Introduction
SSH is a secure protocol used as the primary means of connecting to Linux servers remotely. It provides a text-based interface by spawning a remote shell. After connecting, all commands you type in your local terminal are sent to the remote server and executed there.
In this cheat sheet-style guide, we will cover some common ways of connecting with SSH to achieve your objectives. This can be used as a quick reference when you need to know how to do connect to or configure your server in different ways.
### How To Use This Guide
* Read the SSH Overview section first if you are unfamiliar with SSH in general or are just getting started.
* Use whichever subsequent sections are applicable to what you are trying to achieve. Most sections are not predicated on any other, so you can use the examples below independently.
* Use the Contents menu on the left side of this page (at wide page widths) or your browser's find function to locate the sections you need.
* Copy and paste the command-line examples given, substituting the values in `red` with your own values.
### SSH Overview
The most common way of connecting to a remote Linux server is through SSH. SSH stands for Secure Shell and provides a safe and secure way of executing commands, making changes, and configuring services remotely. When you connect through SSH, you log in using an account that exists on the remote server.
#### How SSH Works
When you connect through SSH, you will be dropped into a shell session, which is a text-based interface where you can interact with your server. For the duration of your SSH session, any commands that you type into your local terminal are sent through an encrypted SSH tunnel and executed on your server.
The SSH connection is implemented using a client-server model. This means that for an SSH connection to be established, the remote machine must be running a piece of software called an SSH daemon. This software listens for connections on a specific network port, authenticates connection requests, and spawns the appropriate environment if the user provides the correct credentials.
The user's computer must have an SSH client. This is a piece of software that knows how to communicate using the SSH protocol and can be given information about the remote host to connect to, the username to use, and the credentials that should be passed to authenticate. The client can also specify certain details about the connection type they would like to establish.
#### How SSH Authenticates Users
Clients generally authenticate either using passwords (less secure and not recommended) or SSH keys, which are very secure.
Password logins are encrypted and are easy to understand for new users. However, automated bots and malicious users will often repeatedly try to authenticate to accounts that allow password-based logins, which can lead to security compromises. For this reason, we recommend always setting up SSH key-based authentication for most configurations.
SSH keys are a matching set of cryptographic keys which can be used for authentication. Each set contains a public and a private key. The public key can be shared freely without concern, while the private key must be vigilantly guarded and never exposed to anyone.
To authenticate using SSH keys, a user must have an SSH key pair on their local computer. On the remote server, the public key must be copied to a file within the user's home directory at `~/.ssh/authorized_keys`. This file contains a list of public keys, one-per-line, that are authorized to log into this account.
When a client connects to the host, wishing to use SSH key authentication, it will inform the server of this intent and will tell the server which public key to use. The server then check its `authorized_keys` file for the public key, generate a random string and encrypts it using the public key. This encrypted message can only be decrypted with the associated private key. The server will send this encrypted message to the client to test whether they actually have the associated private key.
Upon receipt of this message, the client will decrypt it using the private key and combine the random string that is revealed with a previously negotiated session ID. It then generates an MD5 hash of this value and transmits it back to the server. The server already had the original message and the session ID, so it can compare an MD5 hash generated by those values and determine that the client must have the private key.
Now that you know how SSH works, we can begin to discuss some examples to demonstrate different ways of working with SSH
### Generating and Working with SSH Keys
This section will cover how to generate SSH keys on a client machine and distribute the public key to servers where they should be used. This is a good section to start with if you have not previously generated keys due to the increased security that it allows for future connections.
#### Generating an SSH Key Pair
Generating a new SSH public and private key pair on your local computer is the first step towards authenticating with a remote server without a password. Unless there is a good reason not to, you should always authenticate using SSH keys.
A number of cryptographic algorithms can be used to generate SSH keys, including RSA, DSA, and ECDSA. RSA keys are generally preferred and are the default key type.
To generate an RSA key pair on your local computer, type:
```
ssh-keygen
```
```
Generating public/private rsa key pair.
Enter file in which to save the key (/home/demo/.ssh/id_rsa):
```
This prompt allows you to choose the location to store your RSA private key. Press ENTER to leave this as the default, which will store them in the `.ssh` hidden directory in your user's home directory. Leaving the default location selected will allow your SSH client to find the keys automatically.
```
Enter passphrase (empty for no passphrase):
Enter same passphrase again:
```
The next prompt allows you to enter a passphrase of an arbitrary length to secure your private key. By default, you will have to enter any passphrase you set here every time you use the private key, as an additional security measure. Feel free to press ENTER to leave this blank if you do not want a passphrase. Keep in mind though that this will allow anyone who gains control of your private key to login to your servers.
If you choose to enter a passphrase, nothing will be displayed as you type. This is a security precaution.
```
Your identification has been saved in /root/.ssh/id_rsa.
Your public key has been saved in /root/.ssh/id_rsa.pub.
The key fingerprint is:
8c:e9:7c:fa:bf:c4:e5:9c:c9:b8:60:1f:fe:1c:d3:8a root@here
The key's randomart image is:
+--[ RSA 2048]----+
| |
| |
| |
| + |
| o S . |
| o . * + |
| o + = O . |
| + = = + |
| ....Eo+ |
+-----------------+
```
This procedure has generated an RSA SSH key pair, located in the `.ssh` hidden directory within your user's home directory. These files are:
* `~/.ssh/id_rsa`: The private key. DO NOT SHARE THIS FILE!
* `~/.ssh/id_rsa.pub`: The associated public key. This can be shared freely without consequence.
#### Generate an SSH Key Pair with a Larger Number of Bits
SSH keys are 2048 bits by default. This is generally considered to be good enough for security, but you can specify a greater number of bits for a more hardened key.
To do this, include the `-b` argument with the number of bits you would like. Most servers support keys with a length of at least 4096 bits. Longer keys may not be accepted for DDOS protection purposes:
```
ssh-keygen -b 4096
```
If you had previously created a different key, you will be asked if you wish to overwrite your previous key:
```
Overwrite (y/n)?
```
If you choose "yes", your previous key will be overwritten and you will no longer be able to log into servers using that key. Because of this, be sure to overwrite keys with caution.
#### Removing or Changing the Passphrase on a Private Key
If you have generated a passphrase for your private key and wish to change or remove it, you can do so easily.
**Note**: To change or remove the passphrase, you must know the original passphrase. If you have lost the passphrase to the key, there is no recourse and you will have to generate a new key pair.
To change or remove the passphrase, simply type:
```
ssh-keygen -p
```
```
Enter file in which the key is (/root/.ssh/id_rsa):
```
You can type the location of the key you wish to modify or press ENTER to accept the default value:
```
Enter old passphrase:
```
Enter the old passphrase that you wish to change. You will then be prompted for a new passphrase:
```
Enter new passphrase (empty for no passphrase):
Enter same passphrase again:
```
Here, enter your new passphrase or press ENTER to remove the passphrase.
#### Displaying the SSH Key Fingerprint
Each SSH key pair share a single cryptographic "fingerprint" which can be used to uniquely identify the keys. This can be useful in a variety of situations.
To find out the fingerprint of an SSH key, type:
```
ssh-keygen -l
```
```
Enter file in which the key is (/root/.ssh/id_rsa):
```
You can press ENTER if that is the correct location of the key, else enter the revised location. You will be given a string which contains the bit-length of the key, the fingerprint, and account and host it was created for, and the algorithm used:
```
4096 8e:c4:82:47:87:c2:26:4b:68:ff:96:1a:39:62:9e:4e demo@test (RSA)
```
#### Copying your Public SSH Key to a Server with SSH-Copy-ID
To copy your public key to a server, allowing you to authenticate without a password, a number of approaches can be taken.
If you currently have password-based SSH access configured to your server, and you have the `ssh-copy-id` utility installed, this is a simple process. The `ssh-copy-id` tool is included in many Linux distributions' OpenSSH packages, so it very likely may be installed by default.
If you have this option, you can easily transfer your public key by typing:
```
ssh-copy-id username@remote_host
```
This will prompt you for the user account's password on the remote system:
```
The authenticity of host '111.111.11.111 (111.111.11.111)' can't be established.
ECDSA key fingerprint is fd:fd:d4:f9:77:fe:73:84:e1:55:00:ad:d6:6d:22:fe.
Are you sure you want to continue connecting (yes/no)? yes
/usr/bin/ssh-copy-id: INFO: attempting to log in with the new key(s), to filter out any that are already installed
/usr/bin/ssh-copy-id: INFO: 1 key(s) remain to be installed -- if you are prompted now it is to install the new keys
demo@111.111.11.111's password:
```
After typing in the password, the contents of your `~/.ssh/id_rsa.pub` key will be appended to the end of the user account's `~/.ssh/authorized_keys` file:
```
Number of key(s) added: 1
Now try logging into the machine, with: "ssh 'demo@111.111.11.111'"
and check to make sure that only the key(s) you wanted were added.
```
You can now log into that account without a password:
```
ssh username@remote_host
```
#### Copying your Public SSH Key to a Server Without SSH-Copy-ID
If you do not have the `ssh-copy-id` utility available, but still have password-based SSH access to the remote server, you can copy the contents of your public key in a different way.
You can output the contents of the key and pipe it into the `ssh` command. On the remote side, you can ensure that the `~/.ssh` directory exists, and then append the piped contents into the `~/.ssh/authorized_keys` file:
```
cat ~/.ssh/id_rsa.pub | ssh username@remote_host "mkdir -p ~/.ssh && cat >> ~/.ssh/authorized_keys"
```
You will be asked to supply the password for the remote account:
```
The authenticity of host '111.111.11.111 (111.111.11.111)' can't be established.
ECDSA key fingerprint is fd:fd:d4:f9:77:fe:73:84:e1:55:00:ad:d6:6d:22:fe.
Are you sure you want to continue connecting (yes/no)? yes
demo@111.111.11.111's password:
```
After entering the password, your key will be copied, allowing you to log in without a password:
```
ssh username@remote_IP_host
```
#### Copying your Public SSH Key to a Server Manually
If you do not have password-based SSH access available, you will have to add your public key to the remote server manually.
On your local machine, you can find the contents of your public key file by typing:
```
cat ~/.ssh/id_rsa.pub
```
```
ssh-rsa AAAAB3NzaC1yc2EAAAADAQABAAACAQCqql6MzstZYh1TmWWv11q5O3pISj2ZFl9HgH1JLknLLx44+tXfJ7mIrKNxOOwxIxvcBF8PXSYvobFYEZjGIVCEAjrUzLiIxbyCoxVyle7Q+bqgZ8SeeM8wzytsY+dVGcBxF6N4JS+zVk5eMcV385gG3Y6ON3EG112n6d+SMXY0OEBIcO6x+PnUSGHrSgpBgX7Ks1r7xqFa7heJLLt2wWwkARptX7udSq05paBhcpB0pHtA1Rfz3K2B+ZVIpSDfki9UVKzT8JUmwW6NNzSgxUfQHGwnW7kj4jp4AT0VZk3ADw497M2G/12N0PPB5CnhHf7ovgy6nL1ikrygTKRFmNZISvAcywB9GVqNAVE+ZHDSCuURNsAInVzgYo9xgJDW8wUw2o8U77+xiFxgI5QSZX3Iq7YLMgeksaO4rBJEa54k8m5wEiEE1nUhLuJ0X/vh2xPff6SQ1BL/zkOhvJCACK6Vb15mDOeCSq54Cr7kvS46itMosi/uS66+PujOO+xt/2FWYepz6ZlN70bRly57Q06J+ZJoc9FfBCbCyYH7U/ASsmY095ywPsBo1XQ9PqhnN1/YOorJ068foQDNVpm146mUpILVxmq41Cj55YKHEazXGsdBIbXWhcrRf4G2fJLRcGUr9q8/lERo9oxRm5JFX6TCmj6kmiFqv+Ow9gI0x8GvaQ== demo@test
```
You can copy this value, and manually paste it into the appropriate location on the remote server. You will have to log into the remote server through other means (like the Serial console).
On the remote server, create the `~/.ssh` directory if it does not already exist:
```
mkdir -p ~/.ssh
```
Afterwards, you can create or append the `~/.ssh/authorized_keys` file by typing:
```
echo public_key_string >> ~/.ssh/authorized_keys
```
You should now be able to log into the remote server without a password.
### Basic Connection Instructions
The following section will cover some of the basics about how to connect to a server with SSH.
#### Connecting to a Remote Server
To connect to a remote server and open a shell session there, you can use the `ssh` command.
The simplest form assumes that your username on your local machine is the same as that on the remote server. If this is true, you can connect using:
```
ssh remote_host
```
If your username is different on the remoter server, you need to pass the remote user's name like this:
```
ssh username@remote_host
```
Your first time connecting to a new host, you will see a message that looks like this:
```
The authenticity of host '111.111.11.111 (111.111.11.111)' can't be established.
ECDSA key fingerprint is fd:fd:d4:f9:77:fe:73:84:e1:55:00:ad:d6:6d:22:fe.
Are you sure you want to continue connecting (yes/no)? yes
```
Type "yes" to accept the authenticity of the remote host.
If you are using password authentication, you will be prompted for the password for the remote account here. If you are using SSH keys, you will be prompted for your private key's passphrase if one is set, otherwise you will be logged in automatically.
#### Running a Single Command on a Remote Server
To run a single command on a remote server instead of spawning a shell session, you can add the command after the connection information, like this:
```
ssh username@remote_host command_to_run
```
This will connect to the remote host, authenticate with your credentials, and execute the command you specified. The connection will immediately close afterwards.
#### Logging into a Server with a Different Port
By default the SSH daemon on a server runs on port 22. Your SSH client will assume that this is the case when trying to connect. If your SSH server is listening on a non-standard port (this is demonstrated in a later section), you will have to specify the new port number when connecting with your client.
You can do this by specifying the port number with the `-p` option:
```
ssh -p port_num username@remote_host
```
To avoid having to do this every time you log into your remote server, you can create or edit a configuration file in the `~/.ssh` directory within the home directory of your local computer.
Edit or create the file now by typing:
```
nano ~/.ssh/config
```
In here, you can set host-specific configuration options. To specify your new port, use a format like this:
```
Host remote_alias
HostName remote_host
Port port_num
```
This will allow you to log in without specifying the specific port number on the command line.
#### Adding your SSH Keys to an SSH Agent to Avoid Typing the Passphrase
If you have an passphrase on your private SSH key, you will be prompted to enter the passphrase every time you use it to connect to a remote host.
To avoid having to repeatedly do this, you can run an SSH agent. This small utility stores your private key after you have entered the passphrase for the first time. It will be available for the duration of your terminal session, allowing you to connect in the future without re-entering the passphrase.
This is also important if you need to forward your SSH credentials (shown below).
To start the SSH Agent, type the following into your local terminal session:
```
eval $(ssh-agent)
```
```
Agent pid 10891
```
This will start the agent program and place it into the background. Now, you need to add your private key to the agent, so that it can manage your key:
```
ssh-add
```
```
Enter passphrase for /home/demo/.ssh/id_rsa:
Identity added: /home/demo/.ssh/id_rsa (/home/demo/.ssh/id_rsa)
```
You will have to enter your passphrase (if one is set). Afterwards, your identity file is added to the agent, allowing you to use your key to sign in without having re-enter the passphrase again.
#### Forwarding your SSH Credentials to Use on a Server
If you wish to be able to connect without a password to one server from within another server, you will need to forward your SSH key information. This will allow you to authenticate to another server through the server you are connected to, using the credentials on your local computer.
To start, you must have your SSH agent started and your SSH key added to the agent (see above). After this is done, you need to connect to your first server using the `-A` option. This forwards your credentials to the server for this session:
```
ssh -A username@remote_host
```
From here, you can SSH into any other host that your SSH key is authorized to access. You will connect as if your private SSH key were located on this server.
### Server-Side Configuration Options
This section contains some common server-side configuration options that can shape the way that your server responds and what types of connections are allowed.
#### Disabling Password Authentication
If you have SSH keys configured, tested, and working properly, it is probably a good idea to disable password authentication. This will prevent any user from signing in with SSH using a password.
To do this, connect to your remote server and open the `/etc/ssh/sshd_config` file with root or sudo privileges:
```
sudo nano /etc/ssh/sshd_config
```
Inside of the file, search for the `PasswordAuthentication` directive. If it is commented out, uncomment it. Set it to "no" to disable password logins:
```
PasswordAuthentication no
```
After you have made the change, save and close the file. To implement the changes, you should restart the SSH service.
On Ubuntu/Debian:
```
sudo service ssh restart
```
On CentOS/Fedora:
```
sudo service sshd restart
```
Now, all accounts on the system will be unable to login with SSH using passwords.
#### Changing the Port that the SSH Daemon Runs On
Some administrators suggest that you change the default port that SSH runs on. This can help decrease the number of authentication attempts your server is subjected to from automated bots.
To change the port that the SSH daemon listens on, you will have to log into your remote server. Open the `sshd_config` file on the remote system with root privileges, either by logging in with that user or by using `sudo`:
```
sudo nano /etc/ssh/sshd_config
```
Once you are inside, you can change the port that SSH runs on by finding the `Port 22` specification and modifying it to reflect the port you wish to use. For instance, to change the port to 4444, put this in your file:
```
#Port 22
Port 4444
```
Save and close the file when you are finished. To implement the changes, you must restart the SSH daemon.
On Ubuntu/Debian:
```
sudo service ssh restart
```
On CentOS/Fedora:
```
sudo service sshd restart
```
After the daemon restarts, you will need to authenticate by specifying the port number (demonstrated in an earlier section).
#### Limiting the Users Who can Connect Through SSH
To explicitly limit the user accounts who are able to login through SSH, you can take a few different approaches, each of which involve editing the SSH daemon config file.
On your remote server, open this file now with root or sudo privileges:
```
sudo nano /etc/ssh/sshd_config
```
The first method of specifying the accounts that are allowed to login is using the `AllowUsers` directive. Search for the `AllowUsers` directive in the file. If one does not exist, create it anywhere. After the directive, list the user accounts that should be allowed to login through SSH:
```
AllowUsers user1 user2
```
Save and close the file. Restart the daemon to implement your changes.
On Ubuntu/Debian:
```
sudo service ssh restart
```
On CentOS/Fedora:
```
sudo service sshd restart
```
If you are more comfortable with group management, you can use the `AllowGroups` directive instead. If this is the case, just add a single group that should be allowed SSH access (we will create this group and add members momentarily):
```
AllowGroups sshmembers
```
Save and close the file.
Now, you can create a system group (without a home directory) matching the group you specified by typing:
```
sudo groupadd -r sshmembers
```
Make sure that you add whatever user accounts you need to this group. This can be done by typing:
```
sudo usermod -a -G sshmembers user1
sudo usermod -a -G sshmembers user2
```
Now, restart the SSH daemon to implement your changes.
On Ubuntu/Debian:
```
sudo service ssh restart
```
On CentOS/Fedora:
```
sudo service sshd restart
```
#### Disabling Root Login
It is often advisable to completely disable root login through SSH after you have set up an SSH user account that has `sudo` privileges.
To do this, open the SSH daemon configuration file with root or sudo on your remote server.
```
sudo nano /etc/ssh/sshd_config
```
Inside, search for a directive called `PermitRootLogin`. If it is commented, uncomment it. Change the value to "no":
```
PermitRootLogin no
```
Save and close the file. To implement your changes, restart the SSH daemon.
On Ubuntu/Debian:
```
sudo service ssh restart
```
On CentOS/Fedora:
```
sudo service sshd restart
```
#### Allowing Root Access for Specific Commands
There are some cases where you might want to disable root access generally, but enable it in order to allow certain applications to run correctly. An example of this might be a backup routine.
This can be accomplished through the root user's `authorized_keys` file, which contains SSH keys that are authorized to use the account.
Add the key from your local computer that you wish to use for this process (we recommend creating a new key for each automatic process) to the root user's `authorized_keys` file on the server. We will demonstrate with the `ssh-copy-id` command here, but you can use any of the methods of copying keys we discuss in other sections:
```
ssh-copy-id root@remote_host
```
Now, log into the remote server. We will need to adjust the entry in the `authorized_keys` file, so open it with root or sudo access:
```
sudo nano /root/.ssh/authorized_keys
```
At the beginning of the line with the key you uploaded, add a `command=` listing that defines the command that this key is valid for. This should include the full path to the executable, plus any arguments:
```
command="/path/to/command arg1 arg2" ssh-rsa ...
```
Save and close the file when you are finished.
Now, open the `sshd_config` file with root or sudo privileges:
```
sudo nano /etc/ssh/sshd_config
```
Find the directive `PermitRootLogin`, and change the value to `forced-commands-only`. This will only allow SSH key logins to use root when a command has been specified for the key:
```
PermitRootLogin forced-commands-only
```
Save and close the file. Restart the SSH daemon to implement your changes.
On Ubuntu/Debian:
```
sudo service ssh restart
```
On CentOS/Fedora:
```
sudo service sshd restart
```
#### Forwarding X Application Displays to the Client
The SSH daemon can be configured to automatically forward the display of X applications on the server to the client machine. For this to function correctly, the client must have an X windows system configured and enabled.
To enable this functionality, log into your remote server and edit the `sshd_config` file as root or with sudo privileges:
```
sudo nano /etc/ssh/sshd_config
```
Search for the `X11Forwarding` directive. If it is commented out, uncomment it. Create it if necessary and set the value to "yes":
```
X11Forwarding yes
```
Save and close the file. Restart your SSH daemon to implement these changes.
On Ubuntu/Debian:
```
sudo service ssh restart
```
On CentOS/Fedora:
```
sudo service sshd restart
```
To connect to the server and forward an application's display, you have to pass the `-X` option from the client upon connection:
```
ssh -X username@remote_host
```
Graphical applications started on the server through this session should be displayed on the local computer. The performance might be a bit slow, but it is very helpful in a pinch.
### Client-Side Configuration Options
In the next section, we'll focus on some adjustments that you can make on the client side of the connection.
#### Defining Server-Specific Connection Information
On your local computer, you can define individual configurations for some or all of the servers you connect to. These can be stored in the `~/.ssh/config` file, which is read by your SSH client each time it is called.
Create or open this file in your text editor on your local computer:
```
nano ~/.ssh/config
```
Inside, you can define individual configuration options by introducing each with a `Host` keyword, followed by an alias. Beneath this and indented, you can define any of the directives found in the `ssh_config` man page:
```
man ssh_config
```
An example configuration would be:
```
Host testhost
HostName example.com
Port 4444
User demo
```
You could then connect to `example.com` on port 4444 using the username "demo" by simply typing:
```
ssh testhost
```
You can also use wildcards to match more than one host. Keep in mind that later matches can override earlier ones. Because of this, you should put your most general matches at the top. For instance, you could default all connections to not allow X forwarding, with an override for `example.com` by having this in your file:
```
Host *
ForwardX11 no
Host testhost
HostName example.com
ForwardX11 yes
Port 4444
User demo
```
Save and close the file when you are finished.
#### Keeping Connections Alive to Avoid Timeout
If you find yourself being disconnected from SSH sessions before you are ready, it is possible that your connection is timing out.
You can configure your client to send a packet to the server every so often in order to avoid this situation:
On your local computer, you can configure this for every connection by editing your `~/.ssh/config` file. Open it now:
```
nano ~/.ssh/config
```
If one does not already exist, at the top of the file, define a section that will match all hosts. Set the `ServerAliveInterval` to "120" to send a packet to the server every two minutes. This should be enough to notify the server not to close the connection:
```
Host *
ServerAliveInterval 120
```
Save and close the file when you are finished.
#### Disabling Host Checking
By default, whenever you connect to a new server, you will be shown the remote SSH daemon's host key fingerprint.
```
The authenticity of host '111.111.11.111 (111.111.11.111)' can't be established.
ECDSA key fingerprint is fd:fd:d4:f9:77:fe:73:84:e1:55:00:ad:d6:6d:22:fe.
Are you sure you want to continue connecting (yes/no)? yes
```
This is configured so that you can verify the authenticity of the host you are attempting to connect to and spot instances where a malicious user may be trying to masquerade as the remote host.
In certain circumstances, you may wish to disable this feature. **Note**: This can be a big security risk, so make sure you know what you are doing if you set your system up like this.
To make the change, the open the `~/.ssh/config` file on your local computer:
```
nano ~/.ssh/config
```
If one does not already exist, at the top of the file, define a section that will match all hosts. Set the `StrictHostKeyChecking` directive to "no" to add new hosts automatically to the `known_hosts` file. Set the `UserKnownHostsFile` to `/dev/null` to not warn on new or changed hosts:
```
Host *
StrictHostKeyChecking no
UserKnownHostsFile /dev/null
```
You can enable the checking on a case-by-case basis by reversing those options for other hosts. The default for `StrictHostKeyChecking` is "ask":
```
Host *
StrictHostKeyChecking no
UserKnownHostsFile /dev/null
Host testhost
HostName example.com
StrictHostKeyChecking ask
UserKnownHostsFile /home/demo/.ssh/known_hosts
```
#### Multiplexing SSH Over a Single TCP Connection
There are situations where establishing a new TCP connection can take longer than you would like. If you are making multiple connections to the same machine, you can take advantage of multiplexing.
SSH multiplexing re-uses the same TCP connection for multiple SSH sessions. This removes some of the work necessary to establish a new session, possibly speeding things up. Limiting the number of connections may also be helpful for other reasons.
To set up multiplexing, you can manually set up the connections, or you can configure your client to automatically use multiplexing when available. We will demonstrate the second option here.
To configure multiplexing, edit your SSH client's configuration file on your local machine:
```
nano ~/.ssh/config
```
If you do not already have a wildcard host definition at the top of the file, add one now (as `Host *`). We will be setting the `ControlMaster`, `ControlPath`, and `ControlPersist` values to establish our multiplexing configuration.
The `ControlMaster` should be set to "auto" in able to automatically allow multiplexing if possible. The `ControlPath` will establish the path to control socket. The first session will create this socket and subsequent sessions will be able to find it because it is labeled by username, host, and port.
Setting the `ControlPersist` option to "1" will allow the initial master connection to be backgrounded. The "1" specifies that the TCP connection should automatically terminate one second after the last SSH session is closed:
```
Host *
ControlMaster auto
ControlPath ~/.ssh/multiplex/%r@%h:%p
ControlPersist 1
```
Save and close the file when you are finished. Now, we need to actually create the directory we specified in the control path:
```
mkdir ~/.ssh/multiplex
```
Now, any sessions that are established with the same machine will attempt to use the existing socket and TCP connection. When the last session exists, the connection will be torn down after one second.
If for some reason you need to bypass the multiplexing configuration temporarily, you can do so by passing the `-S` flag with "none":
```
ssh -S none username@remote_host
```
### Setting Up SSH Tunnels
Tunneling other traffic through a secure SSH tunnel is an excellent way to work around restrictive firewall settings. It is also a great way to encrypt otherwise unencrypted network traffic.
#### Configuring Local Tunneling to a Server
SSH connections can be used to tunnel traffic from ports on the local host to ports on a remote host.
A local connection is a way of accessing a network location from your local computer through your remote host. First, an SSH connection is established to your remote host. On the remote server, a connection is made to an external (or internal) network address provided by the user and traffic to this location is tunneled to your local computer on a specified port.
This is often used to tunnel to a less restricted networking environment by bypassing a firewall. Another common use is to access a "localhost-only" web interface from a remote location.
To establish a local tunnel to your remote server, you need to use the `-L` parameter when connecting and you must supply three pieces of additional information:
* The local port where you wish to access the tunneled connection.
* The host that you want your remote host to connect to.
* The port that you want your remote host to connect on.
These are given, in the order above (separated by colons), as arguments to the `-L` flag. We will also use the `-f` flag, which causes SSH to go into the background before executing and the `-N` flag, which does not open a shell or execute a program on the remote side.
For instance, to connect to `example.com` on port 80 on your remote host, making the connection available on your local machine on port 8888, you could type:
```
ssh -f -N -L 8888:example.com:80 username@remote_host
```
Now, if you point your local web browser to `127.0.0.1:8888`, you should see whatever content is at `example.com` on port 80.
A more general guide to the syntax is:
```
ssh -L your_port:site_or_IP_to_access:site_port username@host
```
Since the connection is in the background, you will have to find its PID to kill it. You can do so by searching for the port you forwarded:
```
ps aux | grep 8888
```
```
1001 5965 0.0 0.0 48168 1136 ? Ss 12:28 0:00 ssh -f -N -L 8888:example.com:80 username@remote_host
1001 6113 0.0 0.0 13648 952 pts/2 S+ 12:37 0:00 grep --colour=auto 8888
```
You can then kill the process by targeting the PID, which is the number in the second column of the line that matches your SSH command:
```
kill 5965
```
Another option is to start the connection *without* the `-f` flag. This will keep the connection in the foreground, preventing you from using the terminal window for the duration of the forwarding. The benefit of this is that you can easily kill the tunnel by typing "CTRL-C".
#### Configuring Remote Tunneling to a Server
SSH connections can be used to tunnel traffic from ports on the local host to ports on a remote host.
In a remote tunnel, a connection is made to a remote host. During the creation of the tunnel, a *remote* port is specified. This port, on the remote host, will then be tunneled to a host and port combination that is connected to from the local computer. This will allow the remote computer to access a host through your local computer.
This can be useful if you need to allow access to an internal network that is locked down to external connections. If the firewall allows connections *out* of the network, this will allow you to connect out to a remote machine and tunnel traffic from that machine to a location on the internal network.
To establish a remote tunnel to your remote server, you need to use the `-R` parameter when connecting and you must supply three pieces of additional information:
* The port where the remote host can access the tunneled connection.
* The host that you want your local computer to connect to.
* The port that you want your local computer to connect to.
These are given, in the order above (separated by colons), as arguments to the `-R` flag. We will also use the `-f` flag, which causes SSH to go into the background before executing and the `-N` flag, which does not open a shell or execute a program on the remote side.
For instance, to connect to `example.com` on port 80 on our local computer, making the connection available on our remote host on port 8888, you could type:
```
ssh -f -N -R 8888:example.com:80 username@remote_host
```
Now, on the remote host, opening a web browser to `127.0.0.1:8888` would allow you to see whatever content is at `example.com` on port 80.
A more general guide to the syntax is:
```
ssh -R remote_port:site_or_IP_to_access:site_port username@host
```
Since the connection is in the background, you will have to find its PID to kill it. You can do so by searching for the port you forwarded:
```
ps aux | grep 8888
```
```
1001 5965 0.0 0.0 48168 1136 ? Ss 12:28 0:00 ssh -f -N -R 8888:example.com:80 username@remote_host
1001 6113 0.0 0.0 13648 952 pts/2 S+ 12:37 0:00 grep --colour=auto 8888
```
You can then kill the process by targeting the PID, which is the number in the second column, of the line that matches your SSH command:
```
kill 5965
```
Another option is to start the connection *without* the `-f` flag. This will keep the connection in the foreground, preventing you from using the terminal window for the duration of the forwarding. The benefit of this is that you can easily kill the tunnel by typing "CTRL-C".
#### Configuring Dynamic Tunneling to a Remote Server
SSH connections can be used to tunnel traffic from ports on the local host to ports on a remote host.
A dynamic tunnel is similar to a local tunnel in that it allows the local computer to connect to other resources *through* a remote host. A dynamic tunnel does this by simply specifying a single local port. Applications that wish to take advantage of this port for tunneling must be able to communicate using the SOCKS protocol so that the packets can be correctly redirected at the other side of the tunnel.
Traffic that is passed to this local port will be sent to the remote host. From there, the SOCKS protocol will be interpreted to establish a connection to the desired end location. This set up allows a SOCKS-capable application to connect to any number of locations through the remote server, without multiple static tunnels.
To establish the connection, we will pass the `-D` flag along with the local port where we wish to access the tunnel. We will also use the `-f` flag, which causes SSH to go into the background before executing and the `-N` flag, which does not open a shell or execute a program on the remote side.
For instance, to establish a tunnel on port "7777", you can type:
```
ssh -f -N -D 7777 username@remote_host
```
From here, you can start pointing your SOCKS-aware application (like a web browser), to the port you selected. The application will send its information into a socket associated with the port.
The method of directing traffic to the SOCKS port will differ depending on application. For instance, in Firefox, the general location is Preferences > Advanced > Settings > Manual proxy configurations. In Chrome, you can start the application with the `--proxy-server=` flag set. You will want to use the localhost interface and the port you forwarded.
Since the connection is in the background, you will have to find its PID to kill it. You can do so by searching for the port you forwarded:
```
ps aux | grep 8888
```
```
1001 5965 0.0 0.0 48168 1136 ? Ss 12:28 0:00 ssh -f -N -D 7777 username@remote_host
1001 6113 0.0 0.0 13648 952 pts/2 S+ 12:37 0:00 grep --colour=auto 8888
```
You can then kill the process by targeting the PID, which is the number in the second column, of the line that matches your SSH command:
```
kill 5965
```
Another option is to start the connection *without* the `-f` flag. This will keep the connection in the foreground, preventing you from using the terminal window for the duration of the forwarding. The benefit of this is that you can easily kill the tunnel by typing "CTRL-C".
### Using SSH Escape Codes to Control Connections
Even after establishing an SSH session, it is possible to exercise control over the connection from within the terminal. We can do this with something called SSH escape codes, which allow us to interact with our local SSH software from within a session.
#### Forcing a Disconnect from the Client-Side (How to Exit Out of a Stuck or Frozen Session)
One of the most useful feature of OpenSSH that goes largely unnoticed is the ability to control certain aspects of the session from within.
These commands can be executed starting with the `~` control character within an SSH session. Control commands will only be interpreted if they are the first thing that is typed after a newline, so always press ENTER one or two times prior to using one.
One of the most useful controls is the ability to initiate a disconnect from the client. SSH connections are typically closed by the server, but this can be a problem if the server is suffering from issues or if the connection has been broken. By using a client-side disconnect, the connection can be cleanly closed from the client.
To close a connection from the client, use the control character (`~`), with a dot. If your connection is having problems, you will likely be in what appears to be a stuck terminal session. Type the commands despite the lack of feedback to perform a client-side disconnect:
```
[ENTER]
~.
```
The connection should immediately close, returning you to your local shell session.
#### Placing an SSH Session into the Background
One of the most useful feature of OpenSSH that goes largely unnoticed is the ability to control certain aspects of the session from within the connection.
These commands can be executed starting with the `~` control character from within an SSH connection. Control commands will only be interpreted if they are the first thing that is typed after a newline, so always press ENTER one or two times prior to using one.
One capability that this provides is to put an SSH session into the background. To do this, we need to supply the control character (\~) and then execute the conventional keyboard shortcut to background a task (CTRL-z):
```
[ENTER]
~[CTRL-z]
```
This will place the connection into the background, returning you to your local shell session. To return to your SSH session, you can use the conventional job control mechanisms.
You can immediately re-activate your most recent backgrounded task by typing:
```
fg
```
If you have multiple backgrounded tasks, you can see the available jobs by typing:
```
jobs
```
```
[1]+ Stopped ssh username@some_host
[2] Stopped ssh username@another_host
```
You can then bring any of the tasks to the foreground by using the index in the first column with a percentage sign:
```
fg %2
```
#### Changing Port Forwarding Options on an Existing SSH Connection
One of the most useful feature of OpenSSH that goes largely unnoticed is the ability to control certain aspects of the session from within the connection.
These commands can be executed starting with the `~` control character from within an SSH connection. Control commands will only be interpreted if they are the first thing that is typed after a newline, so always press ENTER one or two times prior to using one.
One thing that this allows is for a user to alter the port forwarding configuration after the connection has already been established. This allows you to create or tear down port forwarding rules on-the-fly.
These capabilities are part of the SSH command line interface, which can be accessed during a session by using the control character (`~`) and "C":
```
[ENTER]
~C
```
```
ssh>
```
You will be given an SSH command prompt, which has a very limited set of valid commands. To see the available options, you can type `-h` from this prompt. If nothing is returned, you may have to increase the verbosity of your SSH output by using `~v` a few times:
```
[ENTER]
~v
~v
~v
~C
-h
```
```
Commands:
-L[bind_address:]port:host:hostport Request local forward
-R[bind_address:]port:host:hostport Request remote forward
-D[bind_address:]port Request dynamic forward
-KL[bind_address:]port Cancel local forward
-KR[bind_address:]port Cancel remote forward
-KD[bind_address:]port Cancel dynamic forward
```
As you can see, you can easily implement any of the forwarding options using the appropriate options (see the forwarding section for more information). You can also destroy a tunnel with the associated "kill" command specified with a "K" before the forwarding type letter. For instance, to kill a local forward (`-L`), you could use the `-KL` command. You will only need to provide the port for this.
So, to set up a local port forward, you may type:
```
[ENTER]
~C
-L 8888:127.0.0.1:80
```
Port 8888 on your local computer will now be able to communicate with the web server on the host you are connecting to. When you are finished, you can tear down that forward by typing:
```
[ENTER]
~C
-KL 8888
```
### Conclusion
The above instructions should cover the majority of the information most users will need about SSH on a day-to-day basis.
# How To Edit the Sudoers File on Ubuntu and CentOS
A complete guide on how to edit sudoers file on Ubuntu and CentOS Distributions.
#### Introduction
Privilege separation is one of the fundamental security paradigms implemented in Linux and Unix-like operating systems. Regular users operate with limited privileges in order to reduce the scope of their influence to their own environment, and not the wider operating system.
A special user, called `root`, has "super-user" privileges. This is an administrative account without the restrictions that are present on normal users. Users can execute commands with "super-user" or "root" privileges in a number of different ways.
In this article, we will discuss how to correctly and securely obtain `root` privileges, with a special focus on editing the `/etc/sudoers` file.
We will be completing these steps on an Ubuntu 16.04 server, but most modern Linux distributions should operate in a similar manner.
This guide assumes that you have already completed the [initial server setup](https://www.digitalocean.com/community/tutorials/initial-server-setup-with-ubuntu-16-04) discussed here. Log into your server as regular, non-root user and continue below.
### How To Obtain Root Privileges
There are three basic ways to obtain `root` privileges, which vary in their level of sophistication.
#### Log In As Root
The simplest and most straight forward method of obtaining `root` privileges is simply to log into your server as the `root` user from the onset.
If you are logging into a local machine, simply enter "root" as your username at the login prompt and enter the `root` password when asked.
If you are logging in through SSH, specify the `root` user prior to the IP address or domain name in your SSH connection string:
```bash
ssh root@server_domain_or_IP
```
If you have not set up SSH keys for the `root` user, enter the `root` password when prompted.
#### Use "su" to Become Root
Logging in as `root` is usually not recommended, because it is easy to begin using the system for non-administrative tasks, which is dangerous.
The next way to gain super-user privileges allows you to become the `root` user at any time, as you need it.
We can do this by invoking the `su` command, which stands for "substitute user". To gain `root` privileges, simply type:
```
su
```
You will be prompted for the `root` user's password, after which, you will be dropped into a `root` shell session.
When you have finished the tasks which require `root` privileges, return to your normal shell by typing:
```
exit
```
#### Use "sudo" to Execute Commands as Root
The final, and most complex, way of obtaining `root` privileges that we will discuss is with the `sudo`command.
The `sudo` command allows you to execute one-off commands with `root` privileges, without the need to spawn a new shell. It is executed like this:
```
sudo command_to_execute
```
Unlike `su`, the `sudo` command will request the password of the user *calling* the command, not the `root`password.
Because of its security implications, `sudo` access is not granted to users by default, and must be set up before it functions correctly. If you followed the [initial server setup](https://www.digitalocean.com/community/tutorials/initial-server-setup-with-ubuntu-16-04) guide, you already completed a bare-bones configuration.
In the following section, we will discuss how to modify the configuration in greater detail.
### What is Visudo?
The `sudo` command is configured through a file located at `/etc/sudoers`.
Warning: **Never edit this file with a normal text editor! Always use the `visudo` command instead!**
Because improper syntax in the `/etc/sudoers` file can leave you with a system where it is impossible to obtain elevated privileges, it is important to use the `visudo` command to edit the file.
The `visudo` command opens a text editor like normal, but it validates the syntax of the file upon saving. This prevents configuration errors from blocking `sudo` operations, which may be your only way of obtaining `root` privileges.
Traditionally, `visudo` opens the `/etc/sudoers` file with the `vi` text editor. Ubuntu, however, has configured `visudo` to use the `nano` text editor instead.
If you would like to change it back to `vi`, issue the following command:
```
sudo update-alternatives --config editor
```
```
OutputThere are 4 choices for the alternative editor (providing /usr/bin/editor).
Selection Path Priority Status
------------------------------------------------------------
* 0 /bin/nano 40 auto mode
1 /bin/ed -100 manual mode
2 /bin/nano 40 manual mode
3 /usr/bin/vim.basic 30 manual mode
4 /usr/bin/vim.tiny 10 manual mode
Press to keep the current choice[*], or type selection number:
```
Select the number that corresponds with the choice you would like to make.
On CentOS, you can change this value by adding the following line to your `~/.bashrc`:
```
export EDITOR=`which name_of_editor`
```
Source the file to implement the changes:
```
. ~/.bashrc
```
After you have configured `visudo`, execute the command to access the `/etc/sudoers` file:
```
sudo visudo
```
### How To Modify the Sudoers File
You will be presented with the `/etc/sudoers` file in your selected text editor.
I have copied and pasted the file from Ubuntu 16.04, with comments removed. The CentOS `/etc/sudoers`file has many more lines, some of which we will not discuss in this guide./etc/sudoers
```
Defaults env_reset
Defaults mail_badpass
Defaults secure_path="/usr/local/sbin:/usr/local/bin:/usr/sbin:/usr/bin:/sbin:/bin"
root ALL=(ALL:ALL) ALL
%admin ALL=(ALL) ALL
%sudo ALL=(ALL:ALL) ALL
#includedir /etc/sudoers.d
```
Let's take a look at what these lines do.
#### Default Lines
The first line, "Defaults env\_reset", resets the terminal environment to remove any user variables. This is a safety measure used to clear potentially harmful environmental variables from the `sudo` session.
The second line, `Defaults mail_badpass`, tells the system to mail notices of bad `sudo` password attempts to the configured `mailto` user. By default, this is the `root` account.
The third line, which begins with "Defaults secure\_path=...", specifies the `PATH` (the places in the filesystem the operating system will look for applications) that will be used for `sudo` operations. This prevents using user paths which may be harmful.
#### User Privilege Lines
The fourth line, , which dictates the `root` user's `sudo` privileges, is different from the preceding lines. Let's take a look at what the different fields mean:
* `root ALL=(ALL:ALL) ALL`\
The first field indicates the username that the rule will apply to (`root`).
* `demo ALL=(ALL:ALL) ALL`\
The first "ALL" indicates that this rule applies to all hosts.
* `demo ALL=(ALL:ALL) ALL`\
This "ALL" indicates that the `root` user can run commands as all users.
* `demo ALL=(ALL:ALL) ALL`\
This "ALL" indicates that the `root` user can run commands as all groups.
* `demo ALL=(ALL:ALL) ALL`\
The last "ALL" indicates these rules apply to all commands.
This means that our `root` user can run any command using `sudo`, as long as they provide their password.
#### Group Privilege Lines
The next two lines are similar to the user privilege lines, but they specify `sudo` rules for groups.
Names beginning with a "%" indicate group names.
Here, we see the "admin" group can execute any command as any user on any host. Similarly, the `sudo`group can has the same privileges, but can execute as any group as well.
#### Included /etc/sudoers.d Line
The last line might look like a comment at first glance:/etc/sudoers
```
. . .
#includedir /etc/sudoers.d
```
It *does* begin with a `#`, which usually indicates a comment. However, this line actually indicates that files within the `/etc/sudoers.d` directory will be sourced and applied as well.
Files within that directory follow the same rules as the `/etc/sudoers` file itself. Any file that does not end in `~` and that does not have a `.` in it will be read and applied to the `sudo` configuration.
This is mainly meant for applications to alter `sudo` privileges upon installation. Putting all of the associated rules within a single file in the `/etc/sudoers.d` directory can make it easy to see which privileges are associated with which accounts and to reverse credentials easily without having to try to manipulate the `/etc/sudoers` file directly.
As with the `/etc/sudoers` file itself, you should always edit files within the `/etc/sudoers.d` directory with `visudo`. The syntax for editing these files would be:
```
sudo visudo -f /etc/sudoers.d/file_to_edit
```
### How To Give a User Sudo Privileges
The most common operation that users want to accomplish when managing `sudo` permissions is to grant a new user general `sudo` access. This is useful if you want to give an account full administrative access to the system.
The easiest way of doing this on a system set up with a general purpose administration group, like the Ubuntu system in this guide, is actually to just add the user in question to that group.
For example, on Ubuntu 16.04, the `sudo` group has full admin privileges. We can grant a user these same privileges by adding them to the group like this:
```
sudo usermod -aG sudo username
```
The `gpasswd` command can also be used:
```
sudo gpasswd -a username sudo
```
These will both accomplish the same thing.
On CentOS, this is usually the `wheel` group instead of the `sudo` group:
```
sudo usermod -aG wheel username
```
Or, using `gpasswd`:
```
sudo gpasswd -a username wheel
```
On CentOS, if adding the user to the group does not work immediately, you may have to edit the `/etc/sudoers` file to uncomment the group name:
```
sudo visudo
```
/etc/sudoers
```
. . .
%wheel ALL=(ALL) ALL
. . .
```
### How To Set Up Custom Rules
Now that we have gotten familiar with the general syntax of the file, let's create some new rules.
#### How To Create Aliases
The `sudoers` file can be organized more easily by grouping things with various kinds of "aliases".
For instance, we can create three different groups of users, with overlapping membership\:/etc/sudoers
```
. . .
User_Alias GROUPONE = abby, brent, carl
User_Alias GROUPTWO = brent, doris, eric,
User_Alias GROUPTHREE = doris, felicia, grant
. . .
```
Group names must start with a capital letter. We can then allow members of `GROUPTWO` to update the `apt`database by creating a rule like this\:/etc/sudoers
```
. . .
GROUPTWO ALL = /usr/bin/apt-get update
. . .
```
If we do not specify a user/group to run as, as above, `sudo` defaults to the `root` user.
We can allow members of `GROUPTHREE` to shutdown and reboot the machine by creating a "command alias" and using that in a rule for `GROUPTHREE`:/etc/sudoers
```
. . .
Cmnd_Alias POWER = /sbin/shutdown, /sbin/halt, /sbin/reboot, /sbin/restart
GROUPTHREE ALL = POWER
. . .
```
We create a command alias called `POWER` that contains commands to power off and reboot the machine. We then allow the members of `GROUPTHREE` to execute these commands.
We can also create "Run as" aliases, which can replace the portion of the rule that specifies the user to execute the command as\:/etc/sudoers
```
. . .
Runas_Alias WEB = www-data, apache
GROUPONE ALL = (WEB) ALL
. . .
```
This will allow anyone who is a member of `GROUPONE` to execute commands as the `www-data` user or the `apache` user.
Just keep in mind that later rules will override earlier rules when there is a conflict between the two.
#### How To Lock Down Rules
There are a number of ways that you can achieve more control over how `sudo` reacts to a call.
The `updatedb` command associated with the `mlocate` package is relatively harmless on a single-user system. If we want to allow users to execute it with `root` privileges *without* having to type a password, we can make a rule like this\:/etc/sudoers
```
. . .
GROUPONE ALL = NOPASSWD: /usr/bin/updatedb
. . .
```
`NOPASSWD` is a "tag" that means no password will be requested. It has a companion command called `PASSWD`, which is the default behavior. A tag is relevant for the rest of the rule unless overruled by its "twin" tag later down the line.
For instance, we can have a line like this\:/etc/sudoers
```
. . .
GROUPTWO ALL = NOPASSWD: /usr/bin/updatedb, PASSWD: /bin/kill
. . .
```
Another helpful tag is `NOEXEC`, which can be used to prevent some dangerous behavior in certain programs.
For example, some programs, like "less", can spawn other commands by typing this from within their interface:
```
!command_to_run
```
This basically executes any command the user gives it with the same permissions that "less" is running under, which can be quite dangerous.
To restrict this, we could use a line like this\:/etc/sudoers
```
. . .
username ALL = NOEXEC: /usr/bin/less
. . .
```
### Miscellaneous Information
There are a few more pieces of information that may be useful when dealing with `sudo`.
If you specified a user or group to "run as" in the configuration file, you can execute commands as those users by using the "-u" and "-g" flags, respectively:
```
sudo -u run_as_user command
sudo -g run_as_group command
```
For convenience, by default, `sudo` will save your authentication details for a certain amount of time in one terminal. This means you won't have to type your password in again until that timer runs out.
For security purposes, if you wish to clear this timer when you are done running administrative commands, you can run:
```
sudo -k
```
If, on the other hand, you want to "prime" the `sudo` command so that you won't be prompted later, or to renew your `sudo` lease, you can always type:
```
sudo -v
```
You will be prompted for your password, which will be cached for later `sudo` uses until the `sudo` time frame expires.
If you are simply wondering what kind of privileges are defined for your username, you can type:
```
sudo -l
```
This will list all of the rules in the `/etc/sudoers` file that apply to your user. This gives you a good idea of what you will or will not be allowed to do with `sudo` as any user.
There are many times when you will execute a command and it will fail because you forgot to preface it with `sudo`. To avoid having to re-type the command, you can take advantage of a bash functionality that means "repeat last command":
```
sudo !!
```
The double exclamation point will repeat the last command. We preceded it with `sudo` to quickly change the unprivileged command to a privileged command.
For some fun, you can add the following line to your `/etc/sudoers` file with `visudo`:
```
sudo visudo
```
/etc/sudoers
```
. . .
Defaults insults
. . .
```
This will cause `sudo` to return a silly insult when a user types in an incorrect password for `sudo`. We can use `sudo -k` to clear the previous `sudo` cached password to try it out:
```
sudo -k
sudo ls
```
```
Output[sudo] password for demo: # enter an incorrect password here to see the results
Your mind just hasn't been the same since the electro-shock, has it?
[sudo] password for demo:
My mind is going. I can feel it.
```
### Conclusion
You should now have a basic understanding of how to read and modify the `sudoers` file, and a grasp on the various methods that you can use to obtain `root` privileges.
Remember, super-user privileges are not given to regular users for a reason. It is essential that you understand what each command does that you execute with `root` privileges. Do not take the responsibility lightly. Learn the best way to use these tools for your use-case, and lock down any functionality that is not needed.
* [
](https://www.digitalocean.com/community/users/jellingwood)
# Introduction to Nginx and LEMP on Ubuntu
This tutorial series helps sysadmins set up a new web server using the LEMP stack, focusing on Nginx setup with virtual blocks.
This tutorial series helps sysadmins set up a new web server using the LEMP stack, focusing on Nginx setup with virtual blocks. This will let you serve multiple websites from one VPS. You'll start by setting up your Ubuntu server and end with multiple virtual blocks set up for your websites. An Nginx configuration guide is included at the end for reference.
# Initial Server Setup with Ubuntu
## Getting Started
When you first create a new virtual private server, there are a few configuration steps that you should take early on as part of the basic setup. This will increase the security and usability of your server and will give you a solid foundation for subsequent actions.
## Step One — Root Login
To log into your server, you will need to know your server's public IP address and the password for the "root" user's account. If you have not already logged into your server, you may want to follow the first tutorial in this series, How to Connect to Your VPS with SSH, which covers this process in detail.
If you are not already connected to your server, go ahead and log in as the `root` user using the following command (substitute the highlighted word with your server's public IP address):
```
ssh root@SERVER_IP_ADDRESS
```
Complete the login process by accepting the warning about host authenticity, if it appears, then providing your root authentication (password or private key). If it is your first time logging into the server, with a password, you will also be prompted to change the root password.
### About Root
The root user is the administrative user in a Linux environment that has very broad privileges. Because of the heightened privileges of the root account, you are actually *discouraged* from using it on a regular basis. This is because part of the power inherent with the root account is the ability to make very destructive changes, even by accident.
The next step is to set up an alternative user account with a reduced scope of influence for day-to-day work. We'll teach you how to gain increased privileges during the times when you need them.
## Step Two — Create a New User
Once you are logged in as `root`, we're prepared to add the new user account that we will use to log in from now on.
This example creates a new user called "demo", but you should replace it with a user name that you like:
```
adduser demo
```
You will be asked a few questions, starting with the account password.
Enter a strong password and, optionally, fill in any of the additional information if you would like. This is not required and you can just hit "ENTER" in any field you wish to skip.
## Step Three — Root Privileges
Now, we have a new user account with regular account privileges. However, we may sometimes need to do administrative tasks.
To avoid having to log out of our normal user and log back in as the root account, we can set up what is known as "super user" or root privileges for our normal account. This will allow our normal user to run commands with administrative privileges by putting the word `sudo` before each command.
To add these privileges to our new user, we need to add the new user to the "sudo" group. By default, users who belong to the "sudo" group are allowed to use the `sudo` command.
As `root`, run this command to add your new user to the *sudo* group (substitute the highlighted word with your new user):
#### For Ubuntu 14.04 or lower
```
gpasswd -a demo sudo
```
#### For Ubuntu 16.04 or higher
```
usermod -aG sudo demo
```
Now your user can run commands with super user privileges! For more information about how this works, check out this sudoers tutorial.
## Step Four — Add Public Key Authentication (Recommended)
The next step in securing your server is to set up public key authentication for your new user. Setting this up will increase the security of your server by requiring a private SSH key to log in.
### Generate a Key Pair
If you do not already have an SSH key pair, which consists of a public and private key, you need to generate one. If you already have a key that you want to use, skip to the *Copy the Public Key* step.
To generate a new key pair, enter the following command at the terminal of your **local machine** (ie. your computer):
```
ssh-keygen
```
Assuming your local user is called "localuser", you will see output that looks like the following:
```
ssh-keygen outputGenerating public/private rsa key pair.Enter file in which to save the key (/Users/localuser/.ssh/id_rsa):
```
Hit return to accept this file name and path (or enter a new name).
Next, you will be prompted for a passphrase to secure the key with. You may either enter a passphrase or leave the passphrase blank.
**Note:** If you leave the passphrase blank, you will be able to use the private key for authentication without entering a passphrase. If you enter a passphrase, you will need both the private key *and* the passphrase to log in. Securing your keys with passphrases is more secure, but both methods have their uses and are more secure than basic password authentication.
This generates a private key, `id_rsa`, and a public key, `id_rsa.pub`, in the `.ssh` directory of the *localuser*'s home directory. Remember that the private key should not be shared with anyone who should not have access to your servers!
### Copy the Public Key
After generating an SSH key pair, you will want to copy your public key to your new server. We will cover two easy ways to do this.
**Option 1: Use ssh-copy-id**
If your local machine has the `ssh-copy-id` script installed, you can use it to install your public key to any user that you have login credentials for.
Run the `ssh-copy-id` script by specifying the user and IP address of the server that you want to install the key on, like this:
```
ssh-copy-id sammy@your_server_ip
```
After providing your password at the prompt, your public key will be added to the remote user's `.ssh/authorized_keys` file. The corresponding private key can now be used to log into the server.
**Option 2: Manually Install the Key**
Assuming you generated an SSH key pair using the previous step, use the following command at the terminal of your **local machine** to print your public key (`id_rsa.pub`):
```
cat ~/.ssh/id_rsa.pub
```
This should print your public SSH key, which should look something like the following:
```
id_rsa.pub contentsssh-rsa AAAAB3NzaC1yc2EAAAADAQABAAABAQDBGTO0tsVejssuaYR5R3Y/i73SppJAhme1dH7W2c47d4gOqB4izP0+fRLfvbz/tnXFz4iOP/H6eCV05hqUhF+KYRxt9Y8tVMrpDZR2l75o6+xSbUOMu6xN+uVF0T9XzKcxmzTmnV7Na5up3QM3DoSRYX/EP3utr2+zAqpJIfKPLdA74w7g56oYWI9blpnpzxkEd3edVJOivUkpZ4JoenWManvIaSdMTJXMy3MtlQhva+j9CgguyVbUkdzK9KKEuah+pFZvaugtebsU+bllPTB0nlXGIJk98Ie9ZtxuY3nCKneB+KjKiXrAvXUPCI9mWkYS/1rggpFmu3HbXBnWSUdf localuser@machine.local
```
Select the public key, and copy it to your clipboard.
To enable the use of SSH key to authenticate as the new remote user, you must add the public key to a special file in the user's home directory.
**On the server**, as the **root** user, enter the following command to temporarily switch to the new user (substitute your own user name):
```
su - sammy
```
Now you will be in your new user's home directory.
Create a new directory called `.ssh` and restrict its permissions with the following commands:
```
mkdir ~/.sshchmod 700 ~/.ssh
```
Now open a file in `.ssh` called `authorized_keys` with a text editor. We will use `nano` to edit the file:
```
nano ~/.ssh/authorized_keys
```
Now insert your public key (which should be in your clipboard) by pasting it into the editor.
Hit `CTRL-x` to exit the file, then `y` to save the changes that you made, then `ENTER` to confirm the file name.
Now restrict the permissions of the *authorized\_keys* file with this command:
```
chmod 600 ~/.ssh/authorized_keys
```
Type this command **once** to return to the `root` user:
```
exit
```
Now your public key is installed, and you can use SSH keys to log in as your user.
To read more about how key authentication works, read this tutorial: How To Configure SSH Key-Based Authentication on a Linux Server.
Next, we'll show you how to increase your server's security by disabling password authentication.
## Step Five — Disable Password Authentication (Recommended)
Now that your new user can use SSH keys to log in, you can increase your server's security by disabling password-only authentication. Doing so will restrict SSH access to your server to public key authentication only. That is, the only way to log in to your server (aside from the console) is to possess the private key that pairs with the public key that was installed.
**Note:** Only disable password authentication if you installed a public key to your user as recommended in the previous section, step four. Otherwise, you will lock yourself out of your server!
To disable password authentication on your server, follow these steps.
As **root** or **your new sudo user**, open the SSH daemon configuration:
```
sudo nano /etc/ssh/sshd_config
```
Find the line that specifies `PasswordAuthentication`, uncomment it by deleting the preceding `#`, then change its value to "no". It should look like this after you have made the change:sshd\_config — Disable password authentication
```
PasswordAuthentication no
```
Here are two other settings that are important for key-only authentication and are set by default. If you haven't modified this file before, you *do not* need to change these settings:sshd\_config — Important defaults
```
PubkeyAuthentication yesChallengeResponseAuthentication no
```
When you are finished making your changes, save and close the file using the method we went over earlier (`CTRL-X`, then `Y`, then `ENTER`).
Type this to reload the SSH daemon:
```
sudo systemctl reload sshd
```
Password authentication is now disabled. Your server is now only accessible with SSH key authentication.
## Step Six — Test Log In
Now, before you log out of the server, you should test your new configuration. Do not disconnect until you confirm that you can successfully log in via SSH.
In a new terminal on your **local machine**, log in to your server using the new account that we created. To do so, use this command (substitute your username and server IP address):
```
ssh sammy@your_server_ip
```
If you added public key authentication to your user, as described in steps four and five, your private key will be used as authentication. Otherwise, you will be prompted for your user's password.
**Note about key authentication:** If you created your key pair with a passphrase, you will be prompted to enter the passphrase for your key. Otherwise, if your key pair is passphrase-less, you should be logged in to your server without a password.
Once authentication is provided to the server, you will be logged in as your new user.
Remember, if you need to run a command with root privileges, type "sudo" before it like this:
```
sudo command_to_run
```
## Step Seven — Set Up a Basic Firewall
Ubuntu 16.04 servers can use the UFW firewall to make sure only connections to certain services are allowed. We can set up a basic firewall very easily using this application.
Different applications can register their profiles with UFW upon installation. These profiles allow UFW to manage these applications by name. OpenSSH, the service allowing us to connect to our server now, has a profile registered with UFW.
You can see this by typing:
```
sudo ufw app list
```
```
OutputAvailable applications: OpenSSH
```
We need to make sure that the firewall allows SSH connections so that we can log back in next time. We can allow these connections by typing:
```
sudo ufw allow OpenSSH
```
Afterwards, we can enable the firewall by typing:
```
sudo ufw enable
```
Type "y" and press ENTER to proceed. You can see that SSH connections are still allowed by typing:
```
sudo ufw status
```
```
OutputStatus: activeTo Action From-- ------ ----OpenSSH ALLOW AnywhereOpenSSH (v6) ALLOW Anywhere (v6)
```
If you install and configure additional services, you will need to adjust the firewall settings to allow acceptable traffic in. You can learn some common UFW operations in [this guide](https://www.digitalocean.com/community/tutorials/ufw-essentials-common-firewall-rules-and-commands).
## Where To Go From Here?
At this point, you have a solid foundation for your server. You can install any of the software you need on your server now.[
](https://vimzaa.gitbook.io/kb/~/drafts/-LJJ1HbtGrv-3pCJ50KA/primary/)
# Installing LEMP Stack on Ubuntu 14.04
A detailed guide to install LEMP Stack on Ubuntu 14.04 (Linux, Nginx, php, phpMyAdmin, MySQL Server)
## Introduction
The LEMP software stack is a group of software that can be used to serve dynamic web pages and web applications. This is an acronym that describes a Linux operating system, with an Nginx web server. The backend data is stored in MySQL and the dynamic processing is handled by PHP. In this guide, we will demonstrate how to install a LEMP stack on an Ubuntu 14.04 server. The Ubuntu operating system takes care of the first requirement. We will describe how to get the rest of the components up and running.
## Prerequisites
Before you complete this tutorial, you should have a regular, non-root user account on your server with `sudo` privileges. You can learn how to set up this type of account by completing steps 1-4 in our Ubuntu 14.04 initial server setup. Once you have your account available, sign into your server with that username. You are now ready to begin the steps outlined in this guide.
## 1. Install the Nginx Web Server
In order to display web pages to our site visitors, we are going to employ Nginx, a modern, efficient web server. All of the software we will be getting for this procedure will come directly from Ubuntu's default package repositories. This means we can use the `apt` package management suite to complete the installation. Since this is our first time using `apt` for this session, we should start off by updating our local package index. We can then install the server:\
```
sudo apt-get update
sudo apt-get install nginx
```
In Ubuntu 14.04, Nginx is configured to start running upon installation. You can test if the server is up and running by accessing your server's domain name or public IP address in your web browser. If you do not have a domain name pointed at your server and you do not know your server's public IP address, you can find it by typing one of the following into your terminal.
```
ip addr show eth0 | grep inet | awk '{ print $2; }' | sed 's/\/.*$//'
```
```
111.111.111.111
fe80::601:17ff:fe61:9801
```
Or you could try using:
```
curl http://icanhazip.com
```
```
111.111.111.111
```
Try one of the lines that you receive in your web browser. It should take you to Nginx's default landing page:
```
http://server_domain_name_or_IP
```

If you see the above page, you have successfully installed Nginx.
## 2. Install MySQL to Manage Site Data
Now that we have a web server, we need to install MySQL, a database management system, to store and manage the data for our site. You can install this easily by typing:
sudo apt-get install mysql-server
You will be asked to supply a root (administrative) password for use within the MySQL system. The MySQL database software is now installed, but its configuration is not exactly complete yet. First, we need to tell MySQL to generate the directory structure it needs to store its databases and information. We can do this by typing:
```
sudo mysql_install_db
```
Next, you'll want to run a simple security script that will prompt you to modify some insecure defaults. Begin the script by typing:
```
sudo mysql_secure_installation
```
You will need to enter the MySQL root password that you selected during installation.
Next, it will ask if you want to change that password. If you are happy with your MySQL root password, type "N" for no and hit "ENTER". Afterwards, you will be prompted to remove some test users and databases. You should just hit "ENTER" through these prompts to remove the unsafe default settings.
Once the script has been run, MySQL is ready to go.
## 3. Install PHP for Processing
Now we have Nginx installed to serve our pages and MySQL installed to store and manage our data, but we still need something to connect these two pieces and to generate dynamic content. We can use PHP for this.
Since Nginx does not contain native PHP processing like some other web servers, we will need to install `php5-fpm`, which stands for "fastCGI process manager". We will tell Nginx to pass PHP requests to this software for processing.
We can install this module and will also grab an additional helper package that will allow PHP to communicate with our database backend. The installation will pull in the necessary PHP core files. Do this by typing:
```
sudo apt-get install php5-fpm php5-mysql
```
### Configure the PHP Processor
We now have our PHP components installed, but we need to make a slight configuration change to make our setup more secure. Open the main `php5-fpm` configuration file with root privileges:
```
sudo nano /etc/php5/fpm/php.ini
```
What we are looking for in this file is the parameter that sets `cgi.fix_pathinfo`. This will be commented out with a semi-colon (;) and set to "1" by default.
This is an extremely insecure setting because it tells PHP to attempt to execute the closest file it can find if a PHP file does not match exactly. This basically would allow users to craft PHP requests in a way that would allow them to execute scripts that they shouldn't be allowed to execute.
We will change both of these conditions by uncommenting the line and setting it to "0" like this:
```
cgi.fix_pathinfo=0
```
Save and close the file when you are finished. Now, we just need to restart our PHP processor by typing:
```
sudo service php5-fpm restart
```
This will implement the change that we made.
## 4. Configure Nginx to Use our PHP Processor
Now, we have all of the required components installed. The only configuration change we still need to do is tell Nginx to use our PHP processor for dynamic content.
We do this on the server block level (server blocks are similar to Apache's virtual hosts). Open the default Nginx server block configuration file by typing:
```
sudo nano /etc/nginx/sites-available/default
```
Currently, with the comments removed, the Nginx default server block file looks like this:
```
server {
listen 80 default_server;
listen [::]:80 default_server ipv6only=on;
root /usr/share/nginx/html;
index index.html index.htm;
server_name localhost;
location / {
try_files $uri $uri/ =404;
}
}
```
We need to make some changes to this file for our site.
* First, we need to add an `index.php` option as the first value of our `index` directive to allow PHP index files to be served when a directory is requested.
* We also need to modify the `server_name` directive to point to our server's domain name or public IP address.
* The actual configuration file includes some commented out lines that define error processing routines. We will uncomment those to include that functionality.
* For the actual PHP processing, we will need to uncomment a portion of another section. We will also need to add a `try_files` directive to make sure Nginx doesn't pass bad requests to our PHP processor.
The changes that you need to make are in red in the text below:
```
server {
listen 80 default_server;
listen [::]:80 default_server ipv6only=on;
root /usr/share/nginx/html;
index index.php index.html index.htm;
server_name server_domain_name_or_IP;
location / {
try_files $uri $uri/ =404;
}
error_page 404 /404.html;
error_page 500 502 503 504 /50x.html;
location = /50x.html {
root /usr/share/nginx/html;
}
location ~ \.php$ {
try_files $uri =404;
fastcgi_split_path_info ^(.+\.php)(/.+)$;
fastcgi_pass unix:/var/run/php5-fpm.sock;
fastcgi_index index.php;
fastcgi_param SCRIPT_FILENAME $document_root$fastcgi_script_name;
include fastcgi_params;
}
}
```
When you've made the above changes, you can save and close the file.
Restart Nginx to make the necessary changes:
```
sudo service nginx restart
```
## 5. Create a PHP File to Test Configuration
Your LEMP stack should now be completely set up. We still should test to make sure that Nginx can correctly hand `.php` files off to our PHP processor.
We can do this by creating a test PHP file in our document root. Open a new file called `info.php` within your document root in your text editor:\
```
sudo nano /usr/share/nginx/html/info.php
```
We can type this into the new file. This is valid PHP code that will return formatted information about our server:
```
```
When you are finished, save and close the file.
Now, you can visit this page in your web browser by visiting your server's domain name or public IP address followed by `/info.php`:\
```
http://server_domain_name_or_IP/info.php
```
You should see a web page that has been generated by PHP with information about your server:
```
```
If you see a page that looks like this, you've set up PHP processing with Nginx successfully.
After you test this, it's probably best to remove the file you created as it can actually give unauthorized users some hints about your configuration that may help them try to break in. You can always regenerate this file if you need it later.
For now, remove the file by typing:
```
sudo rm /usr/share/nginx/html/info.php
```
## Conclusion
You should now have a LEMP stack configured on your Ubuntu 14.04 server. This gives you a very flexible foundation for serving web content to your visitors.
# Installing LEMP Stack on Ubuntu 16.04
A detailed guide to install LEMP Stack on Ubuntu 16.04 (Linux, Nginx, php, phpMyAdmin, MySQL Server).
## Introduction
The LEMP software stack is a group of software that can be used to serve dynamic web pages and web applications. This is an acronym that describes a Linux operating system, with an Nginx web server. The backend data is stored in the MySQL database and the dynamic processing is handled by PHP.
In this guide, we will demonstrate how to install a LEMP stack on an Ubuntu 16.04 server. The Ubuntu operating system takes care of the first requirement. We will describe how to get the rest of the components up and running.
## Prerequisites
Before you complete this tutorial, you should have a regular, non-root user account on your server with `sudo` privileges. You can learn how to set up this type of account by completing our Ubuntu 16.04 initial server setup.
Once you have your user available, sign into your server with that username. You are now ready to begin the steps outlined in this guide.
## Step 1: Install the Nginx Web Server
In order to display web pages to our site visitors, we are going to employ Nginx, a modern, efficient web server.
All of the software we will be using for this procedure will come directly from Ubuntu's default package repositories. This means we can use the `apt` package management suite to complete the installation.
Since this is our first time using `apt` for this session, we should start off by updating our local package index. We can then install the server:
```
sudo apt-get update
sudo apt-get install nginx
```
On Ubuntu 16.04, Nginx is configured to start running upon installation.
If you have the `ufw` firewall running, as outlined in our initial setup guide, you will need to allow connections to Nginx. Nginx registers itself with `ufw` upon installation, so the procedure is rather straight forward.
It is recommended that you enable the most restrictive profile that will still allow the traffic you want. Since we haven't configured SSL for our server yet, in this guide, we will only need to allow traffic on port 80.
You can enable this by typing:
```
sudo ufw allow 'Nginx HTTP'
```
You can verify the change by typing:
```
sudo ufw status
```
You should see HTTP traffic allowed in the displayed output:
```
Output
---
Status: active
To Action From
-- ------ ----
OpenSSH ALLOW Anywhere
Nginx HTTP ALLOW Anywhere
OpenSSH (v6) ALLOW Anywhere (v6)
Nginx HTTP (v6) ALLOW Anywhere (v6)
---
```
With the new firewall rule added, you can test if the server is up and running by accessing your server's domain name or public IP address in your web browser.
If you do not have a domain name pointed at your server and you do not know your server's public IP address, you can find it by typing one of the following into your terminal:
```
ip addr show eth0 | grep inet | awk '{ print $2; }' | sed 's/\/.*$//'
```
This will print out a few IP addresses. You can try each of them in turn in your web browser.
As an alternative, you can check which IP address is accessible as viewed from other locations on the internet:
```
curl -4 icanhazip.com
```
Type one of the addresses that you receive in your web browser. It should take you to Nginx's default landing page:
```
http://server_domain_or_IP
```
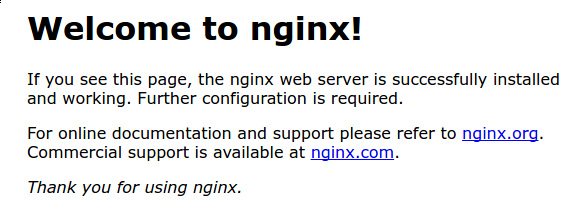
If you see the above page, you have successfully installed Nginx.
## Step 2: Install MySQL to Manage Site Data
Now that we have a web server, we need to install MySQL, a database management system, to store and manage the data for our site.
You can install this easily by typing:
```
sudo apt-get install mysql-server
```
You will be asked to supply a root (administrative) password for use within the MySQL system.
The MySQL database software is now installed, but its configuration is not exactly complete yet.
To secure the installation, we can run a simple security script that will ask whether we want to modify some insecure defaults. Begin the script by typing:
```
sudo mysql_secure_installation
```
You will be asked to enter the password you set for the MySQL root account. Next, you will be asked if you want to configure the `VALIDATE PASSWORD PLUGIN`.
**Warning:** Enabling this feature is something of a judgment call. If enabled, passwords which don't match the specified criteria will be rejected by MySQL with an error. This will cause issues if you use a weak password in conjunction with software which automatically configures MySQL user credentials, such as the Ubuntu packages for phpMyAdmin. It is safe to leave validation disabled, but you should always use strong, unique passwords for database credentials.
Answer **y** for yes, or anything else to continue without enabling.
```
VALIDATE PASSWORD PLUGIN can be used to test passwords
and improve security. It checks the strength of password
and allows the users to set only those passwords which are
secure enough. Would you like to setup VALIDATE PASSWORD plugin?
Press y|Y for Yes, any other key for No:
```
If you've enabled validation, you'll be asked to select a level of password validation. Keep in mind that if you enter **2**, for the strongest level, you will receive errors when attempting to set any password which does not contain numbers, upper and lowercase letters, and special characters, or which is based on common dictionary words.
```
There are three levels of password validation policy:
LOW Length >= 8
MEDIUM Length >= 8, numeric, mixed case, and special characters
STRONG Length >= 8, numeric, mixed case, special characters and dictionary file
Please enter 0 = LOW, 1 = MEDIUM and 2 = STRONG: 1
```
If you enabled password validation, you'll be shown a password strength for the existing root password, and asked you if you want to change that password. If you are happy with your current password, enter **n** for "no" at the prompt:
```
Using existing password for root.
Estimated strength of the password: 100
Change the password for root ? ((Press y|Y for Yes, any other key for No) : n
```
For the rest of the questions, you should press **Y** and hit the **Enter** key at each prompt. This will remove some anonymous users and the test database, disable remote root logins, and load these new rules so that MySQL immediately respects the changes we have made.
At this point, your database system is now set up and we can move on.
## Step 3: Install PHP for Processing
We now have Nginx installed to serve our pages and MySQL installed to store and manage our data. However, we still don't have anything that can generate dynamic content. We can use PHP for this.
Since Nginx does not contain native PHP processing like some other web servers, we will need to install `php-fpm`, which stands for "fastCGI process manager". We will tell Nginx to pass PHP requests to this software for processing.
We can install this module and will also grab an additional helper package that will allow PHP to communicate with our database backend. The installation will pull in the necessary PHP core files. Do this by typing:
```
sudo apt-get install php-fpm php-mysql
```
#### Configure the PHP Processor
We now have our PHP components installed, but we need to make a slight configuration change to make our setup more secure.
Open the main `php-fpm` configuration file with root privileges:
```
sudo nano /etc/php/7.0/fpm/php.ini
```
What we are looking for in this file is the parameter that sets `cgi.fix_pathinfo`. This will be commented out with a semi-colon (;) and set to "1" by default.
This is an extremely insecure setting because it tells PHP to attempt to execute the closest file it can find if the requested PHP file cannot be found. This basically would allow users to craft PHP requests in a way that would allow them to execute scripts that they shouldn't be allowed to execute.
We will change both of these conditions by uncommenting the line and setting it to "0" like this:
/etc/php/7.0/fpm/php.ini
```
cgi.fix_pathinfo=0
```
Save and close the file when you are finished.
Now, we just need to restart our PHP processor by typing: `sudo systemctl restart php7.0-fpm` This will implement the change that we made.
## Step 4: Configure Nginx to Use the PHP Processor
Now, we have all of the required components installed. The only configuration change we still need is to tell Nginx to use our PHP processor for dynamic content.
We do this on the server block level (server blocks are similar to Apache's virtual hosts). Open the default Nginx server block configuration file by typing:
```
sudo nano /etc/nginx/sites-available/default
```
Currently, with the comments removed, the Nginx default server block file looks like this:
/etc/nginx/sites-available/default
```
server {
listen 80 default_server;
listen [::]:80 default_server;
root /var/www/html;
index index.html index.htm index.nginx-debian.html;
server_name _;
location / {
try_files $uri $uri/ =404;
}
}
```
We need to make some changes to this file for our site:
* First, we need to add `index.php` as the first value of our `index` directive so that files named `index.php` are served, if available, when a directory is requested.
* We can modify the `server_name` directive to point to our server's domain name or public IP address.
* For the actual PHP processing, we just need to uncomment a segment of the file that handles PHP requests by removing the pound symbols (#) from in front of each line. This will be the `location ~\.php$` location block, the included `fastcgi-php.conf` snippet, and the socket associated with `php-fpm`.
* We will also uncomment the location block dealing with `.htaccess` files using the same method. Nginx doesn't process these files. If any of these files happen to find their way into the document root, they should not be served to visitors.
The changes that you need to make are in red in the text below:
/etc/nginx/sites-available/default
```
server {
listen 80 default_server;
listen [::]:80 default_server;
root /var/www/html;
index index.php index.html index.htm index.nginx-debian.html;
server_name server_domain_or_IP;
location / {
try_files $uri $uri/ =404;
}
location ~ \.php$ {
include snippets/fastcgi-php.conf;
fastcgi_pass unix:/run/php/php7.0-fpm.sock;
}
location ~ /\.ht {
deny all;
}
}
```
When you've made the above changes, you can save and close the file.
Test your configuration file for syntax errors by typing:
```
sudo nginx -t
```
If any errors are reported, go back and recheck your file before continuing.
When you are ready, reload Nginx to make the necessary changes:
```
sudo systemctl reload nginx
```
## Step 5: Create a PHP File to Test Configuration
Your LEMP stack should now be completely set up. We can test it to validate that Nginx can correctly hand `.php` files off to our PHP processor.
We can do this by creating a test PHP file in our document root. Open a new file called `info.php` within your document root in your text editor:
```
sudo nano /var/www/html/info.php
```
Type or paste the following lines into the new file. This is valid PHP code that will return information about our server:
/var/www/html/info.php
```
```
When you are finished, save and close the file.
Now, you can visit this page in your web browser by visiting your server's domain name or public IP address followed by `/info.php`:
```
http://server_domain_or_IP/info.php
```
You should see a web page that has been generated by PHP with information about your server:
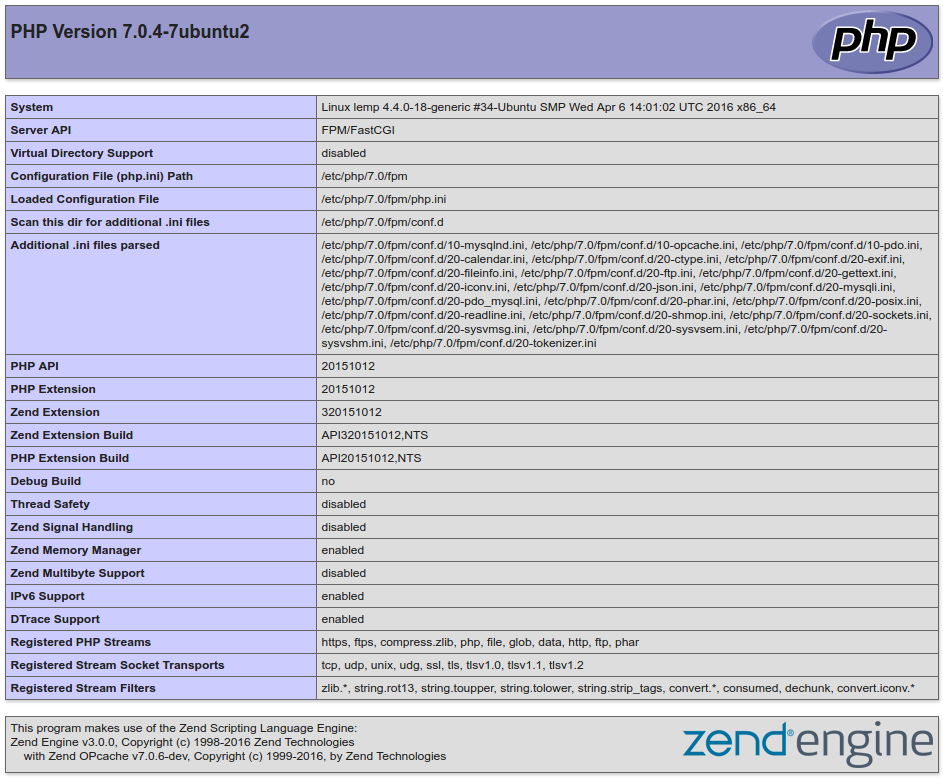
If you see a page that looks like this, you've set up PHP processing with Nginx successfully.
After verifying that Nginx renders the page correctly, it's best to remove the file you created as it can actually give unauthorized users some hints about your configuration that may help them try to break in. You can always regenerate this file if you need it later.
For now, remove the file by typing:
```
sudo rm /var/www/html/info.php
```
## Conclusion
You should now have a LEMP stack configured on your Ubuntu 16.04 server. This gives you a very flexible foundation for serving web content to your visitors.
# Anti-Spam Best Practices
A detialed overview on how to mitigate email spam.
## Introduction
This article contains the best practices for outgoing email from your server to the internet. These practices must be followed so your emails do not get filtered, blocked, or marked as spam by us or other anti-spam organisations.
## Why do we apply protective measures to outgoing emails?
For every IP available with our products and services, as an internet service provider, Vimzaa Web Hosting Services will register and reserve it with organisations such as RIPE or ARIN. This means that we appear as the IP abuse contact for litigation in the WHOIS database.
If an IP is reported to organisations such as Spamhaus and SpamCop?, which work to combat spam, malicious websites and phishing, then the reputation of the entire Vimzaa Web Hosting Services network is at stake.
It is therefore important that Vimzaa Web Hosting Services takes care of the reputation, quality and security of the network, which also forms an important part of your service.
## How does the protection system work?
Our system is based on the Vade Retro anti-spam technology.
## What to do after receiving an email alert
Important steps to take on receiving a block alert BEFORE the affected IP can be unblocked. 1. stop sending email (e.g. stop all mail software such as qmail, Postfix, Sendmail etc.) 2. check the email queue (e.g. qmHandle for qmail, postqueue -p for Postfix) 3. analyse your logs using the Message-ID found in the block alert
## Can I get whitelisted?
It is not possible to get a whitelisting, i.e. a filtering exclusion on the outgoing emails from your server.
We can only assist you with the logs diagnosis, if the Message-IDs are unknown and not part of your legitimate emails or mailing lists.
## False Positives
If you have checked and found that Message-ID are from your legitimate email, you should then ensure that your email messages comply with the RFC and the Best Practices indicated below. If they do comply, you can inform us by sending a sample of your email (including header). Our technical support team will then assist you with the next steps. Simply call our support line or contact us via the email support interface in your manager.
## RFC and Best Practices
RFCs (Request For Comments) are documents intended to describe technical aspects of the internet. They are produced and published by the IETF (Internet Engineering Task Force), a group which basically produces and defines standards.
For more information, see: RFC, IETF and Internet Draft
Best practices are recommended methods which are often based on these documents and are intended to advise you on the best way to proceed. In this instance, this means the basic rules to follow so that your emails are not marked as spam.
## Sending Volume
If your outgoing email volume is very high, you are advised to: 1. reserve an IP block dedicated solely to email usage, 2. provide an 'abuse' address on this block in order to receive complaints, 3. configure reverses on all IPs correctly
This operation will enable you to simultaneously isolate the IP and domain reputation if you send emails for various domains, to receive the complaints, and thus do what is necessary to get unblocked by various organisations. It also enables you to locate a problem more quickly on a form that uses domain X or Y, as the emails are not sent out from the same IP and don't have the same reverse.
## Email Content
Avoid using spammer keywords in your emails such as “buy” and “last chance”, and avoid capital letters, impersonal subjects, exclamation marks, and % discounts.
Don't forgot to provide an unsubscribe link for people who have not requested to receive your email or who believe it to be illegitimate.
Be particularly careful to ensure that your emails contain the sender's address (or an alias), a subject, and a correct ratio of text, images and links in the body of the message.
The text vs. image and text vs. link ratio must be high. Don't overload the email with hypertext links and avoid Javascript.
## FBL - Feedback Loop
This system will enable you to follow up on feedback provided by some internet service providers directly, informing you that their users have marked your message as illicit, and that it has thus been classified as spam. This will enable you to interact with these ISPs directly concerning your reputation. Some FBLs:
* Yahoo
* AOL Postmaster
* SpamCop
* Outlook & live.com
## Authentication
Some authentication services enable you to protect your reputation.
### **Sender-ID**
An email authentication technology developed by Microsoft which validates the authenticity of your domain name by verifying the IP address of the sender. This technology is based on the IETF standard: RFC4406
### **SPF**
Sender Policy Framework is a standard for verififying the domain of the sender. It is based on RFC4408 and consists of adding an SPF or TXT field to the domain DNS, which contains the list of IPs authorised to send emails from this domain.
### **Reverse DNS**
Reverse enables your IP to be "translated” into your domain. That allows the domain associated with the IP address to be found.
### **DKIM**
DKIM This standard is described in RFC4871.
AOL, Google (Gmail) work on this basis. Official website: DKIM
### How to unblock IP?
To unblock your IP, you must submit a ticket to the technical department with information on the IP that was blocked and what you have done to stop the spam.
If spam continues after block is removed, it would result in a longer spam block, reinstallation of the entire sever without prior notice, suspension of service, termination of service, or a combination of multiple consequences.
# cPanel Hosting
A quick overview on how to manage your cPanel Hosting Account.
# Cloudflare
Any website can deploy CloudFlare, regardless of your underlying platform. By integrating closely with Vimzaa, we make the process of setting up CloudFlare "1 click easy" through your existing Vimzaa cPanel dashboard. Just look for the CloudFlare icon, choose the domain you want to enable, and click the orange cloud. That's it!
## Cloudflare Railgun™
### What is Railgun?
Railgun ensures that the connection between your origin server and the Cloudflare network is as fast as possible.
Railgun is a WAN optimization technology that we offer our hosting customers in partnership with a company called CloudFlare.
CloudFlare’s Railgun technology greatly speeds up the delivery of non-cached pages. While CloudFlare automatically caches 65% of the resources needed to make up a page, 35% can't be cached because the resources are dynamically generated or marked as 'do not cache'. That 35% is often the initial HTML of the page that must be downloaded first. CloudFlare Railgun speeds this remaining 35%.
### What are the benefits of Railgun?
Websites running Railgun show a 143% improvement in HTML load times and a 90% decrease in Time To First Byte (TTFB) responses.
### How does Railgun work
Railgun opens a secure, tunneled connection between the CloudFlare network and your host’s origin server where the connection only sends differences from the last request. This is similar to how video encoding works. The markup of websites does not change that frequently from one request to the next. Instead of transferring the entire request between CloudFlare and the origin server, Railgun will transfer only the changes in markup from one request to the next. This cuts down on bandwidth, transfer time, and overall page load times. Railgun caches these differences in memory to make page processing as fast as possible.
### What kind of sites can use Railgun?
Any website can benefit from the performance improvements Railgun offers, especially dynamic sites.
### How much does Railgun cost?
We have partnered with CloudFlare to make Railgun both easy and affordable. If you purchase Railgun directly through CloudFlare, it costs $200/month. However, we have partnered with CloudFlare and are offering Railgun to our customers for free with thier shared hosting plan.
### How do I enable Railgun on my site?
To enable Railgun, follow the steps given below:
\- Login to cPanel,\
\- Go to Cloudflare ( by clicking Cloudflare Icon)\
\- Login/Signup to Cloudflare Account and provision your domain either by CNAME Method or using Cloudflare DNS (Full Zone) `(You may skip this step, if you are already logged in)`\
\- Under `Overview` Turn on the Railgun.
### What if I’m having issues enabling Railgun?
If you experience issues when enabling Railgun, please [contact us](https://vimzaa.com/contact-us.php).
### I’m not a CloudFlare customer, can I still use Railgun?
No. You need to be a CloudFlare customer in order to use Railgun. you can follow the above steps to use Railgun.
### I’m seeing an error on my site and I think Railgun is causing it, what should I do?
If you are using Railgun via cPanel, you can turn it off directly from your control panel. Otherwise, log into your CloudFlare account, go to Performance Settings and turn Railgun off from there. Please file a bug report with a detailed description [here](https://support.cloudflare.com/anonymous_requests/new).
### Remind me, what is CloudFlare?
CloudFlare is a third party service that we offer to our hosting customers. CloudFlare provides performance, security and availability to web properties. CloudFlare runs a globally distributed network where they automatically cache static content, filter malicious traffic and help offload big spikes in traffic. On average, a site loads twice as fast, uses 65% fewer server resources and has and additional layer of secuirity.
# cPanel - Advanced
A quick overview on cPanel Advanced Features.
# How to add and manage cron jobs / scheduled tasks in cPanel
#### Location under cPanel
```
Home > Advanced > Cron Jobs
```
### Overview
Cron jobs are scheduled tasks that the system runs at predefined times or intervals. Typically, a cron job contains a series of simple tasks that the system runs from a script file.
Notes:
Exercise caution when you schedule cron jobs. If you schedule them to run too often, they may degrade performance.
### Add a cron email
The `Cron Email` section of the interface allows you to enter an email address for the system to send notifications when your cron jobs run. To set an email address, perform the following steps:
1. In the `Email` text box, enter the email address at which you wish to receive the notifications.
2. Click `Update Email`.
#### Disable email notifications
To disable email notifications for all cron jobs, remove the email address.
To disable email notifications for a single cron job, perform the following steps:
1. Locate the following string:
| `0 * * * * /home/user/backup.pl` |
| -------------------------------- |
2. Add the following string to that line:
| `/dev/null 2>&1` |
| ---------------- |
3. Save your changes.
### Add a cron job
To create a cron job, perform the following steps:
1. Select the interval at which you wish to run the cron job from the appropriate menus, or enter the values in the text boxes.
* *Common Settings* — This menu allows you to select a commonly-used interval. The system will configure the appropriate settings in the *Minute*, *Hour*, *Day*, *Month*, and *Weekday* text boxes for you.
Note:
If the wildcard characters (`*`) and intervals confuse you, this menu is an excellent way to learn how to configure the other fields.
* *Minute* — Use this menu to select the number of minutes between each time the cron job runs, or the minute of each hour on which you wish to run the cron job.
* *Hour* — Use this menu to select the number of hours between each time the cron job runs, or the hour of each day on which you wish to run the cron job.
* *Day* — Use this menu to select the number of days between each time the cron job runs, or the day of the month on which you wish to run the cron job.
* *Month* — Use this menu to select the number of months between each time the cron job runs, or the month of the year in which you wish to run the cron job.
* *Weekday* — Use this menu to select the days of the week on which you wish to run the cron job.
2. In the *Command* text box, enter the command that you wish the system to run.
Note:
Specify the absolute path to the command that you wish to run. For example, if you wish to run the `public_html/index.php` file in your home directory, enter the following command:
| `/home/user/public_html/index.php` |
| ---------------------------------- |
Important:
* You **must** specify settings for the *Minute*, *Hour*, *Day*, *Month*, *Weekday*, and *Command* text boxes.
* Exercise **extreme** caution when you use the `rm` command in a cron job. If you do not declare the correct options, you may delete your home directory’s data.
3. Click *Add New Cron Job*.
### View existing cron jobs
The *Current Cron Jobs* table displays your existing cron jobs.
#### Edit a cron job
To edit a cron job, perform the following steps:
1. Locate the cron job that you wish to edit and click *Edit*.
2. Edit the settings that you wish to change and click *Edit Line*.
#### Delete a cron job
To delete a cron job, perform the following steps:
1. Click *Delete* next to the cron job that you wish to delete.
2. Click *Delete*.
# How to track DNS using cPanel
Network Tools allow a user to find out information about any domain, or to trace the route from the server your site is on to the computer you are accessing cPanel from. Finding out information about a domain can be useful in making sure your DNS is set up properly as you will find out information about your IP address as well as your DNS.
{% code title="Location under cPanel" %}
```
cPanel > Home > Advanced > Track DNS
```
{% endcode %}
### Overview
This interface contains tools to help you retrieve network information. For example, you can look up an IP address or trace the route from your computer to the computer that hosts your website.
### Domain Lookup
The *Domain Lookup* tool executes the `host domain` command, where `domain` represents a specific domain. This command resolves an IP address from a specified domain name, and returns general DNS information about the server.
To look up a domain, perform the following steps:
1. Enter the domain to look up in the `Enter a domain` *to `look up`* text box.
2. Click `Look Up`.
The domain’s mail servers and IP address will display. You can also view the domain’s DNS information under the `Zone Information` heading.
### Trace Route
The `Trace Route` function traces the route that your computer takes to access your website. This function displays how many servers through which your data passes before it reaches your website. This information also includes the amount of time that your computer requires to reach the server.
To trace the route to your server, click `Trace`. The interface will display the pathways that your computer follows to reach your server.
You can use this information to find problem servers within your path.
Note:You may not possess access to this function. Contact your system administrator for more information about how to use the `Trace Route` function.
# How to create custom ‘error pages’ in cPanel
An error page informs a visitor when there is a problem accessing your site. Each type of problem has its own code. For example, a visitor who enters a nonexistent URL will see a 404 error, while an unauthorized user trying to access a restricted area of your site will see a 401 error.
Basic error pages are automatically provided by the web server (Apache). However, if you prefer, you can create a custom error page for any valid HTTP status code beginning in 4 or 5.
{% code title="Location Under cPanel" %}
```
cPanel > Home > Advanced > Error Pages
```
{% endcode %}
### Overview
Error pages inform visitors about problems when they attempt to access your site. Each problem has its own status code (for example, `404`) and error page.
The web server automatically provides basic error pages, but the *Error Pages* interface allows you to define custom error pages for any [HTTP status code](https://documentation.cpanel.net/display/CKB/HTTP+Error+Codes+and+Quick+Fixes).
### Edit an error page
To customize an error page, perform the following steps:
1. If this account manages more than one domain, select the domain for which you wish to edit an error page from the *Managing:* menu.
2. Click the error status code for which you wish to edit its error page.
* If you do not see the desired error status code in that list, click the *Show All HTTP Error Status Codes* tab. Then, click on the desired error status code.
3. Enter a message in the text box.
* To display information on the error page about the visitor who accessed your site, click the appropriate buttons for the information that you wish to display.
* Enter additional HTML code to further customize your error pages.
4. Click *Save*.
# How to flush your local machines DNS Cache
If your machine is struggling to catch up with DNS changes, then its due to the authoritative nameservers handled by your ISP (internet service provider) caching those records. Also, in some cases, it may be your router inside your network caching those results.
There are two solutions for this to help your machines catch up and see those changes correctly.
The first is to try…
## Flush your DNS caches
## Overview
Your DNS cache stores the locations (IP addresses) of web servers that contain web pages which you have recently viewed. If the location of the web server changes before the entry in your DNS cache updates, you can no longer access the site.
If you encounter a large number of [HTML 404 error codes](https://documentation.cpanel.net/display/CKB/How+To+Clear+Your+DNS+Cache#), you may need to clear your DNS cache. After you clear your DNS cache, your computer will query nameservers for the new DNS information.
## How to clear your DNS cache
The following methods allow you to remove old and inaccurate DNS information that may result in 404 errors.
### Windows® 8
To clear your DNS cache if you use Windows 8, perform the following steps:
1. On your keyboard, press **Win+X** to open the *WinX Menu*.
2. Right-click *Command Prompt* and select *Run as Administrator*.
3. Run the following command:
| `ipconfig /flushdns` |
| -------------------- |
If the command succeeds, the system returns the following message:
| `Windows IP configuration successfully flushed the DNS Resolver Cache.` |
| ----------------------------------------------------------------------- |
### Windows® 7
To clear your DNS cache if you use Windows 7, perform the following steps:
1. Click *Start*.
2. Enter `cmd` in the *Start* menu search text box.
3. Right-click *Command Prompt* and select *Run as Administrator*.
4. Run the following command:
| `ipconfig /flushdns` |
| -------------------- |
If the command succeeds, the system returns the following message:
| `Windows IP configuration successfully flushed the DNS Resolver Cache.` |
| ----------------------------------------------------------------------- |
### Windows XP®, 2000, or Vista®
To clear your DNS cache if you use Windows XP, 2000, or Vista, perform the following steps:
1. Click *Start*.
2. On the *Start* menu, click *Run…*.
* If you do not see the *Run* command in Vista, enter `run` in the *Search* bar.
3. Run the following command in the *Run* text box:
| `ipconfig /flushdns` |
| -------------------- |
If the command succeeds, the system returns the following message:
| `Successfully flushed the DNS Resolver Cache.` |
| ---------------------------------------------- |
### MacOS® 10.10.4 and above
To clear your DNS cache if you use MacOS X version 10.10.4 or above, perform the following steps:
1. Click *Applications*.
2. Click *Utilities*.
3. Click *Terminal*.
4. Run the following command:
| `sudo` `killall -HUP mDNSResponder` |
| ----------------------------------- |
If the command succeeds, the system does **not** return any output.
Warning:
To run this command, you **must** know the computer’s administrator account password.
### MacOS 10.10.1, 10.10.2, and 10.10.3
To clear your DNS cache if you use MacOS X version 10.10 through 10.10.3, perform the following steps:
1. Click *Applications*.
2. Click *Utilities*.
3. Click *Terminal*.
4. Run the following command:
| `sudo` `discoveryutil mdnsflushcache` |
| ------------------------------------- |
If the command succeeds, the system does **not** return any output.
Warning:
To run this command, you **must** know the computer’s administrator account password.
### MacOS 10.7, 10.8, and 10.9
To clear your DNS cache if you use MacOS X version 10.7, 10.8, or 10.9, perform the following steps:
1. Click *Applications*.
2. Click *Utilities*.
3. Double-click *Terminal*.
4. Run the following command:
| `sudo` `killall -HUP mDNSResponder` |
| ----------------------------------- |
If the command succeeds, the system does **not** return any output.
Warning:
To run this command, you **must** know the computer’s administrator account password.
### MacOS 10.5 and 10.6
To clear your DNS cache if you use MacOS X version 10.5 or 10.6, perform the following steps:
1. Click *Applications*.
2. Click *Utilities*.
3. Double-click *Terminal*.
4. Run the following command:
| `sudo` `dscacheutil -flushcache` |
| -------------------------------- |
If the command succeeds, the system does **not** return any output.
Warning:
To run this command, you **must** know the computer’s administrator account password.
The other option is to use the ‘Google Public DNS’ service, which is completely free and improves DNS lookup times drastically.
# How to use the Google Public DNS for faster DNS lookups
When you use Google Public DNS, you are changing your DNS “switchboard” operator from your ISP to Google Public DNS.
In most cases, the IP addresses used by your ISP’s domain name servers are automatically set by your ISP via the Dynamic Host Configuration Protocol (DHCP). To use Google Public DNS, you need to explicitly change the DNS settings in your operating system or device to use the Google Public DNS IP addresses. The procedure for changing your DNS settings varies according to operating system and version (Windows, Mac or Linux) or the device (computer, phone, or router). We give general procedures here that might not apply for your OS or device; please consult your vendor documentation for authoritative information.**Caution:** We recommend that only users who are proficient with configuring operating system settings make these changes.
## Important: Before you start
Before you change your DNS settings to use Google Public DNS, be sure to write down the current server addresses or settings on a piece of paper. It is very important that you keep these numbers for backup purposes, in case you need to revert to them at any time.
We also recommend that you print this page, in the event that you encounter a problem and need to refer to these instructions.
## Google Public DNS IP addresses
The Google Public DNS IP addresses (IPv4) are as follows:
* 8.8.8.8
* 8.8.4.4
The Google Public DNS IPv6 addresses are as follows:
* 2001:4860:4860::8888
* 2001:4860:4860::8844
You can use either address as your primary or secondary DNS server. You can specify both addresses, but do not specify the same address as both primary and secondary.
You can configure Google Public DNS addresses for either IPv4 or IPv6 connections, or both. For IPv6-only networks with a NAT64 gateway using the `64:ff9b::/96` prefix, you can use [Google Public DNS64](https://developers.google.com/speed/public-dns/docs/dns64) instead of Google Public DNS IPv6 addresses, providing connectivity to IPv4-only services without any other configuration.
Some devices use separate fields for all eight parts of IPv6 addresses and cannot accept the `::` IPv6 abbreviation syntax. For such fields enter:
* 2001:4860:4860:0:0:0:0:8888
* 2001:4860:4860:0:0:0:0:8844
Expand the `0` entries to `0000` if four hex digits are required.
## Change your DNS servers settings
Because the instructions differ between different versions/releases of each operating system, we only give one version as an example. If you need specific instructions for your operating system/version, please consult your vendor’s documentation. You may also find answers on our [user group](https://groups.google.com/group/public-dns-discuss?hl=en).
Many systems allow you to specify multiple DNS servers, to be contacted in a priority order. In the following instructions, we provide steps to specify only the Google Public DNS servers as the primary and secondary servers, to ensure that your setup will correctly use Google Public DNS in all cases.**Note:** Depending on your network setup, you may need administrator/root privileges to change these settings.
### Windows
DNS settings are specified in the **TCP/IP Properties** window for the selected network connection.
**Example: Changing DNS server settings on Windows 7**
1. Go to the **Control Panel**.
2. Click **Network and Internet** > **Network and Sharing Center** > **Change adapter settings**.
3. Select the connection for which you want to configure Google Public DNS. For example:
* To change the settings for an Ethernet connection, right-click **Local Area Connection** > **Properties**.
* To change the settings for a wireless connection, right-click **Wireless Network Connection** > **Properties**.
If you are prompted for an administrator password or confirmation, type the password or provide confirmation.
4. Select the **Networking** tab. Under **This connection uses the following items**, select **Internet Protocol Version 4 (TCP/IPv4)** or **Internet Protocol Version 6 (TCP/IPv6)** and then click **Properties**.
5. Click **Advanced** and select the **DNS** tab. If there are any DNS server IP addresses listed there, write them down for future reference, and remove them from this window.
6. Click **OK**.
7. Select **Use the following DNS server addresses**. If there are any IP addresses listed in the **Preferred DNS server** or**Alternate DNS server**, write them down for future reference.
8. Replace those addresses with the IP addresses of the Google DNS servers:
* For IPv4: 8.8.8.8 and/or 8.8.4.4.
* For IPv6: 2001:4860:4860::8888 and/or 2001:4860:4860::8844.
* For IPv6-only: you can use [Google Public DNS64](https://developers.google.com/speed/public-dns/docs/dns64) *instead of* the IPv6 addresses in the previous point.
9. Restart the connection you selected in step 3.
10. Test that your setup is working correctly; see [Test your new settings](https://developers.google.com/speed/public-dns/docs/using#testing) below.
11. Repeat the procedure for additional network connections you want to change.
### Mac OS
DNS settings are specified in the **Network** window.
**Example: Changing DNS server settings on Mac OS 10.5**
1. Click **Apple** > **System Preferences** > **Network**.
2. If the lock icon in the lower left-hand corner of the window is locked, click the icon to make changes, and when prompted to authenticate, enter your password.
3. Select the connection for which you want to configure Google Public DNS. For example:
* To change the settings for an Ethernet connection, select **Built-In Ethernet**, and click **Advanced**.
* To change the settings for a wireless connection, select **Airport**, and click **Advanced**.
4. Select the **DNS** tab.
5. Click **+** to replace any listed addresses with, or add, the Google IP addresses at the top of the list:
* For IPv4: 8.8.8.8 and/or 8.8.4.4.
* For IPv6: 2001:4860:4860::8888 and/or 2001:4860:4860::8844.
* For IPv6-only: you can use [Google Public DNS64](https://developers.google.com/speed/public-dns/docs/dns64) *instead of* the IPv6 addresses in the previous point.
6. Click **Apply** > **OK**.
7. Test that your setup is working correctly; see [Test your new settings](https://developers.google.com/speed/public-dns/docs/using#testing) below.
8. Repeat the procedure for additional network connections you want to change.
### Linux
In most modern Linux distributions, DNS settings are configured through Network Manager.
**Example: Changing DNS server settings on Ubuntu**
1. Click **System** > **Preferences** > **Network Connections**.
2. Select the connection for which you want to configure Google Public DNS. For example:
* To change the settings for an Ethernet connection, select the **Wired** tab, then select your network interface in the list. It is usually called `eth0`.
* To change the settings for a wireless connection, select the **Wireless** tab, then select the appropriate wireless network.
3. Click **Edit**, and in the window that appears, select the **IPv4 Settings** or **IPv6 Settings** tab.
4. If the selected method is **Automatic (DHCP)**, open the dropdown and select **Automatic (DHCP) addresses only**instead. If the method is set to something else, do not change it.
5. In the **DNS servers** field, enter the Google Public DNS IP addresses, separated by a comma:
* For IPv4: 8.8.8.8 and/or 8.8.4.4.
* For IPv6: 2001:4860:4860::8888 and/or 2001:4860:4860::8844.
* For IPv6-only: you can use [Google Public DNS64](https://developers.google.com/speed/public-dns/docs/dns64) *instead of* the IPv6 addresses in the previous point.
6. Click **Apply** to save the change. If you are prompted for a password or confirmation, type the password or provide confirmation.
7. Test that your setup is working correctly; see [Test your new settings](https://developers.google.com/speed/public-dns/docs/using#testing) below.
8. Repeat the procedure for additional network connections you want to change.
If your distribution doesn’t use Network Manager, your DNS settings are specified in `/etc/resolv.conf`.
**Example: Changing DNS server settings on a Debian server**
1. Edit `/etc/resolv.conf`:
```
sudo vi /etc/resolv.conf
```
2. If any `nameserver` lines appear, write down the IP addresses for future reference.
3. Replace the `nameserver` lines with, or add, the following lines:
For IPv4:
```
nameserver 8.8.8.8
nameserver 8.8.4.4
```
For IPv6:
```
nameserver 2001:4860:4860::8888
nameserver 2001:4860:4860::8844
```
For IPv6-only, you can use [Google Public DNS64](https://developers.google.com/speed/public-dns/docs/dns64) *instead of* the above IPv6 addresses.
4. Save and exit.
5. Restart any Internet clients you are using.
6. Test that your setup is working correctly; see [Test your new settings](https://developers.google.com/speed/public-dns/docs/using#testing) below.
Additionally, if you are using DHCP client software that overwrites the settings in `/etc/resolv.conf`, you will need to set up the client accordingly by editing the client’s configuration file.
**Example: Configuring DHCP client sofware on a Debian server**
1. Back up `/etc/resolv.conf`:
```
sudo cp /etc/resolv.conf /etc/resolv.conf.auto
```
2. Edit `/etc/dhcp3/dhclient.conf`:
```
sudo vi /etc/dhcp3/dhclient.conf
```
3. If there is a line containing `domain-name-servers`, write down the IP addresses for future reference.
4. Replace that line with, or add, the following line:
For IPv4:
```
prepend domain-name-servers 8.8.8.8, 8.8.4.4;
```
For IPv6:
```
prepend domain-name-servers 2001:4860:4860::8888, 2001:4860:4860::8844;
```
For IPv6-only, you can use [Google Public DNS64](https://developers.google.com/speed/public-dns/docs/dns64) *instead of* the above IPv6 addresses.
5. Save and exit.
6. Restart any Internet clients you are using.
7. Test that your setup is working correctly; see [Test your new settings](https://developers.google.com/speed/public-dns/docs/using#testing) below.
### Routers
Every router uses a different user interface for configuring DNS server settings; we provide only a generic procedure below. For more information, please consult your router documentation.**Note:** Some ISPs hard-code their DNS servers into the equipment they provide; if you are using such a device, you will not be able to configure it to use Google Public DNS. Instead, you can configure each of the computers connected to the router, as described above.
To change your settings on a router:
1. In your browser, enter the IP address to access the router’s administration console.
2. When prompted, enter the password to access network settings.
3. Find the screen in which DNS server settings are specified.
4. If there are IP addresses specified in the fields for the primary and seconday DNS servers, write them down for future reference.
5. Replace those addresses with the Google IP addresses:
* For IPv4: 8.8.8.8 and/or 8.8.4.4.
* For IPv6: 2001:4860:4860::8888 and/or 2001:4860:4860::8844.
* For IPv6-only: you can use [Google Public DNS64](https://developers.google.com/speed/public-dns/docs/dns64) *instead of* the IPv6 addresses in the previous point.
6. Save and exit.
7. Restart your browser.
8. Test that your setup is working correctly; see [Test your new settings](https://developers.google.com/speed/public-dns/docs/using#testing) below.
Some routers use separate fields for all eight parts of IPv6 addresses and cannot accept the `::` IPv6 abbreviation syntax. For such fields enter:
* 2001:4860:4860:0:0:0:0:8888
* 2001:4860:4860:0:0:0:0:8844
Expand the `0` entries to `0000` if four hex digits are required.
### Mobile or other devices
DNS servers are typically specified under advanced Wi-Fi settings. However, as every mobile device uses a different user interface for configuring DNS server settings, we provide only a generic procedure below. For more information, please consult your mobile provider’s documentation.
To change your settings on a mobile device:
1. Go to the screen in which Wi-Fi settings are specified.
2. Find the screen in which DNS server settings are specified.
3. If there are IP addresses specified in the fields for the primary and seconday DNS servers, write them down for future reference.
4. Replace those addresses with the Google IP addresses:
* For IPv4: 8.8.8.8 and/or 8.8.4.4.
* For IPv6: 2001:4860:4860::8888 and/or 2001:4860:4860::8844.
* For IPv6-only: you can use [Google Public DNS64](https://developers.google.com/speed/public-dns/docs/dns64) *instead of* the IPv6 addresses in the previous point.
5. Save and exit.
6. Test that your setup is working correctly; see [Test your new settings](https://developers.google.com/speed/public-dns/docs/using#testing) below.
## Test your new settings
To test that the Google DNS resolver is working:
1. From your browser, enter a hostname URL (such as [`http://www.google.com/`](http://www.google.com/)). If it resolves correctly, bookmark the page, and try accessing the page from the bookmark.
* If you are using [Google Public DNS64](https://developers.google.com/speed/public-dns/docs/dns64) on an IPv6-only system, repeat the above test with an IPv4-only hostname URL (such as [`http://ipv4.google.com/`](http://ipv4.google.com/)).
If all of these tests work, everything is working correctly. If not, go to step 2.
2. From your browser, type in a fixed IP address. You can use [`http://216.218.228.119/`](http://216.218.228.119/) (which points to the [test-ipv6.com](http://test-ipv6.com/) website) as the URL.[1](https://developers.google.com/speed/public-dns/docs/using#footnote1)
* If you are using [Google Public DNS64](https://developers.google.com/speed/public-dns/docs/dns64) on an IPv6-only system, use [`http://[64:ff9b::d8da:e477]/`](http://\[64:ff9b::d8da:e477]/) as the URL instead. If this test does not work, you do not have access to a NAT64 gateway at the reserved prefix `64:ff9b::/96` and cannot use Google Public DNS64.
* If you are using an IPv6-only system without Google Public DNS64, use [`http://[2001:470:1:18::119]/`](http://\[2001:470:1:18::119]/) as the URL instead.
If this works correctly, bookmark the page, and try accessing the page from the bookmark. If these tests work (but step 1 fails), then there is a problem with your DNS configuration; check the steps above to make sure you have configured everything correctly. If these tests do not work, go to step 3.
3. Roll back the DNS changes you made and run the tests again. If the tests still do not work, then there is a problem with your network settings; contact your ISP or network administrator for assistance.
If you encounter any problems after setting Google Public DNS as your resolver, please run the [diagnostic procedure](https://developers.google.com/speed/public-dns/docs/troubleshooting).
1 *Google thanks Jason Fesler for granting permission to use* [*test-ipv6.com*](http://test-ipv6.com/) *URLs for browser DNS testing purposes.*
## Switch back to your old DNS settings
If you had not previously configured any customized DNS servers, to switch back to your old settings, in the window in which you specified the Google IP addresses, select the option to enable obtaining DNS server addresses automatically, and/or delete the Google IP addresses. This will revert your settings to using your ISP’s default servers.
If you need to manually specify any addresses, use the procedures above to specify the old IP addresses.
If necessary, restart your system.
# How to check if your domain has ‘propagated’ following DNS changes
If you have recently updated your domain name to use new DNS records, or have updated your nameservers entirely, then you can check the propagation status using the following website…
**TIP:** DNS propagation nowadays is mostly gibberish – most providers will tell you DNS propagation can take up to 72 hours. This is rarely the case, and propagation completes in less than an hour globally.
What you may find is that your local machine / network is showing the incorrect DNS records, whilst the ‘whatsmydns.net’ service shows the propagation has completed to an alternative address.
If that is the case, you can do one of two things…
[Flush your DNS caches](https://brixly.uk/learn-article/flush-local-machines-dns-cache/)
[How to use the Google Public DNS service for better DNS lookups](https://brixly.uk/learn-article/use-google-public-dns-faster-dns-lookups/)
# Install Wildcard SSL Certificates using LetsEncrypt with cPanel
are using our cPanel hosting, then we are now able to provide wildcard certificates completely free of charge.
## What is a Wildcard Certificate and do I need one?
A wildcard certificate is an SSL certificate that is valid for all subdomains of one or more domains. It can be identified by an `*.` prefix on any of the names it is issued for, e.g. `*.example.org`, `*.staging.example.org`
We suggest that the majority of users do not need wildcards. They are useful when:
* You have many (10-100+) subdomains or combinations of subdomains
* You don’t know what subdomains will exist, e.g. when you dynamically give each customer/user their own subdomain, e.g. when you have a subdomain-based multi-site
* You regularly create new subdomains (at least on a monthly basis)
* You are using a wildcard DNS record and need to protect all possible domains using SSL
**Unless your requirements resemble one or more of those listed above, we recommend you stick to non-wildcard certificates. They are simpler, faster to issue and safer to manage.**
## Prerequisites
### **DNS Validation is required: Your DNS must be hosted with cPanel**
Due to Let’s Encrypt policy, wildcard certificates *must* use DNS-based validation.
This means that your domain *must* have its DNS hosted within your cPanel’s / our nameservers, because cPanel needs to be able to create TXT records to demonstrate control of your domain. If your domain has its DNS externally hosted, you will not be able to issue wildcard certificates.
The choice of validation method will be presented to you when you go to issue your certificate.
## How to issue a Wildcard Certificate
### **1. Open the Lets Encrypt SSL interface**
Visit the Lets Encrypt SSL interface in cPanel, and select which domain you would like to issue a certificate for, as per the [user guide](https://letsencrypt-for-cpanel.com/docs/for-users/user-guide/).
### **2. Select the DNS validation method**

### **3. Select which domains you would like wildcards for:**
Check the “Include Wildcard?” column to add the wildcard variant of any domain to your certificate request. You may include as many combinations of wildcards and other domains as you like on a single certificate.
Please take note, if you would like a certificate to be valid for `mail.l33t.website` as well as `*.mail.l33t.website`, you must tick both ‘Include?’ and ‘Include Wildcard?’, as the wildcard will not match the domain on its own.

### **4. Issue**
Press the **Issue** button and wait.
If you experience a failure, please double check that your domain is using the nameservers of your cPanel hosting service, rather than being externally hosted (such as on Cloudflare or Route53 or at your domain registrar).
# Correct SPF Records
Your service provider is now using SPAM Experts to send email from the hosting server on which your account is located. Correct Sender Policy Framework (SPF) records need to be configured in your DNS settings to ensure that Internet receivers will properly identify and receive your email. This article describes the DNS records you must add.
### DNS Records
The following records are needed for SPF to work correctly. Replace *example.com* with your own domain name:
| **Location** | **Type** | **Value** |
| ------------ | -------- | ----------------------------------------- |
| example.com | TXT | v=spf1 +a +mx +ip4:\ -all |
| | | |
If you already have an SPF record, leave it. Make sure to add it BEFORE the “all” mechanism as “all” always matches and typically goes at the end of the SPF record.
# Check processes or users with high iowait (99.99%) from Cloudlinux Logs
A handy script! I wrote this script to extract the highest ‘waiting’ processes to diagnose high IO wait issues from users, where the results are not obvious from the LVE stats…
```
grep 99.99 ../*/logfile.txt | tail -n -100000 | awk -v x=12 '{print $x}' | awk -F'/' '{print $2,$3}' | sort | uniq -c | sort -n
```
# How to tune MySQL on a cPanel server with MySQLTuner
Database tuning is an expansive topic, and this guide covers only the basics of editing your MySQL configuration. Large MySQL databases can require a considerable amount of memory. For this reason, we recommend using a [high memory Linode](https://linode.com/pricing#high-memory) for such setups.
> **Note**The steps in this guide require root privileges. Be sure to run the steps below as **root** or with the `sudo` prefix. For more information on privileges see our [Users and Groups](https://linode.com/docs/tools-reference/linux-users-and-groups) guide.
### Tools That Can Help Optimize MySQL[Permalink](https://linode.com/docs/databases/mysql/how-to-optimize-mysql-performance-using-mysqltuner/#tools-that-can-help-optimize-mysql)
In order to determine if your MySQL database needs to be reconfigured, it is best to look at how your resources are performing now. This can be done with the [top command](https://linode.com/docs/uptime/monitoring/top-htop-iotop) or with the Linode [Longview](https://linode.com/docs/platform/longview/longview) service. At the very least, you should familiarize yourself with the RAM and CPU usage of your server, which can be discovered with these commands:
```
echo [PID] [MEM] [PATH] && ps aux | awk '{print $2, $4, $11}' | sort -k2rn | head -n 20
ps -eo pcpu,pid,user,args | sort -k 1 -r | head -20
```
#### MySQLTuner[Permalink](https://linode.com/docs/databases/mysql/how-to-optimize-mysql-performance-using-mysqltuner/#mysqltuner)
The [MySQLTuner](http://mysqltuner.com/) script assesses your MySQL installation, and then outputs suggestions for increasing your server’s performance and stability.
1. Download and run MySQLTuner:
```
curl -L http://mysqltuner.pl/ | perl
```
2. It outputs your results:
```
>> MySQLTuner 1.4.0 - Major Hayden
>> Bug reports, feature requests, and downloads at http://mysqltuner.com/
>> Run with '--help' for additional options and output filtering
Please enter your MySQL administrative login: root
Please enter your MySQL administrative password:
[OK] Currently running supported MySQL version 5.5.41-0+wheezy1
[OK] Operating on 64-bit architecture
-------- Storage Engine Statistics -------------------------------------------
[--] Status: +ARCHIVE +BLACKHOLE +CSV -FEDERATED +InnoDB +MRG_MYISAM
[--] Data in InnoDB tables: 1M (Tables: 11)
[--] Data in PERFORMANCE_SCHEMA tables: 0B (Tables: 17)
[!!] Total fragmented tables: 11
-------- Security Recommendations -------------------------------------------
[OK] All database users have passwords assigned
-------- Performance Metrics -------------------------------------------------
[--] Up for: 47s (113 q [2.404 qps], 42 conn, TX: 19K, RX: 7K)
[--] Reads / Writes: 100% / 0%
[--] Total buffers: 192.0M global + 2.7M per thread (151 max threads)
[OK] Maximum possible memory usage: 597.8M (60% of installed RAM)
[OK] Slow queries: 0% (0/113)
[OK] Highest usage of available connections: 0% (1/151)
[OK] Key buffer size / total MyISAM indexes: 16.0M/99.0K
[!!] Query cache efficiency: 0.0% (0 cached / 71 selects)
[OK] Query cache prunes per day: 0
[OK] Temporary tables created on disk: 25% (54 on disk / 213 total)
[OK] Thread cache hit rate: 97% (1 created / 42 connections)
[OK] Table cache hit rate: 24% (52 open / 215 opened)
[OK] Open file limit used: 4% (48/1K)
[OK] Table locks acquired immediately: 100% (62 immediate / 62 locks)
[OK] InnoDB buffer pool / data size: 128.0M/1.2M
[OK] InnoDB log waits: 0
-------- Recommendations -----------------------------------------------------
General recommendations:
Run OPTIMIZE TABLE to defragment tables for better performance
Enable the slow query log to troubleshoot bad queries
Variables to adjust:
query_cache_limit (> 1M, or use smaller result sets)
```
MySQLTuner offers suggestions regarding how to better the database’s performance. If you are wary about updating your database on your own, following MySQLTuner’s suggestions is one of the safer ways to improve your database performance.
### Tuning MySQL[Permalink](https://linode.com/docs/databases/mysql/how-to-optimize-mysql-performance-using-mysqltuner/#tuning-mysql)
When altering the MySQL configuration, be alert to the changes and how they affect your database. Even when following the instructions of programs such as [MySQLTuner](https://linode.com/docs/databases/mysql/how-to-optimize-mysql-performance-using-mysqltuner/#mysqltuner), it is best to have some understanding of the process.
The file you are changing is located at `/etc/mysql/my.cnf`.
> **Note**
>
> Prior to updating the MySQL configuration, create a backup of the `my.cnf` file:
>
> ```
> cp /etc/mysql/my.cnf ~/my.cnf.backup
> ```
>
> Best practice suggests that you make small changes, one at a time, and then monitor the server after each change. You should restart MySQL after each change:
>
> For systems without systemd:
>
> ```
> systemctl restart mysqld
> ```
>
> For distributions which don’t use systemd:
>
> ```
> service mysql restart
> ```
>
> When changing values in the `my.cnf` file, be sure that the line you are changing hasn’t been commented out with the pound (`#`) prefix.
**key\_bufferPermalink**
Changing the `key_buffer` allocates more memory to MySQL, which can substantially speed up your databases, assuming you have the memory free. The `key_buffer` size should generally take up no more than 25 percent of the system memory when using the MyISAM table engine, and up to 70 percent for InnoDB. If the value is set too high, resources are wasted.
According to MySQL’s documentation, for servers with 256MB (or more) of RAM with many tables, a setting of 64M is recommended. Servers with 128MB of RAM and fewer tables can be set to 16M, the default value. Websites with even fewer resources and tables can have this value set lower.
**max\_allowed\_packetPermalink**
This parameter lets you set the maximum size of a sendable packet. A packet is a single SQL state, a single row being sent to a client, or a log being sent from a master to a slave. If you know that your MySQL server is going to be processing large packets, it is best to increase this to the size of your largest packet. Should this value be set too small, you would receive an error in your error log.
**thread\_stackPermalink**
This value contains the stack size for each thread. MySQL considers the default value of the `thread_stack` variable sufficient for normal use; however, should an error relating to the `thread_stack`be logged, this can be increased.
**thread\_cache\_sizePermalink**
If `thread_cache_size` is “turned off” (set to 0), then any new connection being made needs a new thread created for it. When the connections disengage the thread is destroyed. Otherwise, this value sets the number of unused threads to store in a cache until they need to be used for a connection. Generally this setting has little affect on performance, unless you are receiving hundreds of connections per minute, at which time this value should be increased so the majority of connections can be made on cached threads.
**max\_connectionsPermalink**
This parameter sets the maximum amount of *concurrent* connections. It is best to consider the maximum amount of connections you have had in the past before setting this number, so you’ll have a buffer between that upper number and the `max_connections` value. Note, this does not indicate the maximum amount of *users* on your website at one time; rather it shows the maximum amount of users making *requests* concurrently.
**table\_cachePermalink**
This value should be kept higher than your `open_tables` value. To determine this value use:
```
SHOW STATUS LIKE 'open%';
```
### More Information
You may wish to consult the following resources for additional information on this topic. While these are provided in the hope that they will be useful, please note that we cannot vouch for the accuracy or timeliness of externally hosted materials.
* [MySQL Documentation Library](http://dev.mysql.com/doc/index.html)
* [MySQL Tuning Server Parameters](http://dev.mysql.com/doc/refman/5.7/en/server-parameters.html)
* [MySQLTuner](http://mysqltuner.com/)
# Clear disk space on cPanel Server by removing backups, trash etc
```
for user in `/bin/ls -A /var/cpanel/users` ; do rm -fv /home*/$user/backup-*$user.tar.gz ; done
rm -fv /home*/*/tmp/Cpanel_*
rm -rfv /home*/*/softaculous_backups
rm -rfv /home*/*/public_html/wp-content/updraft/*
find /home*/*/.trash/* -exec rm -rf {} \;
#find /home -type f -name error_log -exec rm -f {} \;
yum clean all
rm -rf /var/cache/yum
find /home -type f -name error_log -exec rm -f {} \;
```
# Add monitoring script to server for monitoring top, iostat etc
Create a directory under /var/log/server-status
Inside this directory, create a file called ‘getstats.sh’ and paste the following contents…
```
#!/bin/sh
path="/var/log/server-status"
ddd=`date +%Y-%m-%d`
logfile=$path/$ddd/logfile.txt
### Check if direction to store log exists, if doesn't - create it ###
if [ ! -d $path/$ddd ]; then
mkdir $path/$ddd
fi
### Add blank line and head 5 of top on every script run ###
echo >> $logfile
echo "!-------------------------------------------- top 20" >> $logfile
COLUMNS=512 /usr/bin/top -cSb -n 1 | head -20 >> $logfile
echo "!---------------------------------------- vmstat 1 4" >> $logfile
/usr/bin/vmstat 1 4 >> $logfile
### Check if load average is greater or equal 7 if it does - collect needed stats ###
if [ `cat /proc/loadavg | /usr/bin/awk '{ print $1 }' | /usr/bin/cut -d. -f1-1` -ge 3 ]
then
### INSERT custom gathering commands after this line, they are executed only when LA is above 7
###
echo "!---------------------------------- netstat by state" >> $logfile
/bin/netstat -an|awk '/tcp/ {print $6}'|sort|uniq -c >> $logfile
echo "!-------------------------------- ps by memory usage" >> $logfile
ps aux | sort -nk +4 | tail >> $logfile
echo "!------------------------------------- iotop -b -n 3" >> $logfile
/usr/sbin/iotop -b -o -n 3 >> $logfile
echo "!------------------------------------------- ps axuf" >> $logfile
ps axuf >> $logfile
echo "!---------------------------- mysqladmin processlist" >> $logfile
/usr/bin/mysqladmin processlist -v >> $logfile
fi
### Do something more if load average does not match threshold ###
### Remove directories older then 30 days ###
cd $path
ls -1r|grep -v getstatus|sed -n '30,$p'|xargs -i rm -rf "{}"
```
You will also need to create a cron for this…
```
vi /etc/cron.d/getstats
```
```
* * * * * root /usr/bin/flock -n /var/run/cloudlinux_getstats.cronlock /bin/sh /var/log/server-status/getstats.sh >/dev/null 2>&1
```
# Testing your site before ‘go-live’ by editing your hosts file
We all know the importance of testing your site after a migration to your hosting account. More often than not we wish to do this prior to updating the domain’s DNS nameservers to Brixly. We have a few options that allow us to do this – via the control panel, as well as by modifying your local PC’s hosts file.
### The cPanel (Linux) Temporary URL:
Every cPanel user’s main domain is accessible via the IP address of the server and their username. For example:
```
http://1.1.1.1/~username
```
(You will need to replace the “IP Address” with the actual IP Address of the server, as well as “username” with your cPanel user to utilize this).
The following addresses will bring you to the contents of your main public\_html folder, you can append subfolders to the URLs for further testing if needed, for example:
```
http://1.1.1.1/~username/subfolder/anotherfolder/yetanotherfolder/
```
### How To Change your Computer’s Hosts File:
Temporary URLs work well in most cases, but in other cases some content management systems rely heavily on DNS and redirections in order to function properly, making testing via temporary URLs difficult as clicking links will take you to the domain name again, itself. In cases like this – we update the hosts file for testing on your local PC.
One thing to keep in mind, regardless of which operating system you use at home, you can simply add your host information to the bottom of the file – in the following format:
```
X.X.X.X domain.com
X.X.X.X www.domain.com
```
X.X.X.X will be the IP address we are going to force your computer (and only your computer) to resolve the domain to. This will be the IP address assigned to the domain name. Domain.com will be the domain name to test prior to updating the DNS.
Another thing to keep in mind when testing your site using the hosts file method- after updating your hosts file, **you will need to clear the cache and cookies from your web browser and restart the browser in order for things to take full effect. In some instances, you may need to flush your DNS cache on the local system as well.**
#### Updating a Hosts File on Windows:
Go to Start -> All Programs -> Accessories
Right click on Notepad, and select “Run as Administrator”
Click “Continue” at the UAC prompt.
In the notepad application – From the toolbar, go to File -> Open
Open the Following File:
```
C:\Windows\System32\drivers\etc\hosts
```
(This path may vary based on your drive/installation configuration, and you may need to choose the file type to open from the drop down menu as “All Files” in order to see your hosts file).
Add your new host entry to the bottom of the file and save.
[](http://blog.arvixe.com/wp-content/uploads/2013/02/change_hosts_file.png)
*figure 2. A Windows 7 hosts file with an example entry added so that mydomain.com resolves to the IP of 1.2.3.4*
#### Updating a Hosts File in Linux:
Open up your favourite terminal application (Most flavours store the default terminal application in the Accessories folder). Also, in this example, we are using the text editor called “nano” which is pre-installed on most Linux distributions. You may also use other text editors such as vim or emacs if you wish.
If you are already logged in as user root, run:
```
nano /etc/hosts
```
If you are logged in as a non-root user, run:
```
sudo nano /etc/hosts
```
Then authenticate with your password to grant root access.
Once the text editor application opens, add your new host entry to the bottom of the file and save.
#### Updating a Hosts File on a Mac:
You will need to launch your Terminal, which you can search for using Spotlight, or you may also access this via Applications/Utilities
Once the terminal application has launched, type the following into the terminal command line:
sudo nano /private/etc/hosts
Enter the Administrator password.
After the file has opened, add your new host entry to the bottom of the file and save.
**Again, make sure you clear the cache from your browser and in some cases the DNS cache may need to be flushed as well.**
*After you update the DNS for your site, make sure to remove any host entries that you may have added during the process to ensure the domain is resolving in the same manner on your local system as other users on the internet!*
# cPanel - Domains
A quick overview on how to manage domain section in cPanel.
# How to use the Site Publisher in cPanel
```
cPanel > Home > Domains > Site Publisher
```
### Overview
This interface enables you to quickly create a simple website, even if you have never created a website before. When you use this interface, you will select an appropriate template for your website, and then enter the website content that the template requests.
For example, you can use this interface to create a simple website with your business’s information, or to create a placeholder page while you prepare a more elaborate website.
Note:
Hosting providers and third-party developers can create and add additional Site Publisher templates. For more information, read our [Guide to Site Publisher Templates](https://documentation.cpanel.net/display/SDK/Guide+to+Site+Publisher+Templates) documentation.
### Create or modify a Site Publisher website
Note:
When you select an option, the interface automatically hides that section of the interface and displays the next section. To return to a section, click that section’s title.
To create or modify a Site Publisher website for one of your domains, perform the following steps:
1. Select a domain from the list of available domains, addon domains, and subdomains.
* If you only own a single domain, or if you accessed this interface via a link after subdomain or addon domain creation, the system automatically selects that domain and proceeds to the next step.
* For more information about domain selection, read the [Select a Domain](https://documentation.cpanel.net/display/68Docs/Site+Publisher#SitePublisher-Domain) section of this document.
2. Select a template from the available options.
* The *Select a Template* section of this interface displays a preview image, name, and description for each available Site Publisher template.
* If you selected a domain that already uses a Site Publisher website, the system preselects the current template.
3. Enter or update the desired website content.
Note:
The template that you select determines the content that you enter in the *Customize and Publish* section.
4. Click *Publish*. A confirmation message will appear with a link to your new website.
5. Warning:
If the directory that will contain your Site Publisher website already contains other files or directories, the system will perform the following actions when you click *Publish*:
1. Back up the directory’s contents. For more information, read the [Site Publisher files](https://documentation.cpanel.net/display/68Docs/Site+Publisher#SitePublisher-files) section below.
2. Delete any existing files that use the same filenames as your new Site Publisher website’s files.
3. Save the new website’s files to the directory.
Note:
You can also click the following helpful links for other common tasks within your cPanel account:
* *Add an email account.* — Create and manage email addresses in cPanel’s [*Email Accounts*](https://documentation.cpanel.net/display/68Docs/Email+Accounts) interface (*cPanel >> Home >> Email >> Email Accounts*).
* *Manage my website’s files*. — Upload and manage files in cPanel’s [*File Manager*](https://documentation.cpanel.net/display/68Docs/File+Manager) interface (*cPanel >> Home >> Files >> File Manager*).
* *Connect to this website with Web Disk.* — Create Web Disk accounts in cPanel’s [*Web Disk*](https://documentation.cpanel.net/display/68Docs/Web+Disk) interface (*cPanel >> Home >> Files >> Web Disk*) to upload and manage files from your local computer.
* *Publish another Site Publisher website*. — Use this interface to create another Site Publisher website.
#### Select a Domain
The *Select a Domain* section of the interface lists the domain name and website directory (document root) for every domain that your cPanel account owns. If a domain currently uses a Site Publisher website, the interface also lists the website’s template’s name.
* Click the domain name to open the domain in a new browser window.
* Click the website directory to open that directory in cPanel’s [*File Manager*](https://documentation.cpanel.net/display/68Docs/File+Manager) interface (*cPanel >> Home >> Files >> File Manager*) in a new browser window.
If your cPanel account owns a large number of domains, the interface automatically paginates the table. Click the page numbers in the top right corner of the section to navigate between pages of domains, or use the *Search* text box at the top of the list to search for a domain.
### Site Publisher files
When you publish a Site Publisher website, cPanel automatically performs the following actions:
1. The script saves a copy of the domain’s document root’s current contents as a tarball in the `/home/user/site_publisher/backups/` directory, where `user` represents your cPanel account’s username.
Note:
If the system encounters a file system or file quota error during this step, it will **not** save the tarball and will **not** publish the new Site Publisher website.
2. The system deletes any existing Site Publisher backups that are more than 30 days old.
3. The system generates the new Site Publisher website’s files and stores them in the domain’s document root.
* If one of the new website’s files conflicts with an existing file, the system overwrites the existing file with the new file.
* If the system encounters an error during this step, it restores the website’s original contents from the backup tarball and does **not** publish the new Site Publisher website.
* The system saves configuration information for the new website in the `/home/user/site_publisher/configurations/` directory, where `user` represents your cPanel account’s username. It saves this file as the `home-user-public_html-example.com.json` file, where `home-user-public_html-example.com` represents the Site Publisher website’s target directory, with hyphens (`-`) instead of slashes (`/`).
Important:
The configuration file stores all of the data for your Site Publisher website. We **strongly** recommend that you do **not** modify this file directly. Instead, always use cPanel’s *Site Publisher* interface (*cPanel >> Home >> Domains >> Site Publisher*) to modify Site Publisher websites.
Your selected template determines the other files that your website uses. These files may include HTML files, images, or other types of files.
* For information about template development, read our [Guide to Site Publisher Templates](https://documentation.cpanel.net/display/SDK/Guide+to+Site+Publisher+Templates) documentation.
* For more information about individual templates, contact your hosting provider or the template creator.
# Managing addon domains in cPanel
An addon domain is an additional domain that the system stores as a subdomain of your main site. Use addon domains to host additional domains on your account.
{% code title="Location under cPanel" %}
```
cPanel > Home > Domains > Addon Domains
```
{% endcode %}
## Overview
Addon domains allow you to control multiple domains from a single account. An addon domain links a new domain name to a directory in your account, and then stores its files in that directory.
Important:
Your hosting provider **must** specify a maximum number of addon domains that you can create (greater than `0`) in the [*Modify an Account*](https://documentation.cpanel.net/display/68Docs/Modify+an+Account) interface (*WHM* >> *Home >> Account Functions >> Modify an Account*). A value of `0` **prevents** addon domain creation.
## Create an addon domain
To create an addon domain, perform the following steps:
1. Enter the new addon domain’s name in the *New Domain Name* text box. When you enter the domain name, cPanel automatically populates the *Subdomain* and *Document Root* text boxes.
2. To create multiple addon domains with the same username and different extensions (for example, `example.com` and `example.net` ), manually enter a unique username in the *Subdomain* text box.
3. To choose a document root other than the automatically populated value, manually enter the directory name in the *Document Root* text box.
4. To create an FTP account for the new addon domain, select the *Create an FTP account associated with this Addon Domain* checkbox.\
If you select this checkbox, additional settings will appear:
* cPanel automatically populates the *FTP Username* text box. To select a different FTP account username, manually enter the desired username.
* Enter and confirm the new password in the appropriate text boxes.
Notes:
* The system evaluates the password that you enter on a scale of 100 points. `0` indicates a weak password, while `100` indicates a very secure password.
* Some web hosts require a minimum password strength. A green password *Strength* meter indicates that the password is equal to or greater than the required password strength.
* Click *Password Generator* to generate a strong password. For more information, read our [Password & Security](https://documentation.cpanel.net/display/68Docs/Password+and+Security) documentation.
5. Click *Add Domain*.
To add files to the addon domain’s home directory, click [*File Manager*](https://documentation.cpanel.net/display/68Docs/File+Manager).
When you create an addon domain in the cPanel interface, the system **automatically** creates a subdomain. To alter or delete the subdomain after you create it, you may alter or delete the information that the addon domain’s website displays.
Also, when you create an addon domain, parked domain, subdomain, or main domain, the system will attempt to automatically secure that domain with the best-available existing certificate. If no certificate exists, the system will generate a self-signed certificate to secure the new domain.
If [AutoSSL](https://documentation.cpanel.net/display/68Docs/Manage+AutoSSL) is enabled for the account that owns the new domain, the system will add a request for an AutoSSL certificate to secure the new domain and install it when it becomes available.
Note:
The system stores and displays the addon domain’s traffic statistics as part of the subdomain’s traffic statistics.
## Modify Addon Domain
### Modify the document root for an addon domain
To modify the document root for an addon domain, perform the following steps:
1. Click the edit icon () for the addon domain that you wish to manage under the *Document Root* column.
2. Enter the new file path to the addon domain’s document root in the available text box.
3. Click *Change*.
### Enable or disable addon domain redirection
To disable or enable redirection of an addon domain, perform the following steps:
1. Click *Manage Redirection* for the addon domain that you wish to manage.
2. To redirect the domain, enter the link to which you wish to redirect the addon domain.
3. Click *Save*, or, to disable the redirection, click *Disable Redirection*.
### Remove an addon domain
To remove an addon domain, perform the following steps:
1. Click *Remove* for the addon domain that you wish to remove.
2. Click *Yes*.
## Email accounts in addon domains
Note:
In the following examples:
* `old_account` represents the cPanel account **from** which you wish to move the addon domain’s email account or accounts.
* `new_account` represents the cPanel account **to** which you wish to move the addon domain’s email account or accounts.
* `domain_name` represents the addon domain’s name.
* `email_account` represents the name of the addon domain’s email account that you wish to move.
You can create email accounts for addon domains. To learn how to set up an email account for an addon domain, read our [Email Accounts](https://documentation.cpanel.net/display/68Docs/Email+Accounts) documentation.
When you remove the addon domain, its email accounts will no longer appear in the cPanel interface. However, the contents for this email account still exist in the `home/username/mail` directory.
* If you add the domain back to the same account as the primary domain, an addon domain, or a parked domain, the email accounts reappear in the cPanel interface.
* If you move the domain to a different account, you **must** add the email accounts manually and move the contents of the email account manually. The email accounts **must** follow the same name and domain format that they previously followed.
* Use the *Email Accounts* interface to add new accounts, or run the `/scripts/addpop` script to manually add new email accounts.
* To move **one** email account under a domain, you can run the following command:
| `mv` `/home/old_account/mail/domain_name/email_account` `/home/new_account/mail/domain_name/` |
| --------------------------------------------------------------------------------------------- |
After you run this command, the system creates the `/home/new_account/mail/domain_name/` directory.
* To move **all** the email accounts under a domain, run the following command:
| `mv /home/old_account/mail/domain_name /home/new_account/mail` |
| -------------------------------------------------------------- |
After you move the files, run the following command to change the ownership of the new account:
| `chown` `-R new_account:new_account /home/new_account/mail/domain_name.` |
| ------------------------------------------------------------------------ |
Note:
Verify ownership of the email account after you move it.
## Search addon domains
To search the list of addon domains, perform the following steps:
1. Enter the search criteria into the *Search* box.
2. Click *Go*.
The interface lists results that match your search criteria.
## Addon and alias domains
| Characteristic | Addon domains | Alias domains |
| ------------------------------------------------------------------------------ | ------------- | ------------- |
| The main domain appears in the address bar. | Yes | No |
| The domain uses the following Apache directive: | VirtualHost | ServerAlias |
| The domain uses separate logs. | Yes | No |
| The domain uses separate stats. | Yes | No |
| The system treats the domain as a subdomain (other than the URL). | Yes | No |
| This type of domain is ideal for multiple domains that share the same address. | No | Yes |
# What is the difference between addon domains and ‘alias’ domains?
### Addon and alias domains
| Characteristic | Addon domains | Alias domains |
| ------------------------------------------------------------------------------ | ------------- | ------------- |
| The main domain appears in the address bar. | Yes | No |
| The domain uses the following Apache directive: | VirtualHost | ServerAlias |
| The domain uses separate logs. | Yes | No |
| The domain uses separate stats. | Yes | No |
| The system treats the domain as a subdomain (other than the URL). | Yes | No |
| This type of domain is ideal for multiple domains that share the same address. | No | Yes |
# Managing subdomains in cPanel
A subdomain is a subsection of your website that can exist as a new website without a new domain name. Use subdomains to create memorable URLs for different content areas of your site. For example, you can create a subdomain for your blog that is accessible through **blog.example.com** and **[www.example.com/blog](http://www.example.com/blog)**
*(cPanel >> Home >> Domains >> Subdomains)*
## Overview
This interface allows you to create and manage subdomains for your cPanel account. A subdomain is a subsection of your website that sometimes exists as a subdirectory of your `public_html` (document root) directory or your account’s home directory. Subdomains use a prefix in conjunction with the domain name.
For example, if the registered domain name is `example.com`, the subdomain will be `prefix.example.com`. You can use subdomains to create unique user accounts for “vanity domains.” This is helpful if, for example, you have a blog, or any other type of website that uses a domain specifically titled for a user.
Note:
Visitors **cannot** view your subdomain immediately. Changes to DNS records may require two days or more to reach all of the nameservers on the Internet.
## Create a subdomain
To create a subdomain, perform the following steps:
1. Enter the desired prefix in the *Subdomain* text box.
2. Select the desired main domain from the menu.
3. Enter the home directory for the subdomain in the *Document Root* text box.
Note:
This directory contains the files that pertain to the subdomain.
4. Click *Create*.
Warning:
Due to the order in which Apache processes its configuration file, wildcard subdomains may disrupt the functionality of proxy subdomains. We **strongly** recommend that you use wildcard subdomains only when absolutely necessary, or when you do not need to use proxy subdomains.
When you create an addon domain, parked domain, subdomain, or main domain, the system will attempt to automatically secure that domain with the best-available existing certificate. If no certificate exists, the system will generate a self-signed certificate to secure the new domain.
* If [AutoSSL](https://documentation.cpanel.net/display/68Docs/Manage+AutoSSL) is enabled for the account that owns the new domain, the system will add a request for an AutoSSL certificate to secure the new domain and install it when it becomes available.
* To open the subdomain’s main directory with the [*File Manager*](https://documentation.cpanel.net/display/68Docs/File+Manager) interface (*cPanel >> Home >> Files >> File Manager)*, click the link under *Document Root* that corresponds to that subdomain.
## Search subdomains
To search existing subdomains, perform the following steps:
1. Enter the search criteria in the *Search* text box.
2. Click *Go*.
## Modify a subdomain
### Modify the document root for a subdomain
To modify the document root for a subdomain, perform the following steps:
1. Click the notepad icon that corresponds to the subdomain that you want to manage.
2. Enter the new file path that you want to use as the document root in the available text text box.
3. Click *Change*.
### Enable or disable subdomain redirection
To enable or disable redirection of a subdomain, perform the following steps:
1. Click the *Manage Redirection* link that corresponds to the subdomain that you wish to manage.
2. If you wish to redirect the subdomain, enter the link to which you want to redirect the subdomain in the available text text box.
3. Click *Save*.
4. To disable the redirect, click *Disable Redirection*.
### Remove a subdomain
To remove an existing subdomain, perform the following steps:
1. Click the *Remove* link that corresponds to the subdomain that you want to remove.
2. Click *Yes* to confirm that you want to remove the subdomain.
3. To keep the subdomain, click *No*.
# Managing domain aliases in cPanel
Domain aliases make your website available from another domain name. For example, you can make **[www.example.net](http://www.example.net)** and **[www.example.org](http://www.example.org)** show content from **[www.example.com](http://www.example.com)**
{% code title="Location Under cPanel" %}
```
cPanel > Home > Domains > Aliases
```
{% endcode %}
### Overview
Domain aliases are domains that you own, but which do not contain any content. Instead, they point to the contents of another domain or subdomain on your account. This is useful, for example, to hold a domain that you will later sell, or to redirect traffic to another domain.
Important:
Unless your hosting provider enables the *Allow Remote Domains* option in the [*Tweak Settings*](https://documentation.cpanel.net/display/68Docs/Tweak+Settings) interface (*WHM >> Home >> Server Configuration >> Tweak Settings*), you **must** perform the following actions **before** you attempt to create a domain alias:
* You **must** register the domain name with a valid registrar.
* You **must** point the domain to your account’s nameservers.
### Create a New Alias
To add a domain alias, enter the domain name in the text box and click *Add Domain*.
To open the alias domain’s home directory with the [*File Manager*](https://documentation.cpanel.net/display/68Docs/File+Manager) interface (*cPanel >> Home >> Files >> File Manager*), click the link that corresponds to that alias under the *Domain Root* column of the *Remove Aliases* table.
When you create an addon domain, parked domain, subdomain, or main domain, the system will attempt to automatically secure that domain with the best-available existing certificate. If no certificate exists, the system will generate a self-signed certificate to secure the new domain.
If [AutoSSL](https://documentation.cpanel.net/display/68Docs/Manage+AutoSSL) is enabled for the account that owns the new domain, the system will add a request for an AutoSSL certificate to secure the new domain and install it when available.
Note:
You can create email accounts for domain aliases. For more information, read the [Alias domain email accounts](https://documentation.cpanel.net/display/68Docs/Aliases#Aliases-EmailAccounts) section below.
### Enable or disable domain alias redirection
To enable or disable redirection of a domain alias, perform the following steps:
1. Click *Manage Redirection* for the domain alias that you wish to manage.
2. To redirect the domain, enter the link to which you wish to redirect the domain alias in the text box.
3. Click *Save*. To disable the redirection, click *Disable Redirection*.
### Remove Aliases
Notes:
* We **strongly** recommend that you create a full account backup before you perform this action.
* This action **only** removes the domain alias, its `vhost` entries, and its DNS entries. The system retains the alias’s directory contents.
To remove an existing domain alias, perform the following steps:
1. Click *Remove* for the alias that you wish to remove.
2. Click *Yes* to confirm that you wish to remove the domain alias. To retain the domain alias, click *No*.
### Search aliases
To search through the list of domain aliases, enter the search criteria in the *Search* text box and click *Go*. Results that match your search criteria will populate the table.
### Domain alias email accounts
To add new email accounts, use cPanel’s [*Email Accounts*](https://documentation.cpanel.net/display/68Docs/Email+Accounts) interface (*cPanel >> Home >> Email >> Email Accounts*), or run the `/scripts/addpop` script from the command line.
* To move **one** email account under a domain, run the following command:
| `mv` `/home/old_account/mail/domain_name/email_account` `/home/new_account/mail/domain_name/` |
| --------------------------------------------------------------------------------------------- |
When you run this command, the system creates the `/home/new_account/mail/domain_name/` directory.
* To move **all** of the email accounts under a domain, run the following command:
| `mv` `/home/old_account/mail/domain_name` `/home/new_account/mail` |
| ------------------------------------------------------------------ |
* After you move the files, change the new account’s ownership with the following command:
| `chown` `-R new_account:new_account /home/new_account/mail/domain_name` |
| ----------------------------------------------------------------------- |
Note:
Make certain that you verify ownership of the email account after you move it.
If you remove the domain alias, its email accounts will no longer appear in the [*Email Accounts*](https://documentation.cpanel.net/display/68Docs/Email+Accounts) interface (*cPanel >> Home >> Email >> Email Accounts*). However, the email accounts’ contents still exist in the mail folder of the user’s `home/username/mail/` directory.
* If you add the domain again, to the same account as the primary domain, an addon domain, or an alias, the email accounts reappear in the interface.
* If you change the account’s primary domain name to the un-aliased domain name, the email accounts reappear in the interface.
* You or your hosting provider can perform this action in WHM’s [*Modify an Account*](https://documentation.cpanel.net/display/68Docs/Modify+an+Account) interface (*WHM >> Home >> Account Functions >> Modify an Account)*.
* When you perform this action, the former primary domain name’s mailboxes will **not** appear in the [*Email Accounts*](https://documentation.cpanel.net/display/68Docs/Email+Accounts) interface (*cPanel >> Home >> Email >> Email Accounts*). However, the files will still exist.
* If you move the domain to a different account, you **must** add the email accounts manually **and** move the contents of the email accounts manually.
Note:
The email accounts **must** follow the same name and domain formats that they previously followed.
### Addon vs. alias domains
| Characteristic | Addon domains | Alias domains |
| ------------------------------------------------------------------------------ | ------------- | ------------- |
| The main domain appears in the address bar. | Yes | No |
| The domain uses the following Apache directive: | VirtualHost | ServerAlias |
| The domain uses separate logs. | Yes | No |
| The domain uses separate stats. | Yes | No |
| The system treats the domain as a subdomain (other than the URL). | Yes | No |
| This type of domain is ideal for multiple domains that share the same address. | No | Yes |
# Managing domain redirects using cPanel
A redirect allows you to make one domain redirect to another domain, either for a website or a specific web page. For example, create a redirect so that **[www.example.com](http://www.example.com)** automatically redirects users to **[www.example.net](http://www.example.net)**.
```
cPanel > Home > Domains > Redirects
```
## Overview
The *Redirects* interface allows you to send all of the visitors of a domain or particular page to a different URL.
For example, if create a page with a long URL, use the *Redirects* interface to add a redirect from a short URL to the long URL. Visitors can enter the short URL to access the content of the long URL.
Warning:
This feature will **not** function if your System Administrator enabled [ModSecurity](https://documentation.cpanel.net/display/68Docs/ModSecurity+Tools)™.
## Add a redirect
To add a redirect, perform the following actions:
1. Select a redirect type from the *Type* menu.
* *Permanent (301) —* This option notifies the visitor’s browser to update its records.
* *Temporary (302)* — This option does **not** update the visitor’s bookmarks.
2. Select a domain name from the menu, or select \* \**All Public Domains\* \** to redirect all of the domains that your cPanel account controls.
3. In the text box to the right of the domain selection menu, enter the rest of the URL from which you wish for the server to redirect visitors. For example, if you wish to redirect `http://example.com/directory.file.html` to another URL, enter `directory/file.html` in this text box.
4. In the *redirects to* text box, enter the URL to which you wish to redirect users.
Important:
You **must** specify a protocol in this text box. For example, `http://`, `https://`, or `ftp://`.
5. Select one of the following options:
* *Only redirect with www*. — This option only redirects visitors who enter the `www.` prefix before the domain name part of the URL.
* *Redirect with or without [www](http://www).* — This option redirects all users, regardless of whether the visitor enters the `www.` prefix before the domain name part of the URL.
* *Do Not Redirect [www](http://www).* — This option does **not** redirect users who enter the `www.` prefix before the the domain name part of the URL.
6. Select the *Wildcard Redirect* option if you wish to redirect all files within a directory to the same filename in the new directory.
* For example, if you enable the *Wild Card Redirect* option and `example1.com` redirects to `example.com`, then a visitor who tries to access the `http://example1.com/pic.jpg` URL redirects to the `http://example.com/pic.jpg` URL.
7. Click *Add*.
* To test the redirect, click the link under *Directory* in the *Current Redirects* table. If you properly configured the redirect, the system directs you to the original domain.
Important:
If you use a third-party application or content management system to add a redirect, such as WordPress®, the redirect may not function properly. When you add a redirect with cPanel interface, the system places redirect rules at the bottom of the `.htaccess` file. Some third-party applications ignore the rule that you add, because those applications only read rules and configurations that their section of the `.htaccess` file contains.
The following example displays the configuration that you **must** add to the **top** of the `.htaccess` file to add a redirect for the [Drupal](https://www.drupal.org/) content management system.
In the following example:
* `drupal.user.example.com` represents the URL to redirect.
* `http://cpanel.net/` represents the URL to which to redirect.
| 12345678 | `RewriteEngine onRewriteBase /RewriteRule ^index\.php$ - [L]RewriteCond %{HTTP_HOST} ^drupal\.user\.example\.com$ [OR]RewriteCond %{HTTP_HOST} ^www\.drupal\.user\.example\.com$RewriteRule ^cptest$ "http\:\/\/cpanel\.net\/" [R=301,L]` |
| -------- | ---------------------------------------------------------------------------------------------------------------------------------------------------------------------------------------------------------------------------------------------------------------------------- |
Note:
You **cannot** edit a redirect. To modify a redirect, you **must** delete it, and then recreate it.
## Remove a redirect
To remove a redirect, perform the following steps:
1. Click *Delete* next to the redirect that you wish to remove.
2. Click *Yes*.
## Search your redirects
To search your redirects, perform the following steps:
1. Enter the search criteria in the *Search* text box.
2. Click *Go*.
The interface will list the redirects that match your search criteria.
To sort your list of redirects, click the appropriate table heading.
# How to use the Simple Zone Editor in cPanel for managing your DNS Records
DNS converts domain names into computer-readable IP addresses. DNS zone files configure domain names to the correct IP addresses. This feature allows you to create and edit these zone files using a simplified interface.
{% hint style="warning" %}
**Warning:** This interface is deprecated and will be removed in a future release. Use the new [Zone Editor](https://alfa.cloudns.io:2083/cpsess1488551919/frontend/paper_lantern/zone_editor/index.html) to perform the same functions.
{% endhint %}
{% code title="Location under cPanel" %}
```
cPanel > Home > Domains > Simple Zone Editor
```
{% endcode %}
## Overview
Important:
We deprecated this interface in cPanel & WHM version 62. We **strongly** recommend that you use cPanel’s [*Zone Editor*](https://documentation.cpanel.net/display/68Docs/Zone+Editor) interface (*cPanel >> Home >> Domains >> Zone Editor*).
DNS (Domain Name System) is the component of the Internet that converts human-readable domain names (for example, `example.com`) into computer-readable IP addresses (for example, `192.0.32.10`). DNS uses zone files that reside on your server to map domain names to IP addresses.
There are several different types of records in a domain’s zone file. This interface allows you to create and delete A and CNAME (Canonical Name) records.
Note:
You **cannot** set a record’s time to live (TTL) in this interface. Records that you create with this interface default to the TTL that your hosting provider specifies. To set the TTL for a record, use cPanel’s [*Advanced Zone Editor*](https://documentation.cpanel.net/display/68Docs/Advanced+Zone+Editor) interface *(cPanel >> Home >> Domains >> Advanced Zone Editor)*.
## Add an A record
An **A record** is a DNS record that maps hostnames to IP addresses. A records are essential because they allow DNS servers to identify and locate your website and its various services on the Internet. Without appropriate A records, your visitors cannot access your website, FTP site, or email accounts.
To add an A record, perform the following steps:
1. If this account owns more than one domain, select the domain that you wish to manage from the *Domain* menu.
2. Enter the *Name* and *Address* of the A record.
3. Click *Add A Record*.
Warning:
cPanel & WHM configures your DNS records so that visitors can resolve your website and its services (for example, FTP and Email). **Only** add A records when you add a service that cPanel & WHM or your service provider do not provide.
## Add a CNAME record
A **CNAME** **record** creates an alias for another domain name, which DNS looks up. This is useful, for example, if you point multiple CNAME records to a single A record in order to simplify DNS maintenance.
To add a CNAME record, perform the following steps:
1. If this account owns more than one domain, select the domain that you wish to manage from the *Domain* menu.
2. Enter CNAME record in the *Name* and *CNAME* text box.
3. Click *Add CNAME Record*.
## Delete a record
To delete an A or CNAME record, perform the following steps:
1. If this account owns more than one domain, select the domain that you wish to manage from the *Domain* menu.
2. Click the *Delete* link next to the record that you wish to remove.
3. Click *Delete*.
## DNSSEC
Important:
This feature **only** appears if your System Administrator installs PowerDNS in either of the following interfaces:
* WHM’s [*Initial Setup Assistant*](https://documentation.cpanel.net/display/68Docs/Initial+Setup+Assistant).
* WHM’s [*Nameserver Selection*](https://documentation.cpanel.net/display/68Docs/Nameserver+Selection) interface (*WHM >> Home >> Service Configuration >> Nameserver Selection*).
DNS Security Extensions (DNSSEC) add a layer of security to your domains’ DNS records. DNSSEC uses digital signatures and cryptographic keys to validate that DNS responses are authentic. These digital signatures protect clients from various forms of attack, such as Spoofing or a Man-in-the-Middle attack.
Important:
* DNSSEC keys remain on a server after you terminate an account. If you restore an account on the same server from which you deleted it, the account’s DNSSEC keys remain valid.
* If you transfer the account to another server, you **must** reconfigure DNSSEC for the domains and update the domain server records on the registrar. The system does not include DNSSEC keys in an account’s backup file.\
To transfer an account with DNSSEC enabled domains, perform the following steps for each domain:
1. Remove the Domain Server (DS) records from the registrar.
2. Wait for the changes to propagate (up to 72 hours).
3. Disable DNSSEC on the domain (optional).
4. Transfer the account to the new server.
5. Enable DNSSEC on the new server.
If you do not remove the old DS records from the registrar, the domains may produce DNS resolution issues due to invalid DNSSEC responses.
### Enable DNSSEC
To enable DNSSEC for a domain, perform the following steps:
1. If this account owns more than one domain, select the domain that you wish to manage from the *Domain* menu.
2. Click *Enable.* The system will generate a new DNSSEC key, and a new line will appear that contains the following information:
| Column | Description |
| ------------- | --------------------------------------------------------------------------------------------------- |
| *Key Tag* | An integer value that identifies the domain’s DNSSEC record. |
| *Algorithm* | The record’s encrypted signature. |
| *Digest Type* | The algorithm type that constructs the digest. Select the Digest Type that your registrar supports. |
| *Digest* | An alpha-numeric string that the algorithm generates. |
Important:
After you generate the domain’s DNSSEC key, you **must** configure a Domain Server (DS) record with your domain registrar. Click the links below for DS record instructions with some of the most popular domain registrars. GoDaddy Namecheap OpenSRS
### Disable DNSSEC
To disable DNSSEC for a domain, perform the following steps:
1. If this account owns more than one domain, select the domain that you wish to manage from the *Domain* menu.
2. Click *Disable.*
Important:
After you generate the domain’s DNSSEC key, you **must** delete the DS record with your domain registrar. Click the links below for DS record instructions with some of the most popular domain registrars. GoDaddy Namecheap OpenSRS
# How to use the Zone Editor within cPanel to manage your DNS records
DNS converts domain names into computer-readable IP addresses. DNS zone files configure domain names to the correct IP addresses. This feature allows you to create and edit these zone files.
```
cPanel >> Home >> Domains >> Zone Editor
```
## Overview
DNS (Domain Name Service) converts human-readable domain names (for example, `example.com`) to computer-readable IP addresses (for example, `192.0.32.10`). DNS uses zone files that reside on your server to map domain names to IP addresses.
Several different types of records reside in a domain’s zone file. This feature allows you to create, edit, and delete the following records:
* A
* AAAA
* CAA (Certificate Authority Authorization Record)
* CNAME (Canonical Name Record)
* DMARC (Domain-based Message Authentication, Reporting, and Conformance)
* MX (Mail Exchanger)
* SRV (Service Record)
* TXT (Text Record)
Note:
To access all available zone record types, your systems administrator **must** enable the *Advanced Zone Editor* feature in WHM’s [*Feature Manager*](https://documentation.cpanel.net/display/68Docs/Feature+Manager) interface (*WHM >> Home >> Packages >> Feature Manager*).
## Domains
This interface displays your account’s domains. For each domain in the list, you can perform some actions directly. Click the text to perform that action.
| Text | Action |
| --------------- | ----------------------------------------------- |
| *A Record* | Add an A record for this domain. |
| *CNAME Record* | Add a CNAME record for this domain. |
| *MX Record* | Add an MX record for this domain. |
| *DNSSEC Record* | Enable or disable DNSSEC for this domain. |
| *Manage* | Add or edit additional records for this domain. |
To refresh the list of domains, click the gear icon () and select *Refresh List.*
## Manage Zone
This interface displays the zone records for the selected domain. To filter the list of zone records, enter a name in the text box, or select one of the record type filters.
## Add a record
To add a record, perform the following steps:
1. If this account owns more than one domain, click *Manage* next to the domain that you wish to modify.
2. Click the arrow next to *Add Record* to select a record type:
* *Add A Record —* This record maps hostnames to IP addresses. A records allow DNS servers to identify and locate your website and its various services on the Internet. Without appropriate A records, your visitors cannot access your website, FTP site, or email accounts.
Note:
cPanel configures your DNS records so that visitors can resolve your website and its services, such as FTP and email. **Only** add A records when you add a service that cPanel & WHM or your service provider does not provide.
* *Add AAAA Record* — This record maps hostnames to IPv6 addresses.
* *Add CAA Record* — This record allows you to specify which certificate authority (CA) will issue an SSL certificate for a domain. Click to view the CAA parameters
Note:
If no CAA records exist for a domain, all CAs can issue certificates for that domain. If conflicting CAA records already exist, remove the existing CAA records or add one for the desired CA. For example, a CAA record for Comodo would resemble the following example, where `example.com` represents the domain name:
| `example.com. 86400 IN CAA 0 issue "comodoca.com"` |
| -------------------------------------------------- |
For more information about a CA’s requirements, read their documentation.
* *Add CNAME Record* — This record creates an alias for another domain name, which DNS looks up. This is useful, for example, if you point multiple CNAME records to a single A record in order to simplify DNS maintenance.
Note:
You **cannot** point a CNAME record to an IP address.
* *Add DMARC Record* — This record allows you to validate an email message’s sender and filter spam email messages on your domain. If you select this option, the system creates a [TXT record](https://documentation.cpanel.net/display/68Docs/Zone+Editor#ZoneEditor-txtrecord) with a default DMARC record. The system also displays a form that allows you to specify the domain’s DMARC policy (*None, Quarantine,* or *Reject*), as well as the following optional parameters: Click to view the DMARC parameters
3. * *Add MX Record —* This record allows you to route a domain’s incoming mail to a specific server. Changes that you make to a domain’s MX (Mail Exchanger) control where the system delivers email for a domain.
* *Add SRV Record* — This record provides information about available services on specific ports on your server.
Note:
The SRV record **must** point at a hostname with an A (or AAAA) record. You **cannot** point an SRV record at a CNAME record.
* *Add TXT Record —* This record contains text information for various services to read. For example, TXT records can specify data for the SPF, DKIM, or DMARC email authentication systems.\
Click the links below to view examples of each TXT record:
Note:
The TXT record text box accepts invalid data and does **not** issue a warning. SPF Records DKIM Records DMARC Records
Note:
On servers that run CentOS 7, you may see a `named` warning about the absence of SPF resource records on DNS.
* This warning is **not** relevant on CentOS 7 servers, because [RFC 7208 deprecated SPF records](https://tools.ietf.org/html/rfc7208). CentOS 7 servers use TXT records instead of SPF records.
* Red Hat 7.1 and CentOS 7.1 both contain `bind-9.9.4-23.el7`, which is an updated version of BIND that complies with RFC 7208. To resolve this issue, update your operating system to a version that contains the updated version of BIND. For more information, read the [the Red Hat Bugzilla case about SPF record errors](https://bugzilla.redhat.com/show_bug.cgi?id=1215164).
4. Enter the appropriate information for the record type that you selected.
5. Click *Add Record*.
## Edit a record
To edit a record, perform the following steps:
1. If this account owns more than one domain, click *Manage* next to the domain you want to modify.
2. Click *Edit* next to the record that you wish to edit.
3. Change the information in the text boxes as necessary.
4. Click *Edit Record* to save your changes, or click *Cancel* to discard them.
## Delete a record
To delete a record, perform the following steps:
1. If this account owns more than one domain, click *Manage* next to the domain you want to modify.
2. Click *Delete* next to the record that you wish to remove.
3. Click *Delete* i n the confirmation dialog box *.*
## Reset zone files
Warning:
This feature erases **any** modifications that you made to your zone records. The system attempts to save the domain’s TXT entries. We recommend that you record any changes that you wish to save before you use this feature.
To reset your DNS zone files to the defaults that your hosting provider specifies, perform the following steps:
1. If this account owns more than one domain, click *Manage* next to the domain that you wish to reset.
2. Click the gear icon () and select *Reset Zone*.
3. Read the warning about the consequences.
4. Click *Continue* to reset your zone, or *Cancel* to return to the *Manage Zone* interface.
## DNSSEC
Important:
This feature **only** appears if your system administrator disables DNS clustering **and** installs PowerDNS in either of the following interfaces:
* WHM’s [*Initial Setup Assistant*](https://documentation.cpanel.net/display/68Docs/Initial+Setup+Assistant) .
* WHM’s [*Nameserver Selection*](https://documentation.cpanel.net/display/68Docs/Nameserver+Selection) interface (*WHM >> Home >> Service Configuration >> Nameserver Selection*).
DNS Security Extensions (DNSSEC) add a layer of security to your domains’ DNS records. DNSSEC uses digital signatures and cryptographic keys to validate that DNS responses are authentic. These digital signatures protect clients from various forms of attack, such as Spoofing or a Man-in-the-Middle attack.
Important:
* DNSSEC keys remain on a server after you terminate an account. If you restore an account on the same server from which you deleted it, the account’s DNSSEC keys remain valid.
* If you transfer the account to another server, you **must** reconfigure DNSSEC for the domains and update the domain server records on the registrar. The system does **not** include DNSSEC keys in an account’s backup file.
Click here for transfer instructions
### Enable DNSSEC
To enable DNSSEC for a domain, perform the following steps:
1. If this account owns more than one domain, click *DNSSEC* next to the domain you want to modify.
2. Click *Enable.* The system will generate a new DNSSEC key, and a new line will appear that contains the following information:
| Column | Description |
| ------------- | --------------------------------------------------------------------------------------------------- |
| *Key Tag* | An integer value that identifies the domain’s DNSSEC record. |
| *Algorithm* | The record’s encrypted signature. |
| *Digest Type* | The algorithm type that constructs the digest. Select the digest type that your registrar supports. |
| *Digest* | An alpha-numeric string that the algorithm generates. |
Important:
After you generate the domain’s DNSSEC key, you **must** configure a Domain Server (DS) record with your domain registrar. Click the links below for DS record instructions with some of the most popular domain registrars. GoDaddy Namecheap OpenSRS
### Disable DNSSEC
To disable DNSSEC for a domain, perform the following steps:
1. If this account owns more than one domain, click *DNSSEC* next to the domain you want to modify.
2. Click *Disable.*
Important:
After you disable DNSSEC, you **must** delete the DS record with your domain registrar. Click the links below for DS record instructions with some of the most popular domain registrars. GoDaddy Namecheap OpenSRS
# How to redirect all domain ‘alias’ to the main domain using cPanel
If you have multiple domain names linked to your cPanel account as ‘alias’ domains, you can ensure they are all redirected to the main account domain by enabling the following within cPanel…
1. Login to cPanel
2. Go to ‘Nginx Cluster Control’ section and select ‘CLOUDNS’
3. Select the domain you wish to enable the protection for from the dropdown list and click ‘Configure’
4. Select ‘Application Settings’
5. Enable the ‘redirect\_aliases’ option
6. Click ‘Submit’
# How to enable Cloudflare on your cPanel account
## Making the Internet Work the Way It Should
Cloudflare speeds up and protects millions of websites, APIs, SaaS services, and other properties connected to the Internet. Their Anycast technology enables our benefits to scale with every server we add to our growing footprint of data centers.
### PERFORMANCE
Cloudflare dramatically improves website performance through our global [CDN](https://www.cloudflare.com/cdn/?utm_referrer=https://www.google.co.uk/) and web optimization features.
### SECURITY
Cloudflare’s [WAF](https://www.cloudflare.com/waf/?utm_referrer=https://www.google.co.uk/), [DDoS protection](https://www.cloudflare.com/ddos/?utm_referrer=https://www.google.co.uk/), and SSL defend website owners and their visitors from all types of online threats.
### RELIABILITY
With over 35% market share, Cloudflare runs the largest, fastest, and most reliable [managed DNS](https://www.cloudflare.com/dns/?utm_referrer=https://www.google.co.uk/) service in the world.
### INSIGHT
Cloudflare’s network helps identify visitor and bot behavior that isn’t accessible to conventional analytics technologies.
## Enabling CloudFlare
To enable Cloudflare, please do the following…
1. Login to cPanel
2. Go to ‘Software -> Cloudflare’
3. Login
4. Click ‘Enable Cloudflare on this Domain’
# How to check what nameservers a domain is using
There are a number of ways to check this, however we find the most reliable to be a simple ‘whois’ check.
The tool we use most commonly is…
# How to create Custom Nameservers / Vanity Nameservers
We can provide custom name servers with the correct glue records associated, providing that the relevant domain is registered with Vimzaa. This is because only the domain vendor can set glue records.
If your domain is not registered with us, you would need ensure that your domain vendor sets the glue records as the following:\
\
ns1 must be set to X.X.X.X\
ns2 must be set to Y.Y.Y.Y\
\
Where X.X.X.X and Y.Y.Y.Y are the two IP addresses of the cloud that your account is on. You can find this information in your Welcome e-mail.\
\
Once the domain glue records have been set by us or your domain provider, you can then update the domain’s name server settings to use the new NS records. Finally you should ensure that A records are set within your cPanel or Plesk to point to the IP addresses of the cloud that your account is on (as above).\
\
Please contact us if would like assistance in achieving this by opening a support ticket.
# How do I transfer a domain name to Vimzaa?
Before initiating the transfer of a non-UK domain (e.g. .COM / .NET / .ORG) you will need to ensure that it has been unlocked by your current provider. Please check with them if you are unsure.\
\
To transfer a domain name to us, please login to your client area at vimzaa.com and select “Domains -> Transfer Domains to Us”\
\
Next, enter the domain name then click Transfer.
# cPanel - Managing Databases
A quick overiview on how to manage databses in cPanel.
# Managing a MySQL Database in cPanel with phpMyAdmin
## Overview
While creating a database, following are some additional things that they need to organize –
* Creating a database user
* Giving your database user rights to work with your database
Fortunately, cPanel added the **MySQL Database Wizard** that can help in creation of database by following the steps below.
### **How to create database in cPanel using the MySQL Database Wizard-**
* Login to your cPanel account provided by your cPanel hosting provider
* Click the **MySQL Database Wizard** below the Databases
* Enter a name for your database next to **New Database** and click on **Next Step**
* Enter a username Next to **Username**.
* Enter a password next to **Password**, reenter the Password and then click on **Create User**
* On the next page, you can assign rights for the user to the database. Check the box next to **All Privileges**and then click on **Next Step**
You have created the database successfully!
You can handle various options for managing the databases by using phpMyAdmin in cPanel such as:
* **Structure:** Helps to organize your schemas, tables, and columns.
* **SQL:** Runs SQL query/queries on a database.
* **Search:** Searches words or values inside database tables.
* **Query:** SQL defines a set of commands, such as SELECT, INSERT, UPDATE, DELETE, CREATE TABLE and etc.
* **Export:** Exports database in different formats such as CSV, PDF, SQL, XML, Text etc.
* **Import:** Imports database in different formats such as OpenDocument Spreadsheet, CSV, SQL, ESRI Shape file, MediaWiki Table, XML.
* **Operations:** There are various operations which you can execute on the whole database and on a separate table.
* **Triggers:** A trigger is known as database object that is linked with a table, and it activates whenever a particular event (e.g. an insert, update or delete) happens for the table.
The basic functionality of the phpMyAdmin is to manage your databases. Follw the steps below to create database
**Step1:**
Click on the **Databases** tab. Choose the database which you want to manage and click on the database name.
**Step 2:**
After clicking on the database name, you will see the list of **database tables**.
## **Operations to Perform on the Database**
### **Browse**
You can only browse the database tables with existing records. The **Browse** window opens with the records when you click on the table name.
By simply clicking on the Pen symbol, you can edit the selected record.
### **Structure**
In the **structure** screen you will see the structure of database’s table. You will see the field name, their data types, collation, attributes etc. You can change the field’s structure as well as delete a field. Also, you can assign indexes i.e. Primary, Unique, Index, Fulltext.
### **Search**
You can create a search query for the selected table by using **Search** action. Either you can write the WHERE clause or use the “query by example” option. You must click on the Go button to perform search query.
### **Insert**
You can insert the records in database table through the **Insert** action. To insert a new record you need to fill the appropriate values and click on the Go button.
### **Empty**
You can empty your database table using the **Empty** option. It will remove the records and keep the table blank.
### **Drop**
You can delete the table as well as delete stored records in it by using the **Drop** option
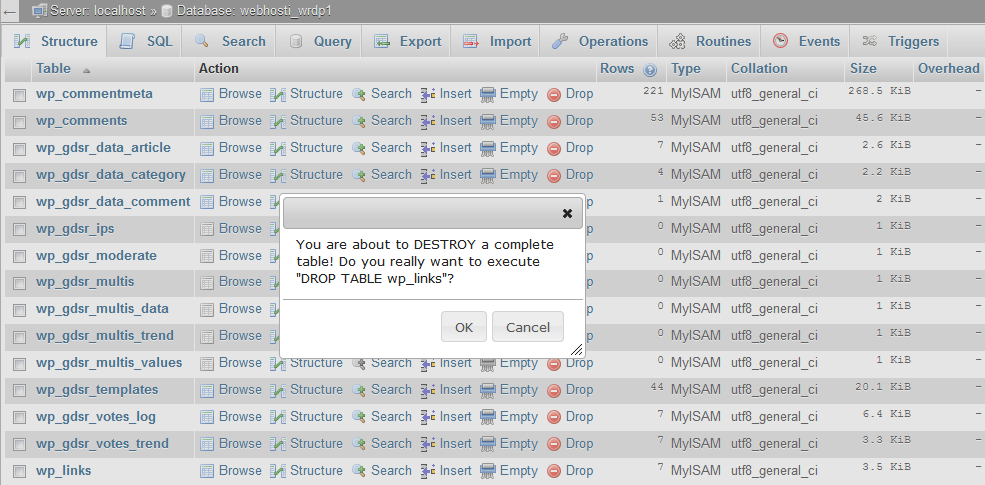
# Manage MySQL Database in cPanel
## Overview
Use this interface to create, manage, and delete MySQL® databases and database users.
Notes:
* We recommend that you use the [*MySQL Database Wizard*](https://documentation.cpanel.net/display/68Docs/MySQL+Database+Wizard) interface (*cPanel >> Home >> Databases >> MySQL Database Wizard*) to create your **first**database and user.
* The maximum length of the database name is 64 characters.
* Due to the method that cPanel & WHM uses to store MySQL database names, each underscore character requires **two** characters of that limit.
* If you enable database prefixing, the maximum length of the database name is **63 characters**, which includes the database prefix and the underscore character. Each additional underscore requires another **two** characters of that limit.
* To enter information in an existing database, use the *phpMyAdmin* interface (*cPanel >> Home >> Databases >> phpMyAdmin*).
Important:
Do **not** use phpMyAdmin to create databases or database users.
## Create a database
To create a database, perform the following steps:
1. In the *New Database* text box, enter a name for the database.
Note:
If your hosting provider has enabled database prefixing, up to the first eight characters of your cPanel account username and an underscore character (*\_*) will precede the *New Database* text box. The system automatically prepends the database name that you enter with this prefix.
2. Click *Create Database*. A new interface will appear.
3. Click *Go Back*. The new database appears in the *Current Databases* table.
## Modify Databases
If you experience problems with a database, check your databases for errors.
### Check a database
To check a database for errors, perform the following steps:
1. In the *Check Database* menu, select the database that you wish to check.
2. Click *Check Database*. A new interface will appear, and the system will check whether the database functions correctly.
* If the system detects a problem in the database, it displays the name of the corrupt table.
* If the *Check Complete* message displays, the database functions correctly.
3. Click *Go Back* to return to the main interface.
## Repair a database
If one of your databases is corrupt, you can attempt to repair it.
To repair a database, perform the following steps:
1. In the *Repair Database* menu, select the database that you wish to repair.
2. Click *Repair Database*. A new interface will appear, and the system will attempt to automatically repair the database.
1. If the system cannot repair the database, it will attempt to determine the source of the corrupt data.
2. If the *Repair Complete* message displays, the system successfully repaired the database.
3. Click *Go Back* to return to the main interface.
## Current Databases
The *Current Databases* table lists the following information for each database in your account:
* *Database* — The name of the database.
* *Size* — The size of the database.
* *Privileged Users* — The users who can manipulate the database.
Note:
When you modify database users, make **certain** that you modify the user’s access to the correct database. Users may have access to more than one database.
* To remove a user from a database, click the trashcan icon () for the desired user, and then click *Revoke User Privileges from Database*.
* To modify a user’s [privileges for a specific database](http://dev.mysql.com/doc/), click the desired username, select and deselect checkboxes to configure the desired privileges, and then click *Make Changes*.
* *Actions* — The available actions for this database. Click the appropriate icon in this column to rename or delete a database.
### Rename a database
{% hint style="warning" %}
Warning:
* It is potentially dangerous to rename a MySQL database. We **strongly** recommend that you perform a backup of the MySQL database before you attempt to rename it.
* When you rename a database, the system terminates all active connections to the database.
* You **must** manually update configuration files and applications to use the new database name.
* The system requires more time to rename larger and more complex databases.
{% endhint %}
To rename a database, perform the following steps:
1. In the *Current Databases* table, click *Rename* for the desired database.
2. Enter the new database name in the *New name* text box.
3. Click *Proceed*.
MySQL does **not** allow you to rename a database. When cPanel & WHM “renames” a database, the system performs the following steps:
1. The system creates a new database.
2. The system moves data from the old database to the new database.
3. The system recreates grants and stored code in the new database.
4. The system deletes the old database and its grants.
Warning:
* If **any** of the first three steps fail, the system returns an error and attempts to restore the database’s original state. If the restoration process fails, the API function’s error response describes these additional failures.
* In rare cases, the system creates the second database successfully, but fails to delete the old database or grants. The system treats the rename action as a success; however, the API function returns warnings that describe the failure to delete the old database or grants.
### Delete a database
To delete a database, perform the following steps:
1. In the *Current Databases* table, click *Delete* for the desired database.
2. To permanently delete the database, click *Delete Database*.
3. Click *Go Back* to return to the main interface.
## Add a MySQL user
After you create a database, add users to the database and configure their privileges.
{% hint style="info" %}
Notes:
* You **must** create MySQL user accounts separately from mail and web administrator accounts.
* You **must** create a user before you can add the user to an existing database.
{% endhint %}
To create a new user account, perform the following steps:
1. Enter a username in the *Username* text box.
Important:
To learn more about database username limits, click your database type: MySQL MariaDB
2. Enter and confirm the new password in the appropriate text boxes.
Notes:
* The system evaluates the password that you enter on a scale of 100 points. `0` indicates a weak password, while `100` indicates a very secure password.
* Some web hosts require a minimum password strength. A green password *Strength* meter indicates that the password is equal to or greater than the required password strength.
* Click *Password Generator* to generate a strong password. For more information, read our [Password & Security](https://documentation.cpanel.net/display/68Docs/Password+and+Security) documentation.
3. Click *Create User*.
4. Click *Go Back* to return to the main interface.
## Add a user to a database
To add a user to a database, perform the following steps:
1. In the *Add User To Database* section of the interface, select the desired user and database from the menus.
2. Click *Add*. The *MySQL Account Maintenance* interface will appear.
3. Select the checkboxes that correspond to the privileges that you wish to grant to the user.
Note:
To grant all of the available privileges to the user, select the *ALL PRIVILEGES* checkbox.
4. Click *Make Changes*.
5. Click *Go Back* to return to the main interface.
For more information about user privileges, read the [MySQL documentation](http://dev.mysql.com/doc/).
## Current Users
The *Current Users* table lists all of your MySQL database users, and allows you to perform the following actions:
* *Change Password* — Click to modify a database user’s password. Enter and confirm the desired password, and then click *Change Password*.
* *Rename* — Click to rename a database user. Enter the desired username, and then click *Change Username*.
* *Delete* — Click to permanently delete a database user, and then click *Delete User* to continue.
# Simplified database creation with the cPanel MySQL Wizard
## Overview
This wizard guides you through the setup of a MySQL® database, user accounts, and user privileges. We recommend that you use this wizard to create your first database and user.
To create additional databases or users, you can also use the [*MySQL Databases*](https://documentation.cpanel.net/display/68Docs/MySQL+Databases) interface (*cPanel >> Home >> Databases >> MySQL Databases*).
## Set up a database
To set up a database, perform the following steps:
1. In the *New Database* text box, enter a name for the database and click *Next Step*.
Note:
The system limits the database name to 64 characters. However, due to the method that cPanel & WHM uses to store MySQL database names, each underscore character requires **two** characters of that limit. Therefore, if your hosting provider enabled database prefixing, the maximum length of the database name is **63 characters**, which includes both the database prefix and the underscore character. Each additional underscore requires another **two** characters of that limit.
2. In the *Username* text box, enter a name for the user who you wish to allow to manage the database.
Important:
To learn more about database username limits, click your database type: `MySQL MariaDB`
3. Enter and confirm the new password in the appropriate text boxes.
Notes:
* The system evaluates the password that you enter on a scale of 100 points. `0` indicates a weak password, while `100` indicates a very secure password.
* Some web hosts require a minimum password strength. A green password *Strength* meter indicates that the password is equal to or greater than the required password strength.
* Click *Password Generator* to generate a strong password. For more information, read our [Password & Security](https://documentation.cpanel.net/display/68Docs/Password+and+Security) documentation.
4. Click *Create User*.
5. Select the checkboxes that correspond to the privileges that you want to grant the user, or select *ALL PRIVILEGES.*
* For more information about user privileges, read the [MySQL documentation](http://dev.mysql.com/doc/).
6. Click *Next Step*.
The system displays a message that states that you successfully set up the database and user account.
### Additional options
After you complete the database setup process, select one of the following options:
* *Add another database* — Click to return to the beginning of the *MySQL Database Wizard* interface to add more databases.
* *Add another MySQL Databases User* — Click to open the [*MySQL Databases*](https://documentation.cpanel.net/display/68Docs/MySQL+Databases) interface (*cPanel >> Home >> Databases >> MySQL Databases*) to create additional user accounts and assign them to a database.
* *Return to Home* — Click to return to the cPanel *Home* interface.
{% hint style="info" %}
**Note:** When you use the *MySQL Database Wizard* interface to add a user and a database, the system automatically grants the user access to the database. You do **not** need to use the *Add User to Database* feature in the *MySQL Databases* interface (*cPanel >> Home >> Databases >> MySQL Databases*).
{% endhint %}
# Managing MySQL databases remotely using ‘Remote MySQL’ in cPanel
## Overview
This feature allows remote hosts (servers) to access MySQL® databases on your account. This is useful, for example, if you wish to allow shopping cart or guestbook applications on other servers to access your databases.
Warning:
Your hosting provider may add remote hosts to this list at the server level. If you see a hostname that you do not recognize or remove a hostname that reappears later, contact your hosting provider.
## Allow a remote server to access your databases
To specify remote hosts that can access MySQL databases on your account, perform the following steps:
1. Enter the host’s name or IP address in the *Host* text box.
Notes:
* You may enter a fully qualified domain name (FQDN) or an IP address.
* You may use the percentage sign character (`%)` as a wildcard. For example, to allow access from all IP addresses that begin with `192.68.0`, enter `192.68.0.%`.
2. Click *Add Host*.
## Deny a remote server access to your databases
To deny database access to a remote host, perform the following steps:
1. Click *Delete* next to the host’s name or IP address.
2. Click *Yes*.
# cPanel - Managing Email Accounts
A quick overview on how to manage Email Accounts Section.
# Managing email accounts with cPanel
Manage the email accounts associated with your domain. Use the *Set Up Mail Client* interface to add an email account to your mobile device or desktop email client.
{% code title="Location Under cPanel" %}
```
cPanel >> Home >> Email >> Email Accounts
```
{% endcode %}
## Overview
This interface allows you to add and manage email accounts for your domains.
## Add an email address
To add a new email address, perform the following steps:
1. Enter the email address that you wish to create in the *Email* text box. If you manage more than one domain, make **certain** to select the appropriate domain from the menu.
2. Enter and confirm the new password in the appropriate text boxes.
Notes:
* The system evaluates the password that you enter on a scale of 100 points. `0` indicates a weak password, while `100` indicates a very secure password.
* Some web hosts require a minimum password strength. A green password *Strength* meter indicates that the password is equal to or greater than the required password strength.
* Click *Password Generator* to generate a strong password. For more information, read our [Password & Security](https://documentation.cpanel.net/display/68Docs/Password+and+Security) documentation.
3. Enter the quota in the *Mailbox Quota* text box. The quota defines the amount of disk space the account may use to store email.
Important:
* Due to mail server constraints, you **cannot** assign quotas that exceed 4096000 MB (4096 GB or 4 TB).You **must** assign the *unlimited* value for quotas that exceed this amount.
* The system calculates mailbox quota use every four hours. For this reason, you may not receive notifications immediately if an email account reaches or exceeds its quota.
4. To send client configuration instructions to the account, select the *Send welcome email with mail client configuration instructions.* option.
Note:
The user can access this message via Webmail, or you can send the message to another mailbox with the *Email Instructions* option in the [*Set Up Email Client*](https://documentation.cpanel.net/display/68Docs/Email+Accounts#EmailAccounts-SetUpEmailClient) interface.
5. Click *Create Account*. The system automatically sends an email to the newly-created email account with a link to the iPhone autoconfigure script.
### Change Password
Important:
Use a secure password. A secure password is **not** a dictionary word, and it contains uppercase and lowercase letters, numbers, and symbols.
To change a password, perform the following steps:
1. Click *Password* for the appropriate email account.
2. Enter and confirm the new password in the appropriate text boxes.
Notes:
* The system evaluates the password that you enter on a scale of 100 points. `0` indicates a weak password, while `100` indicates a very secure password.
* Some web hosts require a minimum password strength. A green password *Strength* meter indicates that the password is equal to or greater than the required password strength.
* Click *Password Generator* to generate a strong password. For more information, read our [Password & Security](https://documentation.cpanel.net/display/68Docs/Password+and+Security) documentation.
3. Click *Change Password* to store the new password.
* If you do not wish to change the password, click *cancel*.
### Change Quota
The quota for an address defines the amount of mail, in Megabytes, that the account can store. When your mailbox exceeds this limit, the system returns any incoming mail to the sender with a message that states that the recipient’s mailbox is full. The system administrator can change this behavior in WHM’s [*Exim Configuration Manager*](https://documentation.cpanel.net/display/68Docs/Exim+Configuration+Manager) interface (*WHM >> Home >> Service Configuration >> Exim Configuration Manager*).
Notes:
* Make **certain** that you track your quota usage, because you **cannot** receive email with a full quota.
* The quota calculation does **not** include your mailbox’s trash folder.
* You **cannot** exceed the quota that your hosting provider sets.
* Due to mail server constraints, you **cannot** assign quotas greater than 4096000 MB (4096 GB or 4 TB). You **must** assign the *unlimited* value for quotas that exceed this amount*.*
* The system calculates mailbox quota use every four hours. For this reason, you may not receive notifications immediately if an email account reaches or exceeds its quota.
To change a mail quota, perform the following steps:
1. Click *Quota*.
2. Enter the new email quota, in Megabytes, in the appropriate text box. For an unlimited account, click *unlimited*.
3. Click *Change Quota* to store the new value.
* To retain the original quota, click *cancel*.
### Manage account suspension
Each row in the *Mail Account* section of the interface displays two status icons.
The first status icon indicates whether the user can log in to, send mail from, and read their mail account. The second status icon indicates whether the mail account can receive incoming email.
| Icon | Status |
| -------------------------------------------------------------------------------------------------------------------------------------- | --------------------------------------------------------------------------------------------------------------------------- |
|  | Incoming email allowed. |
|  | Incoming email suspended.If this is the only service suspended, then the user can still log in to, read, and send email. |
|  | Logins, reading, and sending allowed. |
|  | Logins, reading, and sending suspended.If this is the only service suspended, the mailbox can still receive incoming email. |
To suspend logins, incoming email, or both for an email account, perform the following steps:
1. Click the appropriate *More* link that corresponds to the email account to suspend.
2. Click the appropriate suspension link.
* Click *Suspend* to suspend both incoming mail and logins.
* Click *Suspend Logins* to suspend logins.
* Click *Suspend Incoming* to suspend incoming email.
To unsuspend logins, incoming email, or both for the email account, click *More* and then click the apropriate *Suspend* link.
{% hint style="info" %}
Note: When you suspend an email account, the system also suspends any aliases or forwarders that redirect email to the account.
{% endhint %}
### Delete
To delete an email address, perform the following steps:
1. Click *Delete* for the account to remove.
2. Click *Delete*. To retain the email address, click *cancel*.
### Access Webmail
This feature allows you to access an email account with a web browser. To access this feature, perform the following steps:
1. Click *More* for the appropriate email account.
2. Select *Access Webmail*.
3. Enter the password in the appropriate text box.
4. Click *Log in*.
For more information, read our [Webmail](https://documentation.cpanel.net/display/68Docs/Webmail) documentation.
### Set Up Email Client
This feature automatically configures your email client to access your cPanel email addresses. An email client allows you to access your email account from an application on your computer (for example, Outlook® Express and Apple® Mail).
To access this feature, click *More* for the appropriate email account, and then select *Set Up Email Client*.
{% hint style="info" %}
**Notes:**
* An email client **must** already exist on your computer to automatically configure it with cPanel.
* To use an email client that the interface does not list, you **must** manually configure it. For more information on how to manually configure an email client, review your client’s documentation on the client’s website.
{% endhint %}
To configure your mail client, perform the following steps:
1. Select and download the appropriate configuration file from the list.
2. Run the script file to automatically configure your email client to use the selected address.
When the configuration process finishes, your email client opens automatically and logs in to your email account.
**Notes about email client configuration**
* If you installed a non-wildcard SSL certificate that matches your hostname, the name of your server matches your hostname. For example, if your hostname is `www.example.com` and your SSL certificate matches your hostname, your server’s name is `www.example.com`.
* If you installed a wildcard SSL certificate, the name of your server also matches any subdomains that correspond to the hostname’s domain. For example, an SSL certificate for `*.example.com` is valid for `my.example.com` and `foo.example.com`.
* If you did not install an SSL certificate, the server uses the mail subdomain of your domain. For example, `mail.example.com`. Also, if your certificate does not match your hostname, the server’s name is `mail.example.com`.
**Email Instructions**
To send a mail account’s client configuration instructions to a different email address, enter the address in the *Email Instructions* text box and click *Send*.
### Email subaddresses
This feature, also known as plus addressing, allows senders to route a message directly to the folder of a mailbox.
Email subaddresses use the `username+folder@domain` format, where `username` represents the username of the mailbox and `folder` represents the folder’s name.
For example, if you send a message to `username+Important@example.com`, the mail server will route the message to the `Important` folder in the `username@example.com` mailbox.
Notes:
* If the folder does not already exist, the system will create that folder.
* You **must** subscribe to the folder in your email or webmail client for the folder to appear.
## Default email account
Your default email address appears under the *Default Email Account* heading. The system creates this special email account when your hosting provider creates your cPanel account. The account’s username and password are identical to your cPanel account name and password.
* If your hosting provider configures this address to serve as a catch-all address for all mail that invalid usernames in your domain receive, it may receive a large amount of spam.
* You can check and delete the mail that this account receives. To do this through webmail, click *Access Webmail* and select your desired webmail application.
* You can also use this account to send mail. To do this through webmail, click *Access Webmail* and select your desired webmail application.
The actual address of the account is `account@example.com`, where `account` represents your account username. You **cannot** rename, delete, or place a quota on the default account. We recommend that you create a separate email account for daily use.
This address is also the default *From* and *Reply-to* address of outgoing email that your account’s PHP scripts send.
# How to create and manage email forwarders using cPanel
Send a copy of any incoming email from one address to another. For example, forward **** to **** so that you only have one inbox to check.
{% code title="Location under cPanel" %}
```
cPanel >> Home >> Email >> Forwarders
```
{% endcode %}
## Overview
This interface allows you configure an email address to forward copies of incoming emails to another address. This is useful if, for example, you want to use one email address to check emails addressed to multiple accounts. You can also discard email or send (pipe) email to a program.
To manage forwarders for a specific domain on your account, select the desired domain from the *Managing* menu.
Note:To manage forwarders for email accounts that use the [*BoxTrapper*](https://documentation.cpanel.net/display/68Docs/BoxTrapper) feature *(cPanel >> Home >> Email >> BoxTrapper)*, use the *BoxTrapper Forward List* feature.
## Email Account Forwarders
The *Email Account Forwarders* table lists all of the email addresses that use a forwarder to redirect email to another address or service.
* To quickly find a specific email address, enter a keyword in the *Search* text box and click *Go*.
* To view the route that a forwarded email takes, click *Trace* in the *Functions* next to that email address.
* To delete a forwarder, click *Delete* next to that email address, and then click *Delete Forwarder* to confirm.
Important:
* If you do **not** delete the cPanel account for which email is forwarded, **both** accounts will receive email.
* If you wish to forward all incoming mail from one account to another but do **not** want to receive email at the first account, create a forwarder from an address that does **not** have a cPanel account. If the account already exists, delete it.
### Add Forwarder
To add a mail forwarder, perform the following steps:
1. Click *Add Forwarder*.
2. In the *Address to Forward* text box, enter the address for which you wish to forward incoming email.
3. Select the desired domain from the menu.
4. Select one of the following options:
* *Forward to email address* — Select this option to forward incoming email to another address. Enter the address to which you wish to forward email in the text box.
* *Discard and send an error to the sender (at SMTP time)* — Select this option to discard incoming email and automatically send a failure notice to the sender*.* Enter the desired failure message in the *Failure Message* text box.
* Click *Advanced Options* to view the following additional options:
* *Forward to a system account —* Select this option to forward incoming email to a system user. Enter the desired username in the text box.
Notes:
* This text box accepts the username of any user on the server.
* System accounts do **not** have a public-facing email address.
* *Pipe to a program* — To automatically forward incoming email to a program, enter a path to the program, relative to the account’s home directory (for example, `utilities/support.pl`) in the text box. For more information, read the [Pipe to a Program](https://documentation.cpanel.net/display/68Docs/Forwarders#Forwarders-PipetoaProgram) section below.
* *Discard (Not Recommended)* — Select this option to discard incoming email without a failure notice.
Important:We do **not** recommend this option, because the sender will **not** know that the delivery failed.
5. Click *Add Forwarder*.
### Pipe to a Program
{% hint style="info" %}
Important: Make **certain** that your script uses the proper file permissions (`0700`). To change your script’s file permissions, run the `chmod 0700 myscript.php` command, where `myscript.php` represents your script’s location and file name.
{% endhint %}
Use the *Pipe to a Program* option to parse and enter email information into a different system. For example, use the *Pipe to a Program* option to pipe email information to a program that enters email information into a ticket system.
* `STDIN` pipes email and headers to the program.
* Pipes can accept variables from the `$_SERVER` array and variables on the command line.
* The language or environment that you use may cause memory limit issues.
* If your script produces any output, even a blank line, the system will create a bounce message that contains that output.
When you use the *Pipe to a Program* option, enter a path that is relative to your home directory. For example, to use the `/home/user/script.pl` script, enter `script.pl` in the *Pipe to a Program* text box, where `user` represents your username.
## Domain forwarders
Domain forwarders send copies of all of a domain’s incoming email to another domain. Domain forwarders override the default address for the forwarded domain.
The *Forward All Email for a Domain* table lists all of the domain forwarders for your account.
{% hint style="info" %}
Note: Domain forwarders only forward email when the system **cannot** deliver it to an address or autoresponder. For example, if a user sends an email to the `john@example1.com` address, the following actions might take place:
* If a `john@example1.com` address or autoresponder exists, cPanel will **not** forward the email.
* If a `john@example1.com` address or autoresponder does not exist, cPanel **will** forward the email.
{% endhint %}
### Add Domain Forwarder
To add a domain forwarder, perform the following steps:
1. Click *Add Domain Forwarder*.
2. Enter the domain to which you want to forward email.
3. Click *Add Domain Forwarder*.
### Delete a domain forwarder
To remove a domain forwarder, click *Delete* next to the domain forwarder that you wish to remove, and then click *Delete Domain Forwarder* to confirm.
# Managing email routing with cPanel
## Overview
This interface allows you to configure how the system routes a domain’s incoming mail.
For example, you can use this interface to configure the server as a backup mail exchanger, which will hold a domain’s mail until the primary mail exchanger is available.
## Configure Email Routing
{% hint style="warning" %}
**Warning:** Misconfigured *Email Routing* settings can disrupt your ability to receive mail. If you are unsure which option to choose, contact your system administrator or hosting provider.
{% endhint %}
To configure how your server routes mail for a domain, perform the following steps:
1. Select the desired domain from the menu. If only one domain exists on your cPanel account, the system selects it automatically.
2. Select one of the following options under *Configure* *Email Routing*:
* *Automatically Detect Configuration* — The system uses the following criteria to configure the email routing settings:
* *Local Mail Exchanger* — The lowest numbered mail exchanger points to an IP address on this server.
* *Backup Mail Exchanger* — The lowest numbered mail exchanger points to an IP address not on this server.
* *Remote Mail Exchanger* — No mail exchangers point to an IP address on this server.
Note:
If the configured Mail Exchange (MX) records do not resolve, automatic detection will **not** occur.
* *Local Mail Exchanger* — The server always accepts mail for this domain. The system will deliver mail to the local mailbox.
Note:
Choose this option if your server uses smart hosts or another gateway service to filter mail.
* *Backup Mail Exchanger* — The server functions as a backup mail exchanger. The system will hold mail for this domain until a lower number mail exchanger becomes available .
Note:
You **must** configure the primary MX record to point to the appropriate exchanger.
* *Remote Mail Exchanger* — The server will **not** accept mail for this domain. The system sends all mail for this domain to the lowest numbered mail exchanger.
Note:
You **must** configure the primary MX record to point to the appropriate exchanger.
3. Click *Change*.
# Change Your E-Mail Account Password
{% code title="Location under cPanel" %}
```
cPanel >> Email - Email Accounts
```
{% endcode %}
A secure password is one that contains no dictionary words and includes upper and lower-case letters, numbers, and symbols.
To change the password:
1. Click *Change Password* next to the appropriate email account.\

2. Type your new password into the *Password* box.
3. Confirm your new password in the *Password (again)* box.
* You can click the *Password Generator* link to have a strong password generated for you.
4. Click *Change Password* to store the new password.
* If you do not wish to change the password, click *cancel*.
# Improving mail deliverability (SPF & DKIM)
**cPanel >> Email - Authentication**\
\
The following video guide walks you through improving email deliverability from your Smart account. It includes using [mail-tester.com](http://www.mail-tester.com/) to check SPF and DKIM records and how to set them correctly in your cPanel/DNS.
{% embed url="" %}
Improving Mail Deliverability (SPF & DKIM)
{% endembed %}
## cPanel Email Deliverability Tool – SPF and DKIM Records
As you may know, if mail service is unauthenticated you can face the following issues:
* emails you send are delivered to Spam/Junk folders
* emails you send bounce with "SPF record failure" error
* your Inbox gets numerous "Failed delivery" bounce backs of the emails you never sent
In the first case, recipient mail server looks up SPF record for your domain, and if it is not added / does not match actual outgoing server IP address, such a mail delivery will fail. Such checking mechanism is implemented in order to make sure email comes from a legitimate sender and verified sender.\
\
Second situation takes place when there is no SPF/DKIM configured for your domain or they are configured incorrectly, which lets unauthorized party to forge emails using @yourdomain.com mailbox. Such cases are called **mail spoofing**.\
\
**Email Deliverability** is an effective set of anti-spoofing and anti-spamming tools available in cPanel.\
\
The **Email Deliverability** table displays your cPanel account's domains and allows you to address any existing problems with your mail-related DNS records – **SPF and DKIM**.\
* **SPF record**
Nowadays the vast majority of spam emails have fake data in the «From» field. Spammers and fraudsters use special tools to send their mail on behalf of a real owner of the e-mail address.\
**SPF** record (acronym for Sender Policy Framework) is an effective and simple method which lets you avoid such issues. If your domain name has the correct SPF record, then you can be sure nobody is able to send fake e-mails on behalf of your domain name.\
\
The main idea of SPF record is that an owner of domain name publishes the information about IP addresses that are authorized to send mail from this domain name. The receiving server compares the information in the envelope sender address with the information published by domain name owner. If these details match then e-mail is delivered.\
\
**NOTES:**
* SPF is not added to the domain DNS zone automatically. Thus, it is required to configure the proper record from the **Email Deliverability** menu.
* Sometimes cPanel automatically fetches incorrect server outgoing IP address. This happens when we have to change outgoing mail IP due to poor mail reputation or blacklists. Get in touch with us via [Live Chat](https://www.namecheap.com/support/live-chat/general.aspx) or [Ticket](https://support.namecheap.com/index.php?/Tickets/Submit) and we will gladly re-check if the correct IP is added to your SPF record.
* SPF record has its own specific syntax. It is strongly recommended to get familiar with [SPF record syntax documentation](https://www.spf-record.com/syntax) if you are going to customize the record manually.
* SPF record is added to your domain DNS zone as TXT record. There are cases when you need to add another TXT record to verify your domain name ownership for some service. It is not recommended to modify existing SPF record, it is better to add a new one instead.\
* **DKIM Record**
**DKIM** (DomainKeys Identified Mail) is another way of e-mail authentication. This method uses information about domain which is published by the domain owner. That information allows receiving server to verify if the e-mail message was sent by legal owner of that domain name.\
\
Once TXT record which contains DKIM has been added to DNS zone, a special code is added to the headers of outgoing e-mails. Receiving servers compare these headers with the information in DNS zone and if it matches then the e-mail is delivered.\
\
**NOTE:** DomainKeys(DK) and DomainKeys Identified Mail (DKIM) are separate things.\
\
DomainKeys(DK) are not available on our shared servers as DK implementation was converted to DKIM and extended in a number of ways as of cPanel 11.32 and later releases.\
\
Some of the differences between DomainKeys and DKIM include:
* multiple signature algorithms (as opposed to just one available with DomainKeys)
* more options with regard to canonicalization, that validates both header and body
* the ability to delegate signing to third parties
* the ability for DKIM to self-sign the DKIM-Signature header field – to protect against its being modified
* the ability for wildcard option on some parameters
* the ability to support [signature timeouts in DNS](http://stackoverflow.com/questions/5580136/differences-between-domainkeys-vs-dkim)
If having DomainKeys for you is a must, we suggest upgrading to VPS/Dedicated server where you will be able to setup this feature.\
\
These simple actions will let you be sure that no one is able to send spam on your behalf and your e-mail will not be delivered to spam folders.\
In order to configure the SPF and DKIM records, follow the instructions below:\
\
Log into **cPanel** > **Email** section > **Email Deliverability** menu.\
For cPanel Basic Theme:\  \
\
For cPanel Retro theme:\
\
\
This section allows you to perform the following actions:\
1\. **Repair** — this feature allows the system to repair a domain's invalid records:\
**NOTES**:
* This option is unavailable if the system does not control the domain's DNS records. Thus, you will be able to use the Repair option only in case your domain name is pointed to our **Shared hosting nameservers**.
* You cannot simultaneously update two or more domains whose records exist on the same zone. The bulk records update is possible only in case domains' records exist on separate zones.
* Reloading the interface does not interrupt the repair process.
\
\
For cPanel Retro theme:\
\
\
This section allows you to perform the following actions:\
1\. **Repair** — this feature allows the system to repair a domain's invalid records:\
**NOTES**:
* This option is unavailable if the system does not control the domain's DNS records. Thus, you will be able to use the Repair option only in case your domain name is pointed to our **Shared hosting nameservers**.
* You cannot simultaneously update two or more domains whose records exist on the same zone. The bulk records update is possible only in case domains' records exist on separate zones.
* Reloading the interface does not interrupt the repair process.
\
\
In the window that appears upon clicking **Repair**, you can review and confirm the system's recommendations for any invalid records. You can also **Copy** or **Customize** a suggested record before you approve the system's repairs. Click on **Repair** and the records will be added to the DNS zone of the domain/subdomain automatically.\
\
\
\
This process can take up to **five minutes**, depending on the server. When the records are set up, you will receive a corresponding success message.\
\
\
Allow some time to pass for the records to propagate and refresh the page afterwards. The **Email Deliverability Status** will be then changed to **Valid**:\
\
\
\
2\. **Manage** - this option allows you to manually configure a domain's mail-related DNS records.\
\
The **Manage the Domain** section already displays the properly-configured DKIM and SPF record values. So in most cases, you just need to **Copy** them and paste manually to the DNS zone of your domain. Alternatively, you can click **Install the suggested record** to have the SPF and DKIM records added to the DNS zone automatically:\
**NOTE**: The **Install the suggested record** option is available only in case your domain name is pointed to our **Shared hosting nameservers**.\
After the record is installed, you will receive the confirmation message:\
\
\
In the **SPF** section, you will also have an option to **Customize** the system's recommended SPF record for a domain.\
\
The interface displays the domain's current SPF name and value in the **Current "SPF" (TXT) Record** section, if one exists, and the system's recommendations in the **Suggested "SPF" (TXT) Record** section:\
\
You can configure the following settings:\
1\. **Domain Settings -** this section allows you to define the hosts or MX servers allowed to send mail from your domain:\
\
\
2\. **IP Address Settings** - this section allows you to add additional IP Address blocks to your SPF record. The system automatically includes your server's main IPv4 or IPv6 addresses in these lists:\
\
\
\
3\. **Additional Settings** - this section allows you to modify additional SPF record settings.4. **Preview of the Updated Record**- this section displays what the updated SPF record will look like, based on its current modifications. Click the **Install a Customized SPF Record** tab to install the new record:\
\
\
\
\
That's it!\
\
Source: namecheap.com
# cPanel - Managing Files
A quick overview on how to manage files in cPanel Hosting Account.
# cPanel - Metrics
A quick overview on the Metrics System available in cPanel Hosting Account.
# cPanel - Software and Applications
A quick overview on managing Software and Applications in cPanel.
# cPanel - Security
A quick overview on how to secure your cPanel Hosting Account and Website.
# SiteBuilder Pro
A quick overview on SiteBuilder Pro enabled in cPanel Hosting Account.
# Enable or disable PHP modules
A quick overview on enabling or disabling PHP modules in cPanel Hosting Account.
We provide the facility to enable/disable PHP modules / libraries per account.
To enable a specific PHP module or alter your domains PHP version, please follow the steps below:
1. Login to your cPanel
2. From the drop-down list, change the PHP version from the default (Native) to the desired PHP version, for example 5.4 (please note that you can still select the same version as the native version)
3. Click 'Set as current'
4. A list of available modules / libraries will appear. Use the tickboxes to enable or disable specific libraries
5. Click Save to confirm the changes
Once updated, the selected modules will then be active on your domain. This may take a few moments to take effect.
# How can I migrate my cPanels to Vimzaa Website Hosting?
A quick overview for migrating cPanel Accounts to Vimzaa.
## Introduction
There are two separate methods exist for server-to-server migrations. Both are managed by us to ensure that the migration is as seamless as possible.
## Method 1
It is the fastest and with least disruption; this is `direct SSH access`. If your existing hosting provider permits SSH access to your account, we can simply perform a cPanel to cPanel migration via SSH. This will retrieve your hosting accounts, leaving them fully online with no disruptions to your existing service. They can then be downloaded into your new Vimzaa Hosting account.
## Method 2
If your existing hosting provider does not permit account-level SSH access, we would then use an `account backup method`. cPanel backups can be taken at an account level by your existing provider, or directly via the cPanel control panel if provided. The backup can be transferred to your new Vimzaa Hosting account via FTP. Once we have received the backup file(s), we can restore these for you and ensure your hosting platform is fully online prior to any DNS changes resulting in service changes.
## Conclusion
Both methods will ensure that e-mail and database passwords are maintained. Please contact us when you are ready to migrate and we will be happy to assist.
# SSH Access to cPanel Servers
A quick overview on how to connect cPanel Servers via SSH Terminal.
For security purposes, we lock down SSH access to our platform by IP address. If you wish to gain SSH access to your account, please raise a support ticket detailing your public IP address. This can be found by visiting:
[www.whatismyip.com](http://www.whatismyip.com/)
We can then white-list your IP address, allowing to log in.
# How do I add another domain to my Hosting Account?
A quick overview on how to add addon domains to a cPanel Hosting Account.
To add a new domain to your existing hosting account:
1. Log into your cPanel control panel
2. Click `Addon Domains`
3. Complete the form to add the domain into your hosting account
This ensures that the site runs independently and cannot be influenced by settings within the `public_html` folder.
You can also define your desired FTP username and password if applicable.
Once added and DNS propagated (this can take up to 24 hours), the domain will function without issue.
Once you've added the domain, you can select the `Redirects` option in cPanel if you want to simply point the new domain at another.
# How do I access WHM (Web Host Manager)?
A quick overview on how to access Web Host Manager from cPanel Account.
Your Reseller WHM panel allows you to manage your Reseller account. To access your Reseller WHM panel:
1. Access and log in to your cPanel using the details in your Welcome e-mail. This can also be accessed at
2. Once you are in your cPanel, scroll down to the `Advanced` section
3. Click the WHM icon (`WebHost Manager`)
4. This will open your WHM panel.
# Plesk Hosting
A quick overview on how to manage your Plesk Hosting Account.
# An Introduction to Plesk
#### Introduction
If you are reading this, you have probably purchased, or are thinking of purchasing a windows web hosting account from Vimzaa that comes bundled with Plesk, or perhaps you have installed Plesk on your server because you want to manage websites belonging to your organization, or those of your customers. Congratulations! You have made a great choice. Plesk is a powerful and user-friendly tool that enables you to perform all the day-to-day operations quickly and efficiently. If this is your first time working with Plesk, we strongly recommend that you start reading here. And you probably have two questions on your mind right now:
## What can Plesk do for me?
If you are a shared hosting customer, Plesk enables you to easily manage all aspects of your web hosting account using a web interface that is robust, but easy to learn. You can create domains, mail accounts, databases, and much more. If you are a server administrator or a web designer, Plesk helps you manage websites belonging to your organization or your customers, and also comes with a powerful suite of tools you can use to manage the server itself, as well as to configure the many features and services of Plesk to your liking.
## What will this guide teach me?
This guide consists of three parts:
**Getting started with Plesk**. This section explains how to begin working with Plesk, gives a brief overview of its interface, and also explains the concept of subscriptions.
**Plesk tutorial**. This section walks you through performing the most essential web hosting tasks with the help of Plesk. By the end of the tutorial you will have created a functional website, added a database and a mail account, and will also have learned how to manage DNS records and back up your website.
**Plesk functionality explained**. This section contains expanded instructions explaining how to perform other tasks not covered in the tutorial.
# Getting Started with Plesk
# How to login to Plesk for the first time
You can log in to Plesk by visiting the following URL:
```
https://:8443
```
where **\** is either the domain name or the IP address of the Plesk server. Type in your username and password to log in. When you are logging in to Plesk for the first time, the scenarios will differ depending on whether you are a shared hosting customer, or an administrator managing your server.
NOTE: You would have received the username and password in a welcome email when your account was purchased.
# The Plesk User Interface Explained
Different users in Plesk have very different needs and usage scenarios. While the provider may need to set up service plans and configure server-wide settings, a customer may need to create a database or change PHP settings for one of their domains. To accommodate every party, Plesk provides two different panels, described below:
* **The Customer Panel** is focused on web hosting operations and features the tools necessary to create and manage websites, mailboxes, and so on. This panel is designed for hosting customers.
* **The Power User view** includes all the tools available in the Customer Panel, as well as the tools that enable server-wide settings to be managed. This view is best suited for server administrators hosting their own websites, and web studios that manage websites of their customers.
Both panels allow management of subscriptions.
Because this guide is meant for shared hosting customers and web designers who host their customers’ websites, we will focus on the Power User view. Let us examine a screenshot displaying Plesk in Power User view.
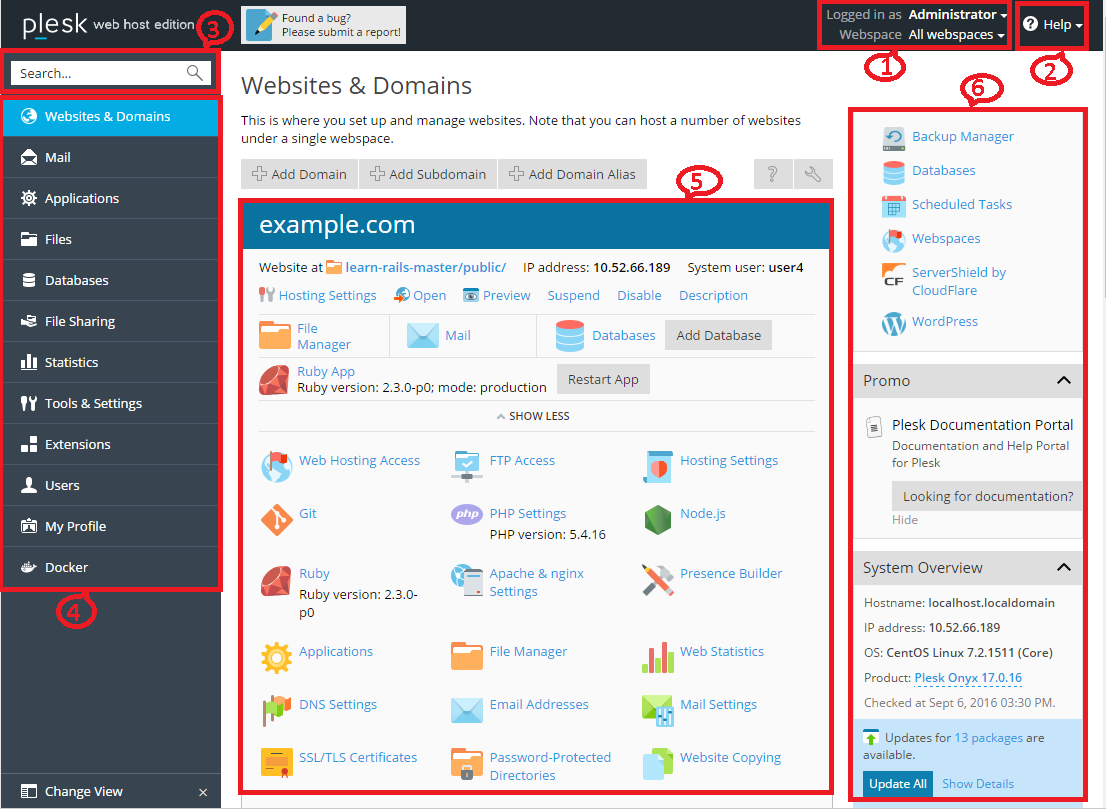
1. This section displays the name of the user who is currently logged in, and the currently selected subscription. The user can change the properties of their user account and choose what subscription they want to manage.
2. This section contains the **Help** menu. The **Help** menu lets users access a context-sensitive online guide and watch video tutorials.
3. This section features the **Search** field.
4. This section holds the navigation pane that helps to organize the Plesk interface. Tools are grouped by function, for example, the tools enabling users to manage web hosting settings are found on the **Websites & Domains** page, and those enabling users to manage mail accounts are found on the **Mail** page. Here is a short description of all the tabs and their functionality:
* **Websites & Domains**. The tools here enable customers to add and remove domains, subdomains, and domain aliases. They also enable them to manage various web hosting settings, create and manage databases and database users, change their DNS settings, and secure their websites with SSL/TLS certificates.
* **Mail**. The tools here enable customers to add and remove mail accounts, as well as manage mail server settings.
* **Applications**. The tools here enable customers to easily install and manage a wide range of web applications.
* **Files**. This item features a web-based file manager that enables customers to upload content to their website, as well as manage the files already present on the server within their subscription.
* **Databases**. This item allows customers to create new or manage existing databases.
* **File Sharing**. This item features a file-sharing service that enables customers to store personal files, as well as share files with other Plesk users.
* **Statistics**. This item features information about disk and traffic usage, as well as the link to web statistics that present a detailed overview of the site’s visitors.
* **Server**. This item is only visible to the server administrator. It features tools that enable the administrator to configure server-wide settings.
* **Extensions**. This item enables customers to manage extensions installed in Plesk and access the functions provided by these extensions.
* **Users**. The tools here enable customers to add and remove user accounts that enable other people to log in to Plesk.
* **My Profile**. This item is only visible in the power user view. Here you can review and update contact details and other personal information.
* **Account**. This item is only visible in the Control Panel of shared hosting customers. It features information about resource usage for the subscription, allowed hosting options and granted permissions. The tools here enable customers to retrieve and update their contact details and other personal information, and also back up their subscription settings and websites.
* **Docker**. This item is visible if the Docker Manager extension is installed. Here you can run and manage containers that are based on Docker images.
5. This section houses all the controls relevant to the tab that is currently open. On the screenshot, the **Websites & Domains** tab is open, and so the various tools that allow managing aspects of the subscription related to web hosting are displayed.
6. This section contains a mix of various miscellaneous controls and information displays for users’ convenience.
Later in the guide, we will provide instructions explaining how to perform many everyday tasks. In most cases, they instruct users to open one of the tabs and click one of the controls present there. If the tab or control in question is missing from the panel, the most likely reason is that it is disabled for the subscription in question. Customers who find themselves in such a situation need to contact their provider for assistance.
# Understanding Subscriptions in Plesk
To understand how the usage of resources is managed in Plesk, as well as how the number of options available to different users is controlled, you need to learn about the concept of *subscription*.
When a customer purchases a hosting account, a *subscription* is created in Plesk for them. A subscription can be defined as a combination of resources available and permissions granted to a user. Resources include disk space and traffic, and permissions include, for example, the ability to add additional domains or change PHP settings. Permissions give providers a lot of flexibility regarding whether or not customers are allowed to manage certain services and perform certain operations.
**Note:** Later in this guide, you will find instructions explaining how to perform a wide variety of everyday tasks. If you are unable to follow a set of instructions because of a missing tab or button, the most likely cause is that the provider has disabled the corresponding permission in your subscription’s properties. Contact your provider for assistance.
Resources assigned to a subscription can be used however the customer sees fit. For example, if a subscription includes 100 megabytes of disk space, the customer is free to use the disk space for domain content, mail, databases, or all of these. If the subscription allows multiple domains to be created, the customer can create one or more additional domains and split the available disk space among them.
A single customer can own more than one subscription. It is important to understand that in such cases resources are not shared between subscriptions. For example, if a customer has two subscriptions, both of which include 100 megabytes of disk space, the customer cannot use 150 megabytes for one subscription and 50 for the other. Such resource usage is in violation of one of the subscriptions’ resource limits and may cause the offending subscription to be suspended.
**Caution:** If a subscription is suspended, all domains associated with it become unavailable and the owner is unable to manage the subscription until it has been activated by the provider. If you find that your subscription is suspended, contact your provider as soon as possible to resolve the issue.
If you are managing your own Plesk server and are hosting your own websites, or those of your customers, there is no need for resource limits, so your subscription has unlimited resources
# How to upload content with Plesk
#### Uploading Content Using FTP
To connect to the server using FTP, you need the following information:
* **FTP server address.** The FTP address is your domain name, that is, your site’s Internet address.
* **FTP username.** It is identical to your system user name. To find what your system user name is, go to **Websites & Domains** > **Web Hosting Access**. You will find it under **Username**. You can change your system user name if you want.
* **FTP password.** It is identical to your system user password. If you do not know what your system user password is, go to **Websites & Domains** > **Web Hosting Access**. You can reset the password under **Password**.
You will also require a program called an FTP client. There are many free FTP clients available on the Internet, such as FileZilla or FireFTP. Download and install the client on your computer to connect to the FTP server. Please refer to the FTP client’s instructions for information on how to install and configure it.
To change the FTP account username or password, go to **Websites & Domains** > **Web Hosting Access**.
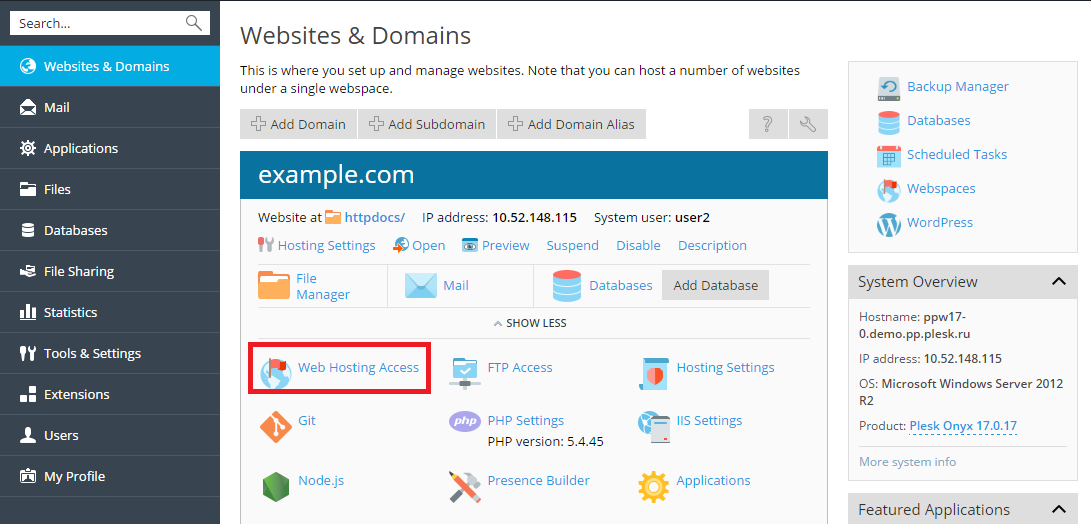
Then specify new username and password for the **System User**.
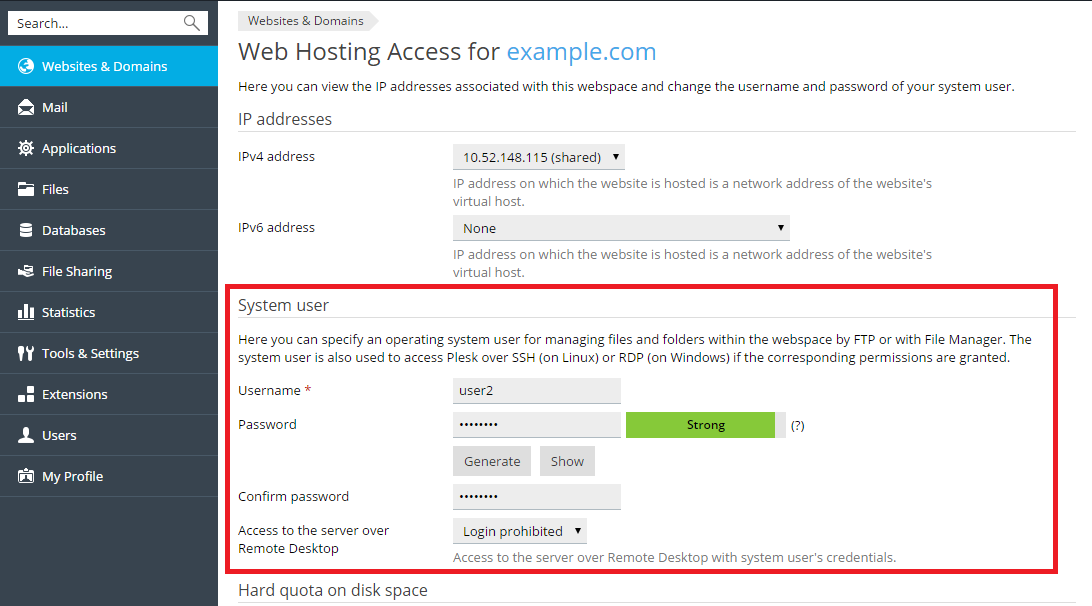
#### Uploading Content Using the File Manager
To upload content, go to **Files**, navigate to the folder to which you want to upload content, click **Upload**, select the file to be uploaded, and click **Open**.
Note that when uploading multiple files it is recommended to add them to an archive, upload the archive, and extract the files to save time. Only ZIP archive files are supported at the present time.
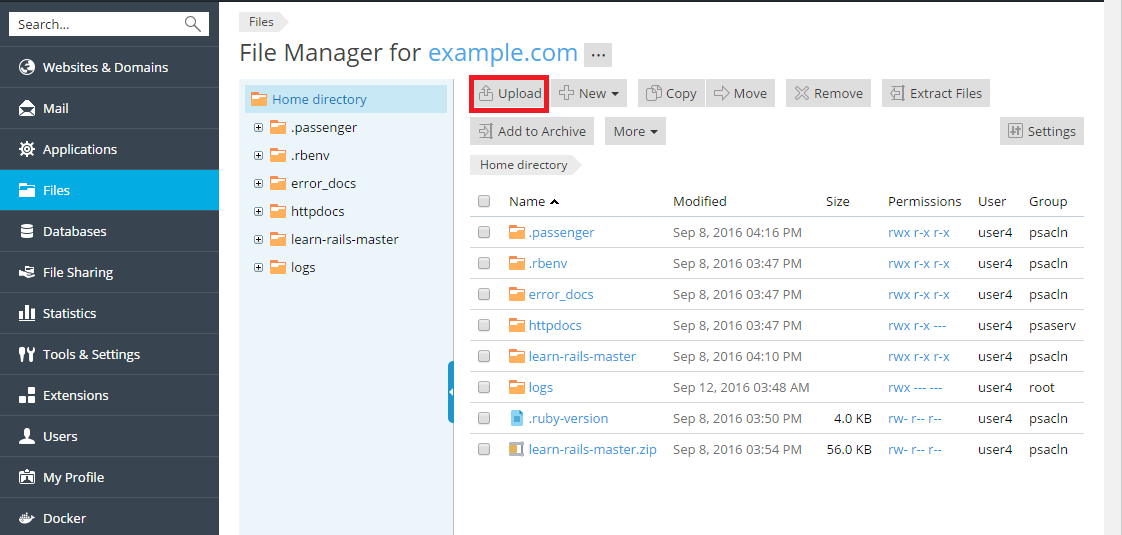
To download a file, go to **Files**, navigate to the location of the file you want to download, click the  icon next to the file you want to download, and select **Download** from the menu.
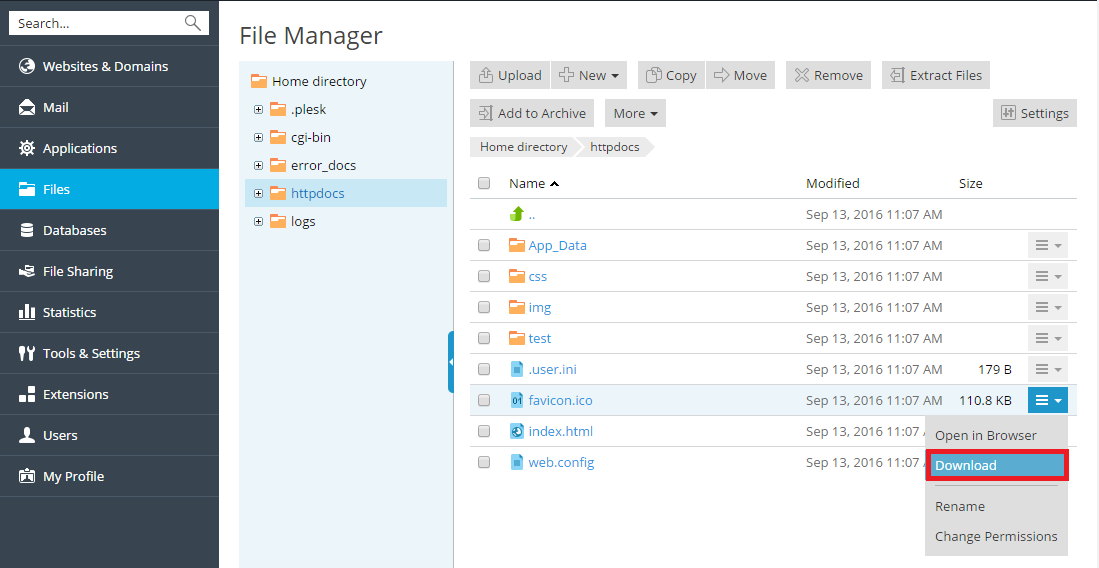
To compress files, go to **Files**, navigate to the location of the file or folder you want to compress, select the checkbox next to it, and click **Add to Archive**.
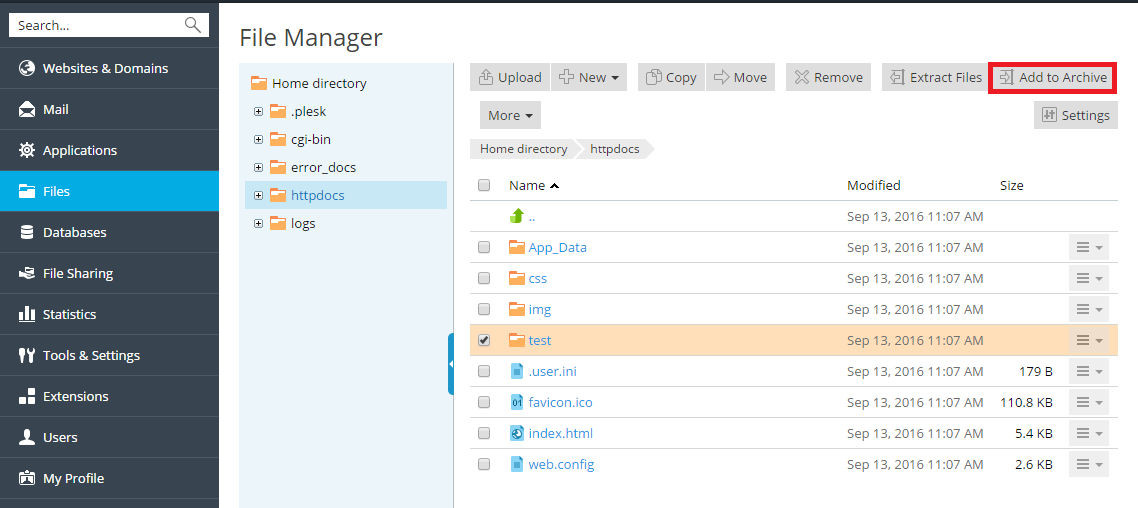
To extract files from an archive, go to **Files**, select the checkbox next to the file you want to extract, and click **Extract Files**.
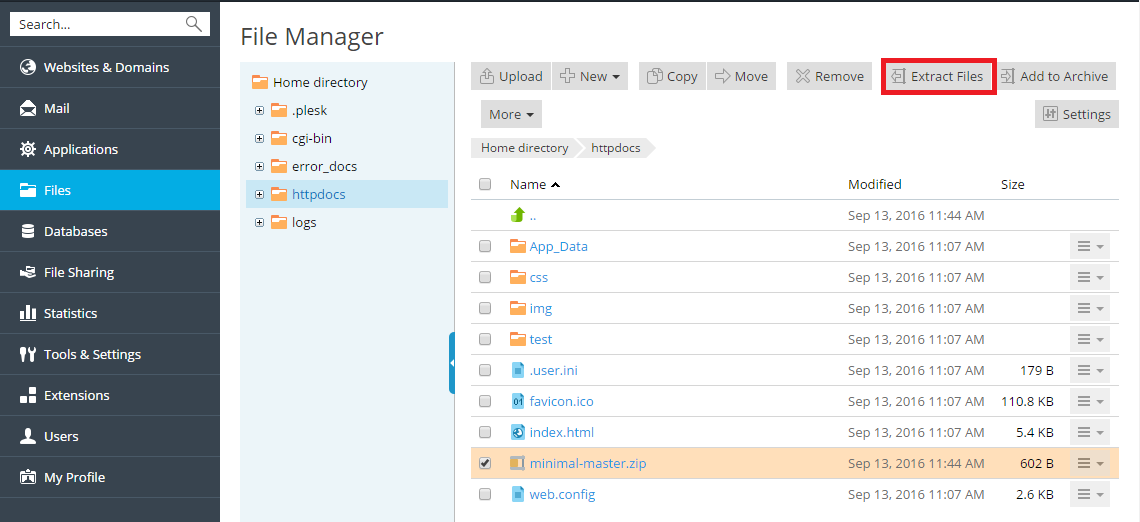
To edit files, go to **Files**, navigate to the location of the file you want to edit, and do either of the following:
* To edit the file in the code editor, click the  icon next to the file you want to edit, and select **Edit in Code Editor** from the menu.
* To edit the file in the HTML editor, click the  icon next to the file you want to edit, and select **Edit in HTML Editor** from the menu.
* To edit the file in the text editor, click the  icon next to the file you want to edit, and select **Edit in Text Editor** from the menu.
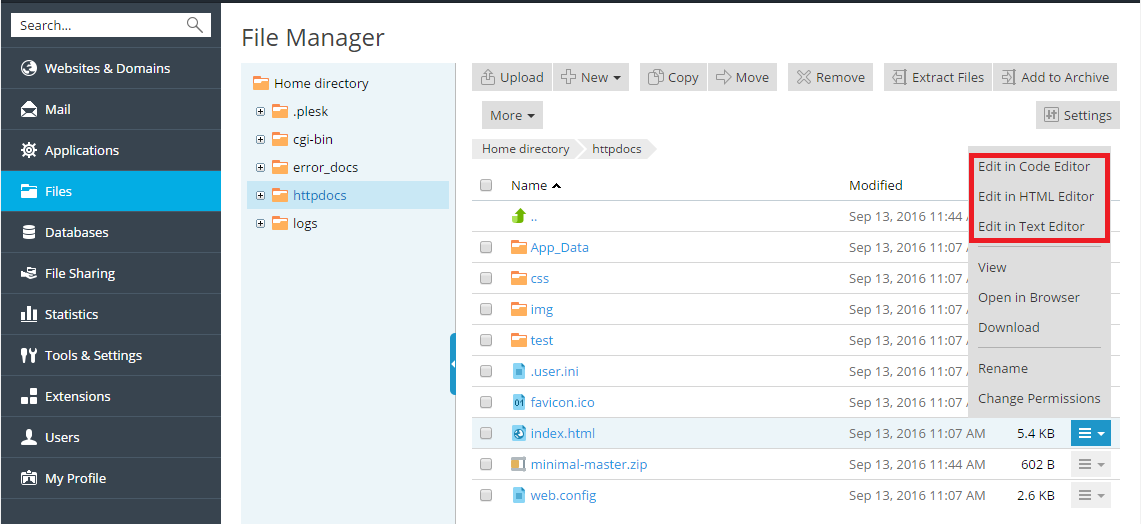
# How to manage mailboxes / mail accounts with Plesk
Mail service enables Internet users to send email messages to each other. Plesk can function as your mail server. It also enables you to create mail accounts and manage them, including performing a number of common mail-related operations. Such operations include changing the password for a mail account, enabling automatic replies, and so on.
To create a mail account:
Go to **Mail** > **Create Email Address**.
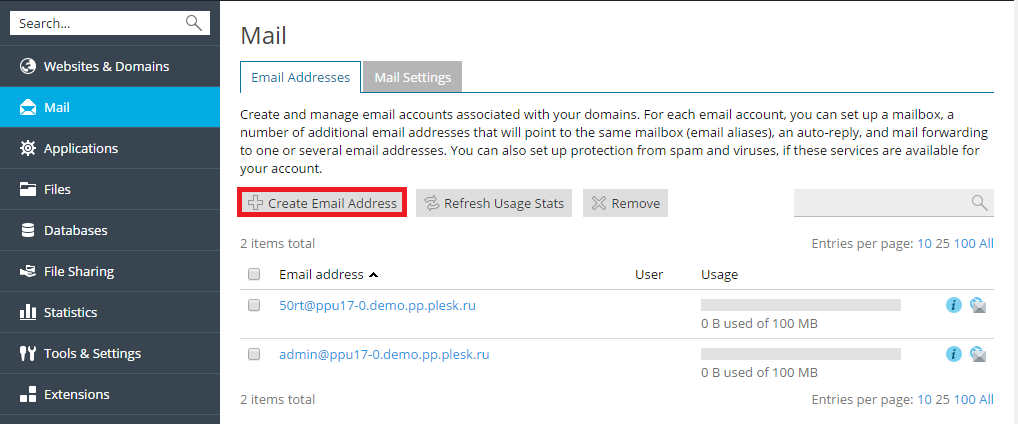
To access your mail account using webmail:
* In a Web browser, visit the URL `webmail.example.com`, where `example.com` is the Internet address of your website. When prompted, specify your full email address as the username (for example, `mail@example.com`), and specify the email address password.
* When logged in to Plesk, go to **Mail**, and in the list of email addresses, click the  icon next to the email address you need.
**Note:** If you cannot open the webmail page, make sure that a webmail solution is enabled. Go to **Mail** > **Mail Settings**, click the name of the domain for which webmail is inaccessible, and select a webmail client in the **Webmail** menu.
To access your mail account using a mail client:
Install a mail client program on your computer and start it. Typically, in such programs you should specify the following settings:
* **Username**. Specify your full email address in this field. For example, **.
* **Password**. Specify the password to your email account here.
* **Mail server protocol**. This property defines whether you want to keep copies of messages on the server or not. To keep the copies on the server, select the **IMAP** option. If you do not want to keep them on the server, select **POP3**. Selecting IMAP also enables you to train the SpamAssassin spam filter on email messages you receive, if SpamAssassin is switched on on the server.
* **Incoming mail server** *(POP3/IMAP)*. Specify your domain name here. For example, *example.com*. The default POP3 port is 110. The default IMAP port is 143.
* **Outgoing mail server** *(SMTP)*. Specify your domain name here. For example, *example.com*. The default SMTP port is 25. Specify that the server requires authentication.
For detailed instructions on configuring your mail client, refer to your mail client documentation.
**Note:** If you cannot access your mailbox following the instructions in this section, this might be caused by mail server settings. For example, mail services may be listening on non-standard ports, or access to them may be blocked. Contact your hosting provider to resolve the issue.
# Managing Web ApplicationsManaging Web Applications
Web applications are software products designed to be installed on websites to add functionality and improve user experience. A wide range of applications covering many different user scenarios are available from the Plesk Application vault, and can be installed from the Plesk interface with a minimum of effort.
To install an application, go to **Applications** > **Install** or **Install (Custom)** or **Install Version**.
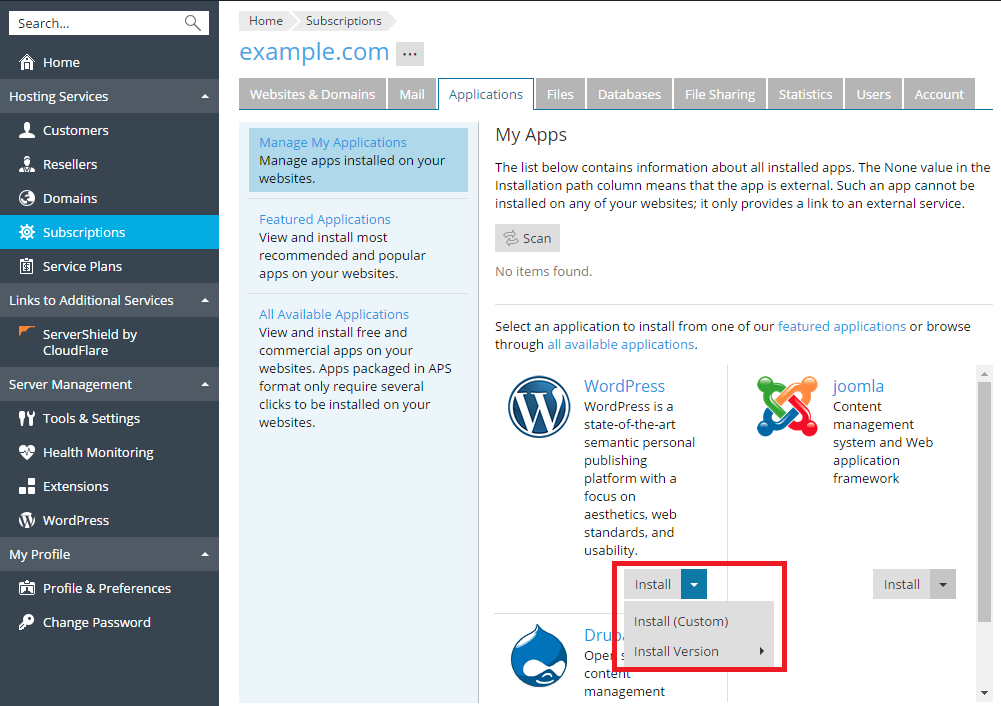
# Plesk Tutorials
# A basic getting started guide to creating your first site with Plesk
This section walks you through the steps of performing the most essential web hosting tasks with the help of Plesk. By the end of the tutorial you will have created a functional website, added a database and a mail account, and you will also have learned how to manage DNS records and back up your website.
## Step 1. Create Your First Website
To set up your first website, you need to follow these steps:
1. Register a domain name.
2. Add a domain in Plesk.
3. Create your website.
#### **Registering a Domain Name**
Think of the domain name as your business’ address. Your customers will use it to find you online, so make sure it is a good one. The best domain names are short, easy to type, and easy to remember. An example of a domain name is *example.com*. Registering a domain name can be done through one of the many organizations called domain registrars. Your hosting provider will usually be able to assist you in registering a domain name as well. Web hosting services are often bundled with domain name registration offers, and vice versa.
{% hint style="warning" %}
**Caution:** If you are a web hosting customer, make sure that when registering a domain name through your hosting provider, it is registered in your name. Otherwise, you may have trouble if you decide to change your hosting provider in the future.
{% endhint %}
#### **Adding a Domain in Plesk**
If you are a web hosting customer, your provider has probably already added your first domain for you. If they have not, contact your provider. If you are a web admin using the Power User view, you have configured your first subscription during the initial Plesk setup. Adding a domain in Plesk enables you to upload content, use Presence Builder, or install a content management system.
In the future, you will be able to add more domains, but for the purpose of this section, your first domain will suffice.
#### **Creating Your Website**
There are three ways to create the content for your website. Each has its advantages and disadvantages. Here is a short summary of all three:
* **Employ a professional designer and upload content.** This option guarantees you will get exactly what you want. However, it is also the most expensive one. The web designer will provide you with the files you will need to upload to your hosting account. You can do it using FTP or the File Manager. To learn how to do it, [**click here**](https://docs.plesk.com/en-US/onyx/quick-start-guide/plesk-tutorial.74376/#o74379).
* **Use Presence Builder.** The Presence Builder tool that comes bundled with Plesk enables you to create websites using a web interface. You can use one of the provided templates to create a professional-looking website in a matter of minutes. To learn how to do it, [**click here**](https://docs.plesk.com/en-US/onyx/quick-start-guide/plesk-tutorial.74376/#o74380).
* **Use a content management system.** Content management systems (CMS for short) are third-party applications that enable you to create and maintain a website. They are highly versatile, and come with a large number of optional add-ons. CMS offer a greater degree of customization as compared to Presence Builder but demand more technical knowledge from the user. To learn how to use a CMS, [**click here**](https://docs.plesk.com/en-US/onyx/quick-start-guide/plesk-tutorial.74376/#o74381).
### Option A. Upload Content
If you have coded your website yourself, or employed a web designer to do it for you, you need to upload the website content to Plesk before the website becomes available on the Internet. Plesk gives you the option to upload content either using FTP, or the file manager. The instructions below explain how to do both – choose which option works best for you.
To publish a website using FTP:
1. Download an FTP client program. You can choose any FTP client you like. If you do not know what FTP client to choose, you can use FileZilla:
* You can download FileZilla here:
* You can find FileZilla documentation here:
2. Connect to your subscription on the server using the FTP client. To connect, you need the following information:
* **FTP server address.** The FTP address should be *ftp\://your-domain-name.com*, where your-domain-name.com is your site’s Internet address.
* **FTP username.** This is identical to your system user name. Note that the system user name may differ from the username that you use for logging in to Plesk. To find what your system user name is, open the **Websites & Domains** tab and click **Web Hosting Access**. You will find it under **Username**. You can change your system user name if you wish.
* **FTP password.** This is identical to your system user password. If you do not know what your system user password is, open the **Websites & Domains** tab and click **Web Hosting Access**. You can reset the password under **Password**.
3. Switch on the passive mode if you are behind a firewall. Refer to your FTP client documentation to learn how to enter the passive mode.
4. Upload the files and directories of your site to the `httpdocs` directory. If you use CGI scripts, place them in the `cgi-bin` directory.
To publish a website using the file manager:
1. On your computer, add the folder containing your website’s files to a .ZIP archive.
2. In Plesk Control Panel, go to **Files**, click the `httpdocs` folder to open it, click **Upload**, select the archive file, and click **Open**.
3. Once the file has been uploaded, click the checkbox next to it, click the **More** button, and select the **Extract Files** option.
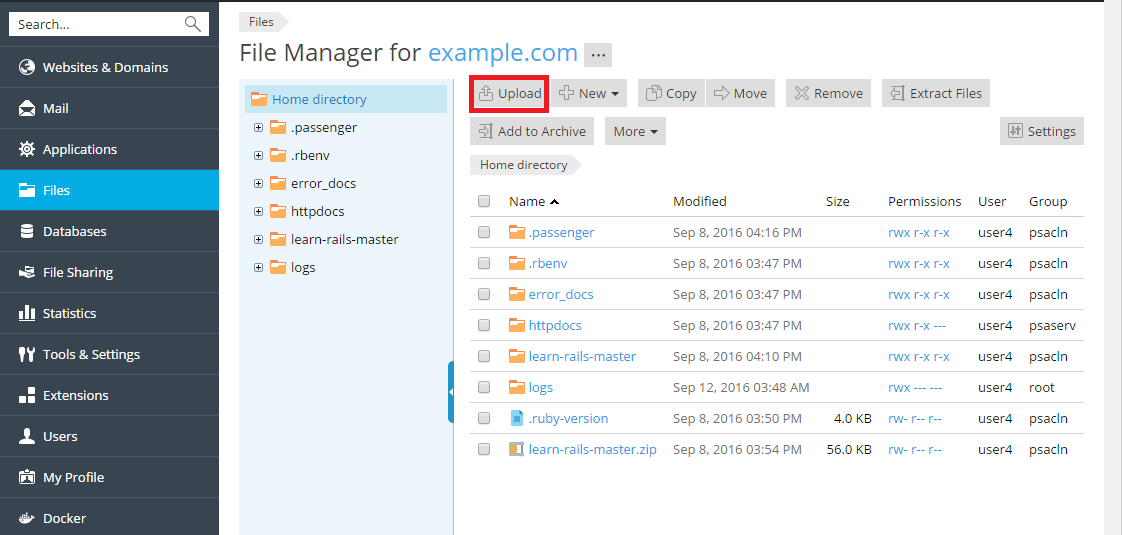
It is possible that the website you have uploaded requires a database to function. To learn how to create a database, [**click here**](https://docs.plesk.com/en-US/onyx/quick-start-guide/plesk-tutorial.74376/#o74382).
### Option B. Create your Website in Presence Builder
To create a website using Presence Builder, go to **Websites & Domains**> **Presence Builder** and click **Create Site**.
Find more information on creating and editing websites in Presence Builder at [http://docs.plesk.com/current/customer-guide/](https://docs.plesk.com/en-US/12.5/redirect.html?book=customer-guide\&page=70317.htm).
Creating your website in Presence Builder means that you do not need a database. Proceed to the [**next step**](https://docs.plesk.com/en-US/onyx/quick-start-guide/plesk-tutorial.74376/#o74389) to learn how to create a mail account in Plesk.
### Option C. Install a Content Management System
To create a website using a *Content Management System* (or *CMS*), go to **Applications** > **Install**.
Note that installing a CMS following the instructions above means that a database will be created for your website automatically. Proceed to the [**next step**](https://docs.plesk.com/en-US/onyx/quick-start-guide/plesk-tutorial.74376/#o74389) to learn how to create a mail account in Plesk.
## Step 2. Create a Database
Databases are relational structures used for storing data. Databases are indispensable in modern web hosting, and most of the popular CMSs require a database to operate. Plesk supports MySQL, MSSQL and PostgreSQL database servers, and enables you to add, remove and access databases, as well as manage database users.
If your website does not require a database, proceed to the [**next step**](https://docs.plesk.com/en-US/onyx/quick-start-guide/plesk-tutorial.74376/#o74389) to learn how to create a mail account in Plesk.
To create a database and a database user:
Go to **Databases** > **Add Database**.
## Step 3. Create a Mail Account
The mail service enables Internet users to send email messages to each other. Plesk can function as your mail server. It also enables you to create mail accounts and manage them, including performing a number of common mail-related operations. Such operations include changing the password for a mail account, enabling automatic replies, and so on.
If you do not need to create a mail account, proceed to the [**next step**](https://docs.plesk.com/en-US/onyx/quick-start-guide/plesk-tutorial.74376/#o74390) to learn how to add a custom DNS record in Plesk.
To create a mail account, go to **Mail** > **Create Email Address**.
## Step 4. Add a Custom DNS Record
DNS records serve to facilitate domain name translation and help visitors reach your website online. When a domain is created in Plesk, all the necessary DNS records are added automatically. However, Plesk also enables you to add custom DNS records, as explained below.
If you do not need to create a custom DNS record, proceed to the [**next step**](https://docs.plesk.com/en-US/onyx/quick-start-guide/plesk-tutorial.74376/#o74391) to learn how to back up your website.
To add a custom DNS record to the domain’s DNS zone, go to **Websites & Domains** > **DNS Settings** > **Add Record**.
## Step 5. Back Up Your Website
It is always recommended to keep a backup copy of your websites in case their configuration or content becomes damaged or lost.
If you do not need to back up your website, proceed to the [**next step**](https://docs.plesk.com/en-US/onyx/quick-start-guide/plesk-tutorial.74376/#o74392) to learn how to change your password and log out of Plesk.
To access the backup function, do the following:
* If you are a hosting customer, go to **Websites & Domains** > **Backup Manager** > **Back Up**.
* If you are a server administrator and are using the power user view, go to **Backup Manager** > **Back Up**.
## Step 6. Change Your Password and Log Out
If you are a web hosting customer, it is likely that the password you use to log in to Plesk was set up for you by your hosting provider. To change it, hover your mouse pointer over your user name located at the top of the page and click **Edit Profile**.

Now that we have performed all the desired tasks, it is time to log out of Plesk. Hover your mouse pointer over your user name located at the top of the page and click **Log out**.
This concludes our tutorial. We hope it was useful, and encourage you to further explore Plesk and learn all the other ways it can make managing your web hosting account easier.
# How to manage DNS and nameservers using Plesk
## Managing DNS Records
A domain name is a human-readable Internet address of a website that can be used to reach the website. The translation of human-readable names into machine-readable ones is carried out by the Domain Name System, or DNS for short. It is very important for the DNS settings for your websites to be correct, otherwise the operation of your services may be disrupted. For example, your domain may become unavailable, or mail may fail to reach your mail server. Plesk can function as the primary (master) or a secondary (slave) name server for your domains. DNS settings are configured automatically, but can be changed from the interface. If the DNS service for your domains is provided by third-party name servers, you can disable the DNS service in Plesk.
### Adding and Modifying DNS Records
**Note:** This section is meant for advanced users. Configuring DNS settings incorrectly can negatively affect website and mail accessibility.
For each new domain name, Plesk automatically creates a DNS zone in accordance with the settings configured by your service provider. The domain names should work fine with the automatic configuration. However, if you use Plesk NS server and need to perform custom modifications in the domain name zone, you can do that in your control panel.
To view the resource records in a DNS zone of a domain, go to **Websites & Domains** > **DNS Settings**.

To add a resource record to the zone, go to **Websites & Domains** > **DNS Settings** > **Add Record**.
To modify the properties of a resource record, go to **Websites & Domains** > **DNS Settings** and click on the record.
In addition to the resource records described above, there is also a Start of Authority record. This record indicates that this DNS name server is responsible for the domain’s DNS zone. It also contains settings that affect propagation of information about the DNS zone in the Domain Name System.
### Using External Name Servers
If you host websites on your account and do not want to use Plesk as your primary (master) NS server, you have the following options:
* Use Plesk name server as a secondary (slave) name server. Choose this option if you have a standalone name server acting as a primary (master) name server for your websites.
* Disable DNS for your domain in Plesk. Choose this option if you have external primary and secondary name servers that are authoritative for your websites.
To switch the Plesk DNS server to a secondary name server, go to **Websites & Domains** > **DNS Settings** and click **Master/Slave**.
To revert the Plesk DNS server to the primary name server, go to **Websites & Domains** > **DNS Settings** and click **Master/Slave**.
To switch off Plesk’s DNS service for a site served by external name servers, go to **Websites & Domains** > **DNS Settings** and click **Disable**.
# Plesk Funtionality - Explained
# Managing your User Account in Plesk
### **Changing Your Username for Access to Plesk**
Customers do not have the ability to change their user account login name in the Plesk GUI. To change your user account login name, contact your provider.
### **Changing Your Password for Access to Plesk**
To change your password, place the mouse pointer over your username located at the top of the page and click **Edit Profile**, or go to **My Profile**. Type in your new password and confirm it.
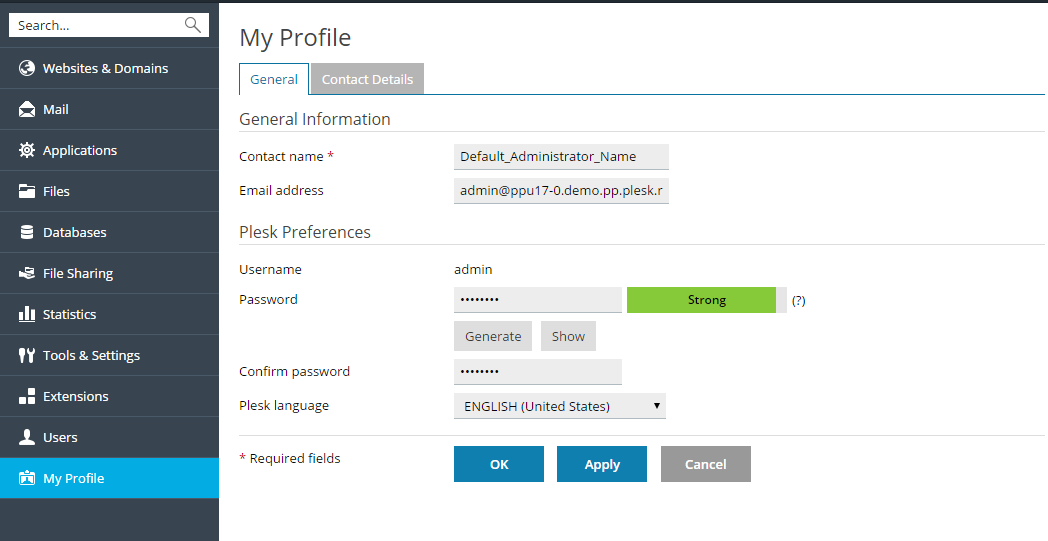
**Changing Your Interface Language**
To change your interface language, place the mouse pointer over your username located at the top of the page and click **Edit Profile**, or go to **My Profile**. Select the desired language from the **Plesk language** menu.
### **Changing Your Contact Details**
To change your contact details, place the mouse pointer over your username located at the top of the page, click **Edit Profile**, or go to **My Profile**. Then go to the **Contact Details** tab. Change your contact details and confirm them.
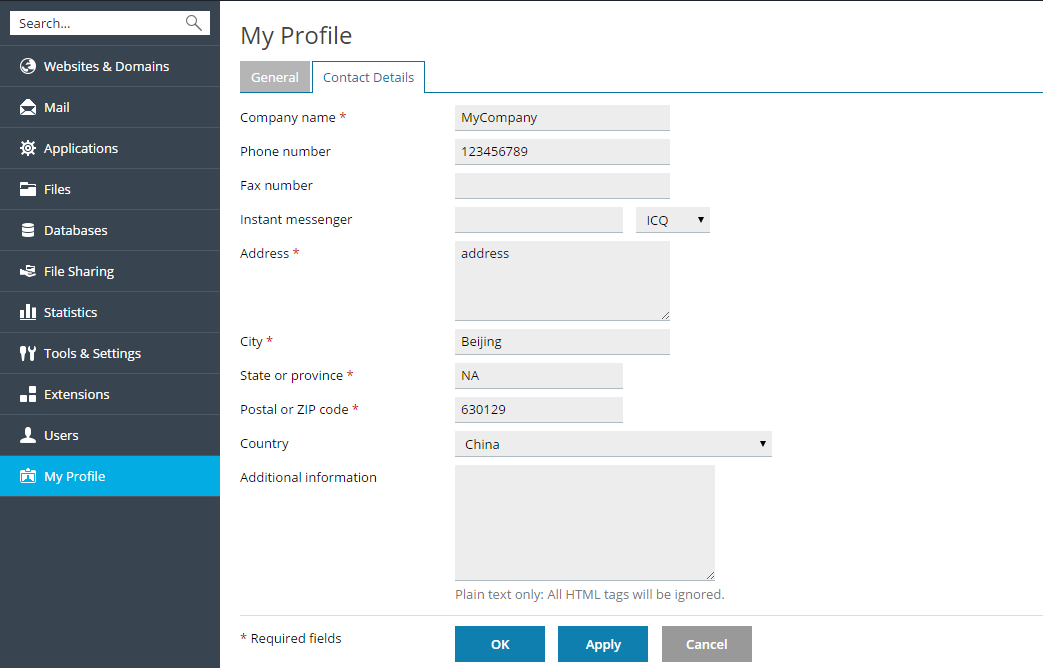
### **Logging Out of Plesk**
To log out of Plesk, place the mouse pointer over your username located at the top of the page, and click **Log out**.

# Managing your Web Hosting with Plesk
## Adding Domains
If your subscription allows it, you can create more than one domain on a single subscription. The newly added domain will share the subscription’s resources with all other domains belonging to the same subscription. However, in all other respects the newly created domain will be independent from the principal one – it will have its own web hosting and DNS settings, databases, mail accounts, and so on.
Adding a new domain is helpful in the following scenarios:
* You want to create an additional website that is unrelated to any of the websites you already own, with its own name, web content, mail accounts, and so on. Note that in this scenario, unless you already have another second-level domain name registered, you will need to register one for the new website. A second-level domain name consists of a proper name and a top level domain suffix (called TLD for short), such as .com or .net. *example.com* is an example of a second-level domain. You may be able to register a domain name through your provider. Alternatively, you can purchase one from a domain registrar of your choice.
* You want to transfer a domain already hosted at a different provider. In this scenario you may need to contact your domain registrar to change the authoritative name servers for the domain name of the website you want to transfer to Plesk name servers. You will also need to transfer website content – you can upload it via FTP or the File Manager, as described in the **Uploading Content** section.
* You want to set up a website that will redirect visitors to a different website. Some possible reasons for setting up such redirection are listed in the **Adding Domain Aliases** section. You need a separate domain name for the domain alias.
To add a new domain, go to **Websites & Domains** > **Add Domain**.
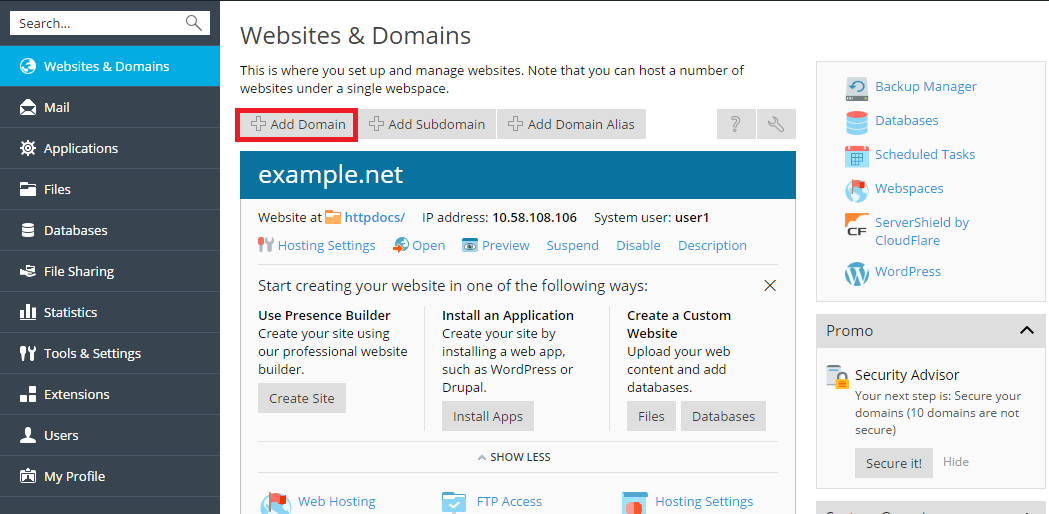
## Adding Subdomains
If your subscription allows it, you can create one or more subdomains, or third-level domains, for each of your domains. Subdomains share all the subscription’s resources with all the other domains and subdomains belonging to the same subscription. However, every subdomain can have its own web hosting and DNS settings.
Adding a new subdomain is helpful in the following scenarios:
* You want to logically organize the structure of your website. For example, you can display the information about your company at *info.example.com*, or have your web store accessible at *store.example.com*.
* You want to host a large number of simple websites and do not want to purchase a separate domain name for each of them. For example, you can host personal websites using addresses like *johndoe.example.com* and *janedoe.example.com*.
To add a new subdomain, go to **Websites & Domains** > **Add Subdomain**.
## Adding Domain Aliases
If your subscription allows it, you can create one or more domain aliases. Domain aliases do not have any content of their own, but instead redirect to a different website when visited. Note that unless you already have another second-level domain name registered, you will need to register one for the domain alias. You may be able to register a domain name through your provider. Alternatively, you can purchase one from a domain registrar of your choice.
Adding a new domain alias is helpful in the following scenarios:
* You want to make sure that the visitors can find your website regardless of the TLD they use. For example, you can register *example.net*and *example.org,* and use them as domain aliases pointing to your website *example.com*.
* You want to make sure that visitors who mistype your domain name can find your website. For example, you can register *exmaple.com*and use it as a domain alias pointing to your website *example.com*.
* You want to change the domain name of your website but also want visitors who use your old domain name to be able to find your website. For example, you want to change the domain name of your website from *example.com* to *anotherexample.com.* You can configure the *example.com* name to be a domain alias pointing to your new website *anotherexample.com*.
To add a new domain alias, go to **Websites & Domains** > **Add Domain Alias**.
## Setting Up Custom Error Pages
Whenever the web server encounters an error that prevents it from correctly displaying the page of your website a visitor has requested, a special error page is displayed along with the relevant error code. By default, such pages are often generic and may not be sufficiently informative. You can replace the standard error pages with custom ones.
### **Setting Up Custom Error Pages on Linux**
1. Go to **Websites & Domains** > **Hosting Settings**.
2. Select the **Custom error documents** checkbox and click **OK**.
3. Connect to your FTP account, and go to the `error_docs` directory.
4. Edit or replace the respective files. Be sure to preserve the correct file names:
* 400 Bad File Request – bad\_request.html
* 401 Unauthorized – unauthorized.html
* 403 Forbidden/Access denied – forbidden.html
* 404 Not Found – not\_found.html
* 405 Method Not Allowed – method\_not\_allowed.html
* 406 Not Acceptable – not\_acceptable.html
* 407 Proxy Authentication Required – proxy\_authentication\_required.html
* 412 Precondition Failed – precondition\_failed.html
* 414 Request-URI Too Long – request-uri\_too\_long.html
* 415 Unsupported Media Type – unsupported\_media\_type.html
* 500 Internal Server Error – internal\_server\_error.html
* 501 Not Implemented – not\_implemented.html
* 502 Bad Gateway – bad\_gateway.html
* 503 Service Temporarily Unavailable – maintenance.html
The web server will start using your error documents after it is restarted.
### **Setting Up Custom Error Pages on Windows**
1. Go to **Websites & Domains** > **Hosting Settings**.
Select the **Custom error documents** checkbox and click **OK**.
2. Click **Virtual Directories** and open the **Error Documents** tab. The list of error documents for the root web directory will be displayed. These are used for all web pages of the selected site. If you want to customize error pages for a specific virtual directory, navigate to that directory first.
3. Click the error document you want to change. The following options are available:
* To use the default document provided by IIS for this error page, select **Default** from the **Type** menu.
* To use a custom HTML document located in the `error_docs` directory situated in the virtual host directory of the domain, select **File** from the **Type** menu and specify the file name in the **Location** field.
* To use a custom HTML document located in a directory other than `error_docs`, select **URL** from the **Type** menu and enter the path to your document in the **Location** field. The path must be relative to the virtual host root (that is, the `%plesk_vhosts%\\httpdocs folder`).
For example, you have created a file named `forbidden_403_1.html` and saved it in the `my_errors` directory located in the `httpdocs directory`. To use this file as an error document, you need to type the following path into the **Location** field: `/my_errors/forbidden_403_1.html`.
**Note:** You can use FTP or File Manager in Plesk to upload your custom error document to the server. By default, all error documents are stored in the `%plesk_vhosts%\\error_docs\` directory.
The web server will start using your error documents after it is restarted.
## Setting Up HTTP 301 Redirection
Plesk provides two ways of setting up the search engine friendly HTTP 301 redirection from one website to another. This allows preserving search engine rankings of the website to which visitors are redirected. For example, if you set up HTTP 301 redirection from *example.com*to *[www.example.com](http://www.example.com)*, search engines will treat both www and non-www versions as the same site. If you use HTTP 302 redirection instead, the www and non-www versions will be treated as different sites. As a result, rankings will be split between them.
To set up HTTP 301 redirection using domain aliases, go to **Websites & Domains** > **Add Domain Alias**.
To set up HTTP 301 redirection using forwarding hosting type, go to **Websites & Domains** > **Add Domain**.
## Configuring the Preferred Domain
As a rule, any website is available using both a URL with a www prefix (such as *[www.example.com](http://www.example.com)*) and one without it (such as *example.com*). We recommend that you pick one and always redirect visitors from the other. Typically, the non-www version is chosen to accept all visitors. As an example, if you configure the non-www version (*example.com*) as the preferred domain, a visitor will be redirected to *example.com* even if they type *[www.example.com](http://www.example.com)* in their browser address bar.
To configure or disable the preferred domain, go to **Websites & Domains** > **Hosting Settings**.
Plesk uses the search engine friendly HTTP 301 code for the redirection. This allows for preserving search engine rankings of your site (preferred domain). If you disable the redirection, search engines will treat both www and non-www versions as different sites. As a result, rankings will be split between them.
## Setting the Default Homepage
### **To change the default index page in Plesk for Linux**
1. Go to **Websites & Domains** > **Apache & Nginx Settings**.
2. Select the **Enter custom value** option in the **Index files** section. Specify the file name or names to be used as the default page. You can specify more than one, separating the file names from each other with white spaces. For example, if you specify “index.htm index.php”, the web server will serve **index.htm** as the default page. If the file with such name is not found, **index.php** will be served.
### **To change the default index page in Plesk for Windows**
1. Go to **Websites & Domains** > **IIS Settings.**
2. Select the **Enter custom value** option in the **Default documents** section. Add or remove file names from the list. The web server will be looking for the default page file starting from the topmost entry in the list and continuing downwards. For example, if you specify “index.htm” with “index.php” right underneath it, the web server will serve index.htm as the default page. If the file with such name is not found, index.php will be served.
## Changing the Document Root Directory
Every domain in Plesk created with website hosting has its own directory created on the server’s file system. By default the path to the directory is as follows:
* On Linux: `/var/www/vhosts/`
* On Windows: `C:\Inetpub\vhosts\`
This folder contains the document root directory, that is, the folder where all the domain’s web content is stored. By default it is the `httpdocs` folder, but it can be changed in Plesk.
To change the document root directory, go to **Websites & Domains**> **Hosting Settings** and change the directory name in the **Document root** field.
## Selecting PHP Version
To change the PHP version, go to **Websites & Domains** > **Hosting Settings** and select the required version in the **PHP version** menu.
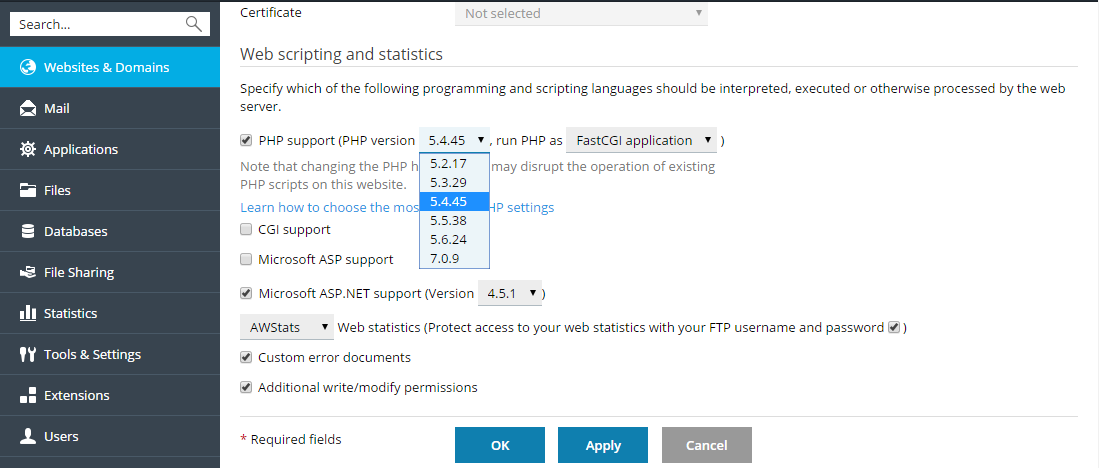
## Configuring PHP Settings
To change PHP settings, go to **Websites & Domains** > **PHP Settings**.
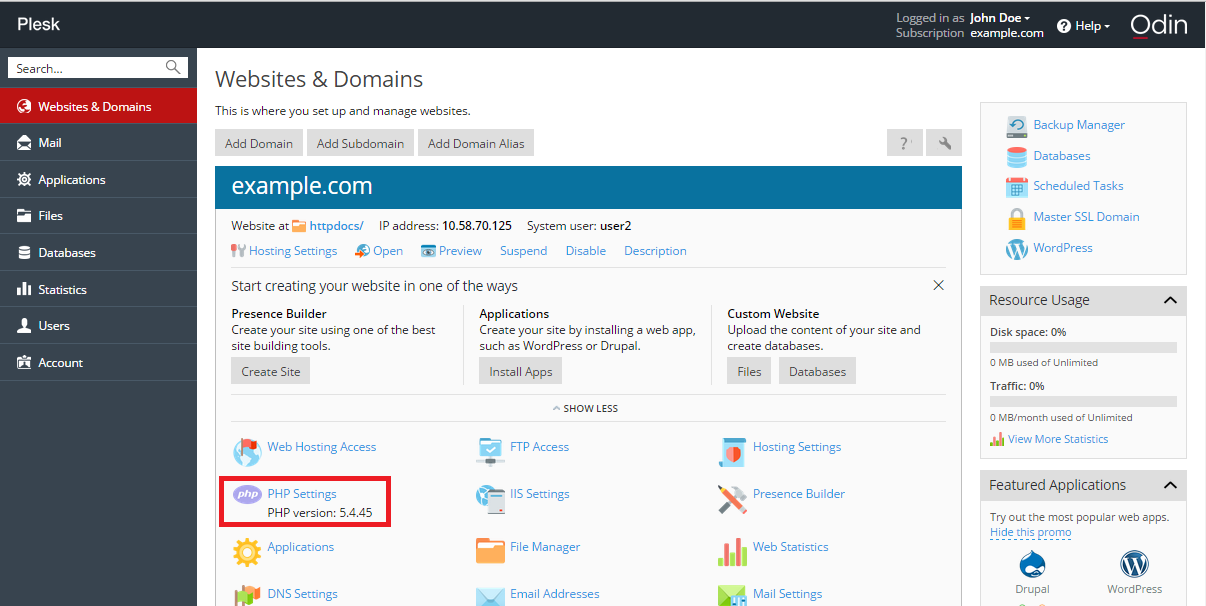
## Selecting ASP.NET Version
To change the ASP.NET version, go to **Websites & Domains** tab > **Hosting Settings** and select the required version in the **Version** menu near the **Microsoft ASP.NET support** checkbox.

## Setting MIME Types
Multipurpose Internet Mail Exchange (MIME) types instruct a web browser or a mail application how to handle files received from the server. For example, when a web browser requests an item on a server, it also requests the MIME type of the object. Some MIME types, such as graphics, can be displayed inside the browser. Others, such as word processing documents, require an external application to be displayed.
By setting custom MIME types you can determine what applications are used to open a particular type of file on the client side.
To configure MIME types in Plesk for Linux, go to **Websites & Domains** > **Apache & Nginx Settings**.
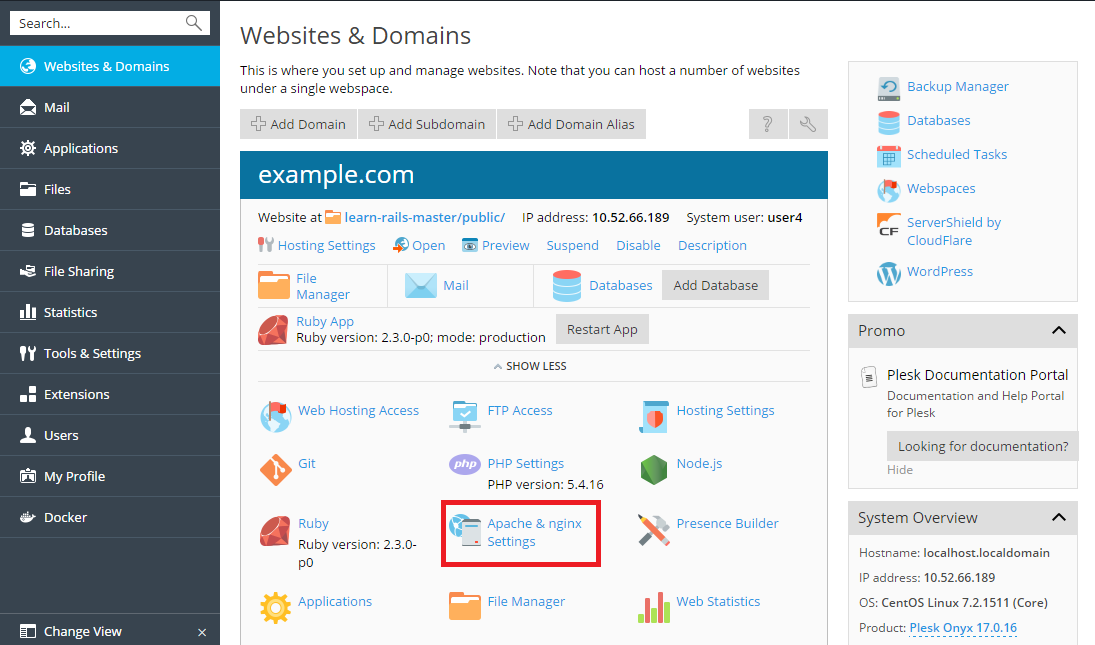
To configure MIME types in Plesk for Windows, go to **Websites & Domains** > **IIS Settings**.

Then specify MIME types associating file extensions with file types. For example: “text/plain .mytxt”.
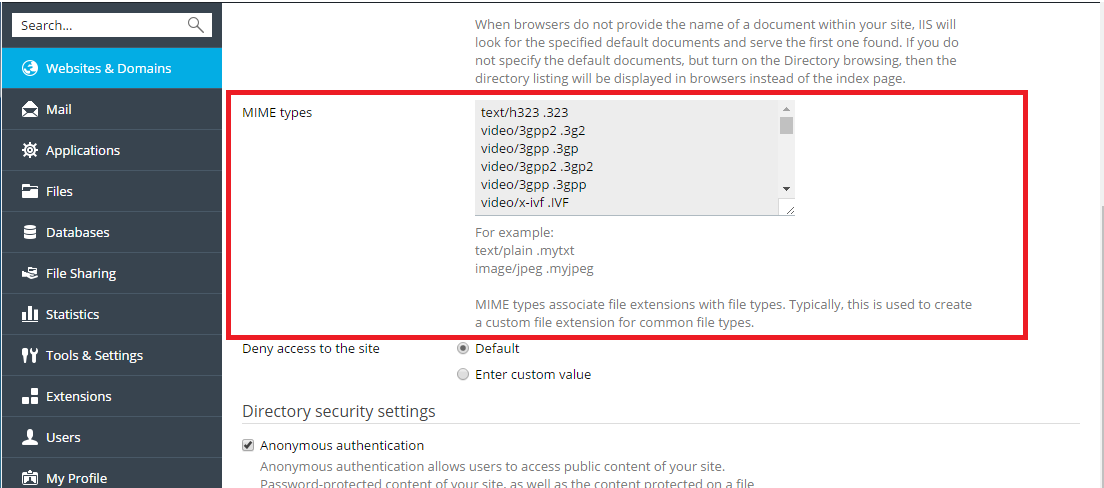
# Game Servers
A quick overview on how to manage your Game Servers.
# Setup Teamspeak 3 Server on Linux
A quick guide to setup Teamspeak 3 server on Ubuntu 16.04, Ubuntu 14.04, CentOS 6, CentOS 7, Debian 7 & Debian 8.
## Introduction
A Teamspeak server is a piece of VoIP software which allows users to communicate with each other via speech. Teamspeak consists of two applications: a client and a server.
The client application is the program that you use on your computer to log into teamspeak. It can be downloaded from the [download page on the official website](https://www.teamspeak.com/en/downloads). Download the client for the operating system that you are using.
The server application is the application that brings each client together. It is in charge of processing the VoIP data and handling messages between you and your friends.
This guide will explain the basics of setting up a TeamSpeak 3 server on Linux (Debian, CentOS & Ubuntu Distributions).
## Prerequisites
* A VPS running Ubuntu / Debian / CentOS.
* Teamspeak client software installed on your computer.
* An initial server setup for:
* [Ubuntu](/virtual-private-servers/introduction-to-nginx-and-lemp-on-ubuntu/initial-server-setup-with-ubuntu)
* CentOS
* Debian
## **Step 1 - Adding User For Teamspeak 3 Server**
First, create a new user with your desired name, we will use the name "teamspeak" for this guide.
### Ubuntu / Debian
```bash
adduser --disabled-login teamspeak
```
### CentOS
```bash
useradd teamspeak
passwd teamspeak
```
## **Step 2 - Downloading Latest Version of Teamspeak 3 Server**
Get the latest TeamSpeak 3 server files for 64-bit Linux. Check their website, a new version may be available for all the distributions.
```bash
wget http://dl.4players.de/ts/releases/3.3.0/teamspeak3-server_linux_amd64-3.3.0.tar.bz2
```
## **Step 3 - Extracting the tar.bz2**
Extract the archive for all the distributions.
```bash
tar xvf teamspeak3-server_linux_amd64-3.3.0.tar.bz2
```
This will create a new folder in the root directory called: `teamspeak3-server_linux_amd64`
## **Step 4 - Moving the Files to Home Directory of Teamspeak**
Move the extracted files to the `teamspeak` user's home directory then remove the extracted folder and downloaded archive.
```
cd teamspeak3-server_linux_amd64 && mv * /home/teamspeak && cd .. && rm -rf teamspeak3*
```
Accept the license agreement:
```
touch /home/teamspeak/.ts3server_license_accepted
```
## **Step 5 - Setting up Ownership for user Teamspeak**
Change ownership of the TeamSpeak 3 server files.
```
chown -R teamspeak:teamspeak /home/teamspeak
```
## **Step 6 - Setting up start script**
### **Ubuntu 16.04 / Debian 8 / CentOS 7 or Higher**
Make the TeamSpeak 3 server start on boot. Use your favorite editor to make a new file called `teamspeak.service` in `/lib/systemd/system/`.
```bash
nano /lib/systemd/system/teamspeak.service
```
Paste this content into it:
{% code title="/lib/systemd/system/teamspeak.service" %}
```bash
[Unit]
Description=TeamSpeak 3 Server
After=network.target
[Service]
WorkingDirectory=/home/teamspeak/
User=teamspeak
Group=teamspeak
Type=forking
ExecStart=/home/teamspeak/ts3server_startscript.sh start
ExecRestart=/home/teamspeak/ts3server_startscript.sh stop
ExecStop=/home/teamspeak/ts3server_startscript.sh stop
PIDFile=/home/teamspeak/ts3server.pid
RestartSec=15
Restart=always
[Install]
WantedBy=multi-user.target
```
{% endcode %}
Once you are done, save the file and close the editor. Now we will activate the script so that it will start on boot.
This makes to systemd recognize the file we just created.
```bash
systemctl --system daemon-reload
```
Enable the service.
```bash
systemctl enable teamspeak.service
```
Start the TeamSpeak server.
```bash
systemctl start teamspeak.service
```
Once you've started the server, you can check that it's running with this command.
```bash
systemctl status teamspeak.service
```
### Ubuntu 14.04 / Debian 7 or Lower
Make Teamspeak3 start on boot up. For this, we will need to create a symlink to the script which was included in the archive that we downloaded earlier.
```bash
sudo ln -s /usr/local/teamspeak/ts3server_startscript.sh /etc/init.d/teamspeak
sudo update-rc.d teamspeak defaults
```
Now all that is left to do is to start your Teamspeak server!
```bash
sudo service teamspeak start
```
On your terminal, you will see a screen with the query username/password and a privilege key - be sure to write this information down as you will need it to administer your server.
### CentOS 6 or Lower
Now we need to create the script in the /etc/init.d folder:
```bash
nano /etc/init.d/teamspeak
```
Once you are in the file paste the following code into the file by right clicking the mouse.
{% code title="/etc/init.d/teamspeak" %}
```bash
#!/bin/sh
# chkconfig: 2345 99 10
USER="teamspeak"
TS3='/home/teamspeak/'
STARTSCRIPT="$TS3/ts3server_startscript.sh"
cd $TS3
case "$1" in
'start')
su $USER -c "$STARTSCRIPT start"
;;
'stop')
su $USER -c "$STARTSCRIPT stop"
;;
'restart')
su $USER -c "$STARTSCRIPT restart"
;;
'status')
su $USER -c "$STARTSCRIPT status"
;;
*)
echo "Usage $0 start|stop|restart|status"
esac
```
{% endcode %}
Click Ctrl + O to save the file then Ctrl + X to exit the file. We can then set the file permission so it will work properly.
```bash
chmod 755 /etc/init.d/teamspeak
```
Now we need to add the service so it will restart when the server is restarted. Enter the following commands and then restart the server.
```bash
chkconfig --add teamspeak
chkconfig --level 2345 teamspeak on
```
Once the server restarts connect to teamspeak and make sure everything restarted. You can also check the status through command line by using the following command.
```bash
service teamspeak status
```
## **Step 7 - Retrieving Privilege Key**
When you first try to connect to your TeamSpeak server, you may be prompted to use a privilege key. This privilege key allows to administrate your TeamSpeak server. To get this privilege key, use the following command:
```
cat /home/teamspeak/logs/ts3server_*
```
At bottom you'll see something that looks like this:
```
--------------------------------------------------------
ServerAdmin privilege key created, please use the line below
token=****************************************
--------------------------------------------------------
```
Replace the stars with your unique token, and enter it into your TeamSpeak client. You'll see a prompt telling you that the privilege key was successfully used.
## **Optional: Firewall**
If you are using the built-in firewall that was included with the Ubuntu installation then `iptables` is your firewall. You may need to forward the following ports to allow connections to your TeamSpeak 3 Server.
```bash
iptables -A INPUT -p udp --dport 9987 -j ACCEPT
iptables -A INPUT -p udp --sport 9987 -j ACCEPT
iptables -A INPUT -p tcp --dport 30033 -j ACCEPT
iptables -A INPUT -p tcp --sport 30033 -j ACCEPT
iptables -A INPUT -p tcp --dport 10011 -j ACCEPT
iptables -A INPUT -p tcp --sport 10011 -j ACCEPT
```
## Conclusion
Congratulations! You've successfully created a Teamspeak Server. You can connect to it with the [Teamspeak Client](https://www.teamspeak.com/en/downloads.html#client).
Have fun!
# Installing SteamCMD for Steam Game Servers
A detialed overview on how to install SteamCMD for Game Servers in any environment.
## SteamCMD
The Steam Console Client or SteamCMD is a command-line version of the Steam client. Its primary use is to install and update various dedicated servers available on Steam using a command-line interface. It works with games that use the [SteamPipe](https://developer.valvesoftware.com/wiki/SteamPipe) content system. All games have been migrated from the deprecated [HLDSUpdateTool](https://developer.valvesoftware.com/wiki/HLDSUpdateTool) to SteamCMD.
## Downloading SteamCMD
### Windows
1. Create a folder for SteamCMD.
For example
```
C:\steamcmd
```
2. Download SteamCMD for Windows:
3. Extract the contents of the zip to the folder.
### Linux
Create a user account named steam to run SteamCMD safely, isolating it from the rest of the operating system. Do not run steamcmd while operating as the root user - to do so is a security risk.
1. As the root user, create the steam user:
```bash
useradd -m steam
```
2. Go into its home folder:
```bash
cd /home/steam
```
**Package from repositories**
3. It's recommended to install the SteamCMD package from your distribution repositories, if available:
Ubuntu/Debian
```bash
sudo apt-get install steamcmd
```
RedHat/CentOS
```bash
yum install steamcmd
```
Arch Linux: install [steamcmd from the AUR](https://aur.archlinux.org/packages/steamcmd/).
4. Link the steamcmd executable:
```bash
ln -s /usr/games/steamcmd steamcmd
```
**Manually**
5. Before you begin, you must first install the dependencies required to run SteamCMD:
Ubuntu/Debian 64-Bit
```bash
sudo apt-get install lib32gcc1
```
RedHat/CentOS
```bash
yum install glibc libstdc++
```
RedHat/CentOS 64-Bit
```bash
yum install glibc.i686 libstdc++.i686
```
6. As the root user, escalate to the steam user:
```bash
su - steam
```
If you're not logging in as root and you instead use sudo to perform administration, escalate to the steamuser as follows:
```bash
sudo -iu steam
```
7. Create a directory for SteamCMD and switch to it.
```bash
mkdir ~/Steam && cd ~/Steam
```
8. Download and extract SteamCMD for Linux.
```bash
curl -sqL "https://steamcdn-a.akamaihd.net/client/installer/steamcmd_linux.tar.gz" | tar zxvf -
```
### OS X
1. Open Terminal.app and create a directory for SteamCMD.
```bash
mkdir ~/Steam && cd ~/Steam
```
2. Download and extract SteamCMD for OS X.
```bash
curl -sqL "https://steamcdn-a.akamaihd.net/client/installer/steamcmd_osx.tar.gz" | tar zxvf -
```
## Running SteamCMD
On first run, SteamCMD will automatically update and enter you into a **Steam** > **prompt**. Type **help** for more information.
### Windows
Open a Command Prompt and start SteamCMD.
```bash
cd C:\steamcmd
steamcmd
```
### Linux/OS X
Open a terminal and start SteamCMD.
If you installed it using the package from repositories:
```bash
cd ~
steamcmd
```
If you installed it manually:
```bash
cd ~/Steam
./steamcmd.sh
```
## SteamCMD Login
### Anonymous
To download most game servers, you can login anonymously.
```bash
login anonymous
```
### With a Steam account
Some servers require you to login with a Steam Account.
> **Note:** For security reasons it is recommended that you create a new Steam account just for your dedicated servers.
> **Note:** A user can only be logged in once at any time (counting both graphical client as well as SteamCMD logins).
```bash
login
```
Next enter your password.
If Steam Guard is activated on the user account, check your e-mail for a Steam Guard access code and enter it. This is only required the first time you log in (as well as when you delete the files where SteamCMD stores the login information).
You should see a message stating that you have successfully logged in with your account.
## Downloading an app
1. Start SteamCMD and log in.
2. Set your app install directory. (Note: use forward slashes for Linux/OS X and backslashes for Windows.)
```
force_install_dir
```
e.g. a directory named cs\_go inside the current directory:
```
force_install_dir ./cs_go/
```
**For Windows:** force\_install\_dir c:\cs\_go\\
3. Install or update the app using the `app_updatecommand` (supplying a [Steam Application ID](https://developer.valvesoftware.com/wiki/Steam_Application_IDs)). Please check here for the dedicated server list: [Dedicated server list](https://developer.valvesoftware.com/wiki/Dedicated_Servers_List). To also validate the app, add `validate` to the command. To download a beta branch, use the `-beta ` option – for example, the HLDS beta branch is named `beta` and the SrcDS beta branch is named `prerelease`. Some beta branches are protected by a password; to be able to download from them, also add the `-betapassword ` option.
```bash
app_update [-beta ] [-betapassword ] [validate]
```
HLDS is a special case: the App ID is always 90 and a mod must be chosen first. This is done by setting the app config option mod to the requested value.
```
app_set_config
```
Example: Install and validate the Counter Strike: Global Offensive dedicated server:
```
app_update 740 validate
```
Example: Install and validate HLDS with Team Fortress Classic:
```
app_set_config 90 mod tfc app_update 90 validate
```
**Bug:** HLDS (appid 90) currently requires multiple runs of the `app_update` command before all the required files are successfully installed. Simply run `app_update 90 validate` multiple times until no more updates take place.
Example: Install and validate beta version of HLDS (Half-Life):
```
app_update 90 -beta beta validate
```
Example: install and validate beta version of the Counter Strike: Source dedicated server:
```
app_update 232330 -beta prerelease validate
```
Example: install and validate a private beta version of the Natural Selection 2 dedicated server (name alpha, password natsel): \[beta name] is the name of the private beta branch \[beta code] is the password for the private beta branch
```
app_update 4940 -beta alpha -betapassword natsel validate
```
4. Once finished, type `quit` to properly log off of the Steam servers.
```
quit
```
### Validate
```
validate
```
Validate is a command that will check all the server files to make sure they match the SteamCMD files. This command is useful if you think that files may be missing or corrupted.
> **Note:** Validation will overwrite any files that have been changed. This may cause issues with customized servers. For example, if you customize `mapcycle.txt`, this file will be overwritten to the server default. Any files that are not part of the default installation will not be affected.
It is recommended you use this command only on initial installation and if there are server issues.
### Supported Servers
A list of known servers that use SteamCMD to install is available on the [Dedicated Servers List](https://developer.valvesoftware.com/wiki/Dedicated_Servers_List) page. Note that any extra commands listed need to be executed before the `app_update` line.
## Automating SteamCMD
There are two ways to automate SteamCMD. (Replace `steamcmd` with `./steamcmd.sh` on Linux/OS X.)
### Command line
> **Note:** When using the `-beta` option on the command line, it must be quoted in a special way, such as `+app_update "90 -beta beta"`.
> **Note:** If this does not work, try putting it like `"+app_update 90 -beta beta"` instead.
Append the commands to the command line prefixed with plus characters, e.g.:
```
steamcmd +login anonymous +force_install_dir ../csgo_ds +app_update 740 +quit
```
To install a specific game mod for HL1, such as Counter-Strike: Condition Zero:
```
steamcmd +login anonymous +force_install_dir ../czero +app_set_config 90 mod czero +app_update 90 +quit
```
For a game that requires logins, like Killing Floor:
```
steamcmd +login +force_install_dir c:\KFServer\ +app_update 215350 +quit
```
### Creating a script
1. Put your SteamCMD commands in a text file. (You may add comments which start with `//`.) Example:
```bash
// update_csgo_ds.txt
//
@ShutdownOnFailedCommand 1 //set to 0 if updating multiple servers at once
@NoPromptForPassword 1
login //for servers which don't need a login
//login anonymous
force_install_dir ../csgo_ds
app_update 740 validate
quit
```
2. Run SteamCMD with the `+runscript` option, referring to the file you created previously. Example:
```
steamcmd +runscript csgo_ds.txt
```
## Cross-Platform Installation
It is possible to choose the platform for which SteamCMD should download files, even if it isn't the platform it is currently running on. This is done using the `@sSteamCmdForcePlatformType` variable. (Yes, those are two "s"es at the beginning of the variable name.) For example, to download the Windows CSGO dedicated server on Linux, you can run the following command:
```
./steamcmd.sh +@sSteamCmdForcePlatformType windows +login anonymous +force_install_dir ../csgo_ds +app_update 740 validate +quit
```
or use the following script:
```
@ShutdownOnFailedCommand 1
@NoPromptForPassword 1
@sSteamCmdForcePlatformType windows
login anonymous
force_install_dir ../csgo_ds
app_update 740 validate
quit
```
The supported values are `windows`, `macos` and `linux`.
## Windows Software/Scripts
### condenser
[condenser](https://github.com/sympatovit/condenser) is a bootstrapper for installing, configuring, & launching Steam dedicated server apps.
### SteamCMD AutoUpdater
Install and automatically update any game server
GitHub Repo:
### SteamCMD GUI
This tool allows the user to use SteamCMD on Windows without command lines and/or batch files.
GitHub Repo:
### SteamCMD Guardian 1.2
View and download here:
## Linux Scripts
### Linux Game Server Managers
LinuxGSM is the command line tool for quick, simple deployment and management of dedicated game servers, using SteamCMD.
#### Features
* Backup
* Console
* Details
* Installer (SteamCMD)
* Monitor
* Alerts (Email, Pushbullet)
* Update (SteamCMD)
* Start/Stop/Restart server
#### Supported Servers
There are now 70+ different game servers supported and rising. For a full list visit the website.
#### Links
Website:
GitHub Repo:
### SteamCMD Guardian 1.2
The following script was tested on Debian Wheezy.
View and download here:
**Installation**
To make this script work, we need a location. Preferably you created a user (e.g. steam) with it's own home directory (/home/steam) and are logged in as it via SSH, tty or using su.
1. Make the file
```
nano updateserver.sh
```
2. Paste in the code
3. Modify the code, add `at least` 1 game to the `DL_SV*=` rows.
4. Close the file with `Ctrl`+`O`, followed by `↵ Enter` and concluding with `Ctrl`+`X`.
5. Give the file execute rights for the userchmod u+x ./updateserver.sh
6. Run the file
```
./updateserver.sh
```
The file will auto-download SteamCMD, update it and install all chosen games (up to 4). Run the file again to update the games.
## Known issues
### ERROR! Failed to install app 'xxxxxx' (No subscription)
If you get the 'No subscription' error, the game/server you are trying to download either requires a login or that you have purchased the game. You will therefore have to log in with a Steam username and password – if that doesn't help, you may need to purchase a copy of the game on Steam first. See [Dedicated Servers List](https://developer.valvesoftware.com/wiki/Dedicated_Servers_List).
> **Note:** For security reasons it is recommended that you create a new Steam account just for your dedicated servers.
For example
```
steamcmd +login
```
### 32-bit libraries on 64-bit Linux systems
Since SteamCMD is a 32-bit binary, 32-bit libraries are required.
The following error may occur:
```
steamcmd: error while loading shared libraries: libstdc++.so.6: cannot open shared object file: No such file or directory
```
The resolution depends on your distro:
#### Debian based distributions (Ubuntu, Mint, etc.)
```
sudo apt-get install lib32stdc++6
```
> **Note:** ia32-libs are not required to install SteamCMD; lib32gcc1 is enough.
With **Debian 7 "Wheezy"** you may encounter this error:
```
The following packages have unmet dependencies: ia32-libs : Depends: ia32-libs-multiarch but it is not installable E: Unable to correct problems, you have held broken packages.
```
To fix this, do the following:
```
dpkg --add-architecture i386
apt-get update
apt-get install lib32gcc1
```
#### Red Hat based distributions (RHEL, Fedora, CentOS, etc.)
```
yum install glibc.i686 libstdc++.i686
```
#### Arch Linux
Don't forget to first enable the [multilib repository](https://wiki.archlinux.org/index.php/Multilib).
```
pacman -S lib32-gcc-libs
```
### Login Failure: No Connection
On linux servers, you may experience a "Login Failure: No Connection" error. This is related to missing iptables rules. You will want something along these lines:
```
iptables -A INPUT -p udp -m udp --sport 27000:27030 --dport 1025:65355 -j ACCEPT iptables -A INPUT -p udp -m udp --sport 4380 --dport 1025:65355 -j ACCEPT
```
The port list is found here:
On Windows servers, you may experience "SteamUpdater: Error: Download failed: http error 0" and "SteamUpdater: Error: Steam needs to be online to update. Please confirm your network connection and try again.". This is usually fixed by checking "Automatically detect settings" in IE (Internet Explorer) through the lan settings in the Internet option menu. 1. Open Internet Explorer (IE). 2. Click on **Tools** → **Internet Options** 3. Click on the **Connections** tab 4. At the bottom, you should see **Local Area Network (LAN) Settings**. 5. Check the first box (**Automatically detect settings**) 6. Hit **OK**, and **Apply**. Try running the SteamCMD again; if it still doesn't work. try lowering your **Internet Security level zone** to medium or lower. You can find that in the **Security** tab in **Internet Options**.
### SteamCMD startup errors
#### Unable to locate a running instance of Steam
You may get the following error when starting a server with Linux:
```
[S_API FAIL] SteamAPI_Init() failed; unable to locate a running instance of Steam, or a local steamclient.dll.
```
Resolve the issue by linking `steamclient.so` to the `~/.steam/sdk32/steamclient.so` directory:
```
ln -s steamcmd/linux32/steamclient.so ~/.steam/sdk32/steamclient.so
```
#### ulimit Linux startup error
Some users may get a `ulimit` error (no permission/cannot open file) while script is starting up. This error caused by a low setting of the `-nparameter` (number of file descriptors) of `ulimit`. SteamCMD uses standard commands inside of the initialization shell script to change the `ulimitautomatically`, but some servers may forbid increasing `ulimit` values after startup (or beyond a limit set by `root`).
This can be fixed by changing the file descriptor number ulimit:
```
ulimit -n 2048
```
If an error appears (no permission), you will have to log in as root to change the parameter. To check the current setting, type `ulimit -a`; the system will reply with many rows, you need to find one:
```
open files (-n) 1024
```
In this case,`1024` is the current value.
`root` can also modify the limits in the `/etc/security/limits.conf` file.
In most instances you will simply get a warning message however it will not stop SteamCMD from running.
### Only the HLDS engine is downloaded
When trying to download a HL1 mod like TFC, initially it only downloads the engine files of the HLDS, but not the mod. This happens with both the regular version and the beta. You may have to try multiple times until all the required files are downloaded, but once this is done, the files should update correctly next time.
Work-around for this issue here:
Just deleting the appmanifest files, without downloading replacements from a third party, may work as well! You will get an error at first though, complaining that something went wrong, which is due to the deleted files.
On a side note, for some reason CS is always installed as well.
## See Also
* Source Dedicated Server
* Half-Life Dedicated Server
* Dedicated Servers List
* SteamCMDui
# SSL Certificates
A quick overview on how to manage your SSL Certficates.
# Domains
A quick overview on how to manage your Domains
# Can I register or transfer my domain to Vimzaa
Yes, we do provide domain registration and transfer services.
If you are willing to register or transfer your domain to Vimzaa, you may proceed with the registration and/or transfer at the checkout while buying web hosting services or at the Client Area.
In order to register and/or transfer the domain separately (without web hosting services), you need to be registered to our internal [`Client Area`](https://vimzaa.com/clientarea.php).
After the registration is performed, log in to your Client Area, click to ***Services > Add new domains***. At the displayed page you will see both options – domain registration and transfer.
Please note, that in order to transfer your domain, it needs to be ***active for at least 60 days***.
# Can I buy a domain name together with a web hosting plan
There are a few options to get a domain name together with your web hosting plan.
* When signing up for our web hosting plans at the checkout, you can purchase a new domain together with your web hosting service.
* You can also buy a domain name through your Client Area.
# Default nameservers for shared webhosting
### cPanel Hosting
Our default nameservers for the shared hosting platforms are:
* Primary Name Server: ns4.vimzaa.com\
Primary Name Server IP: 77.72.0.13
* Secondary Name Server: ns4.vimzaa.com \
Secondary Name Server IP: 139.162.254.53
### Plesk Hosting
Our default nameservers for the shared hosting platforms are:
* Primary Name Server: ns1.apollo.vimzaa.com\
Primary Name Server IP: 185.3.166.179
* Secondary Name Server: ns2.apollo.vimzaa.com\
Secondary Name Server IP: 185.3.166.179